


4
Make sure the
Main
sheet is displayed.
5
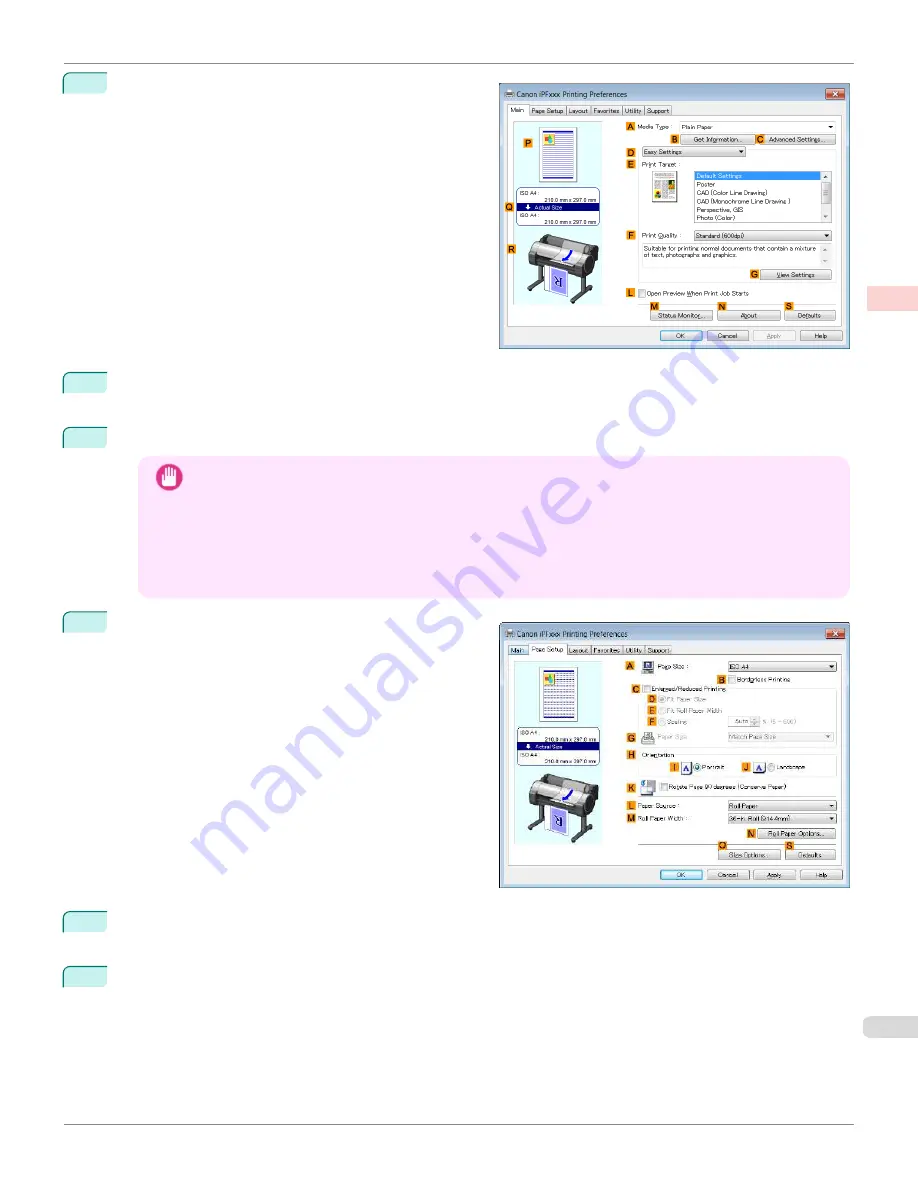
In the
A
Media Type
list, select the type of paper that is loaded. In this case, click
Canon Glossy Photo Pa-
per 170gsm
.
6
Select the print target in the
E
Print Target
list.
Important
•
When you are using paper that takes longer for ink to adhere for borderless printing and the Cutter Unit
touches printing surfaces that are not dry yet, it may damage the paper or the edge of the document that is
cut, depending on frequency of use. In this kind of situation, change the ink drying time using the following
procedure.
•
Click
Advanced Settings
in
Media Type
.
•
Select an ink drying time in the list for the
Between Pages
setting of
Drying Time
.
7
Click the
Page Setup
tab to display the
Page Setup
sheet.
8
In the
A
Page Size
list, click the size of the original as specified in the source application. In this case, click
10"x12"
.
9
Select and click a roll paper in the
L
Paper Source
list.
iPF670
Borderless Printing at Actual Size (Windows)
Enhanced Printing Options
Printing at full size
81
Summary of Contents for IPF670
Page 14: ...14 ...
Page 154: ...iPF670 User s Guide 154 ...
Page 342: ...iPF670 User s Guide 342 ...
Page 474: ...iPF670 User s Guide 474 ...
Page 524: ...iPF670 User s Guide 524 ...
Page 606: ...iPF670 User s Guide 606 ...
Page 628: ...iPF670 User s Guide 628 ...
Page 634: ...iPF670 User s Guide 634 ...


