


5
Select
Roll Paper Width
that is set in the printer.
6
Select image size.
7
Select layout.
8
To configure
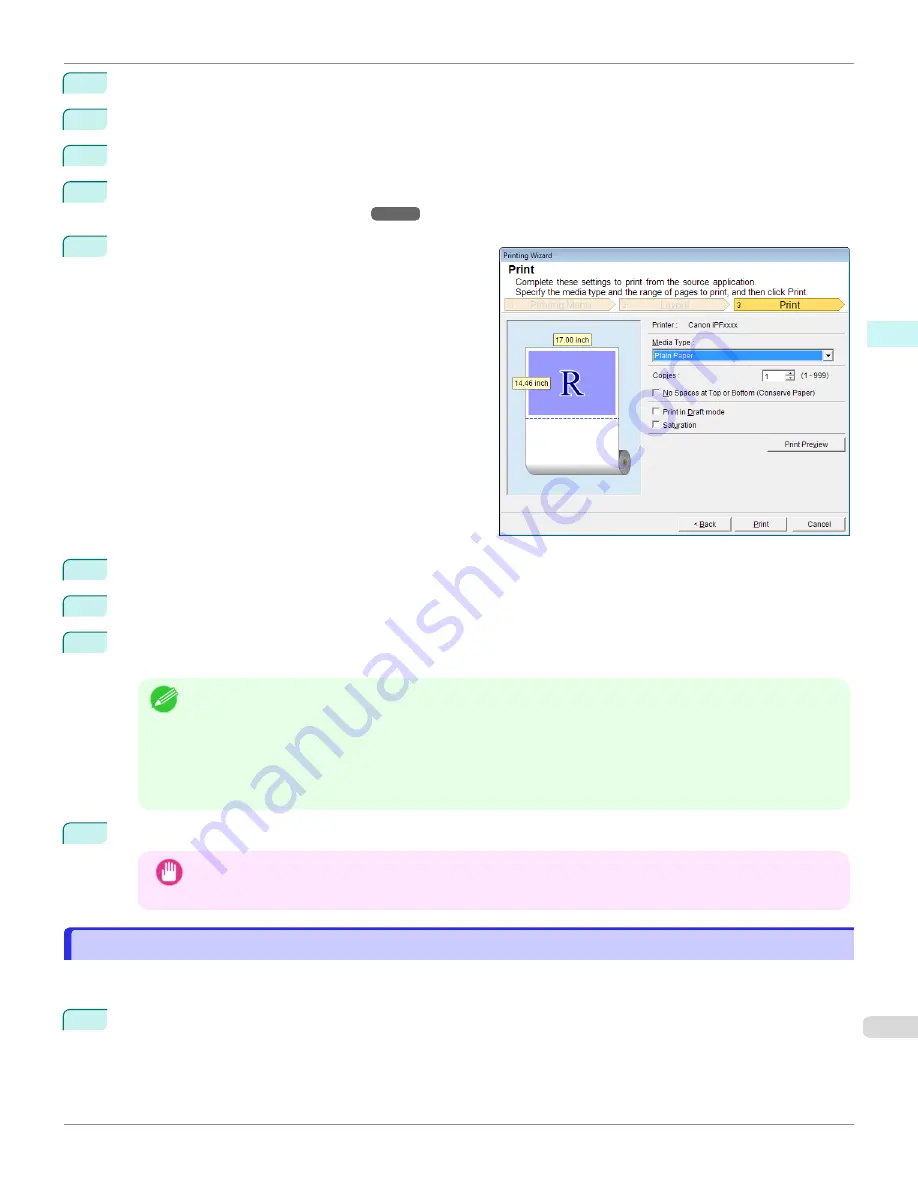
Binding
, click the
Binding Settings
button.
Refer to
for details on the procedure for configuring
Binding
.
9
Select
Next
.
10
Select
Media Type
.
11
Enter
Copies
.
12
If the upper and lower margins are too wide, check
No Spaces at Top or Bottom (Conserve Paper)
.
The upper and lower margins can be checked in
Print Preview
.
Note
•
When
Print in Draft mode
is selected, printing is fast but the print quality is poor.
•
When
Saturation
is selected, you can print posters, etc., vividly.
•
Press the
Print Preview
button to display the preview screen. You can check and make changes to the layout
in the preview screen.
•
When you print to the edge of the roll width, the maximum print length is 18.0m.
13
Press
to start printing.
Important
•
If divided into plural pages, try reducing the data size or the range you select.
•
You cannot run
or
Print Preview
if you select it for a worksheet with no data displayed.
Print Selected Area(Excel)
Print Selected Area(Excel)
For resizing the selected range of cells to fit the roll width. Choose this option to enlarge a particular part of the sheet
before printing.
1
Start
Microsoft Excel
.
iPF670
Print Selected Area(Excel)
Windows Software
Print Plug-In for Office
269
Summary of Contents for IPF670
Page 14: ...14 ...
Page 154: ...iPF670 User s Guide 154 ...
Page 342: ...iPF670 User s Guide 342 ...
Page 474: ...iPF670 User s Guide 474 ...
Page 524: ...iPF670 User s Guide 524 ...
Page 606: ...iPF670 User s Guide 606 ...
Page 628: ...iPF670 User s Guide 628 ...
Page 634: ...iPF670 User s Guide 634 ...


