0
Things
You C
an Do with the S
can and S
end F
unc
tions
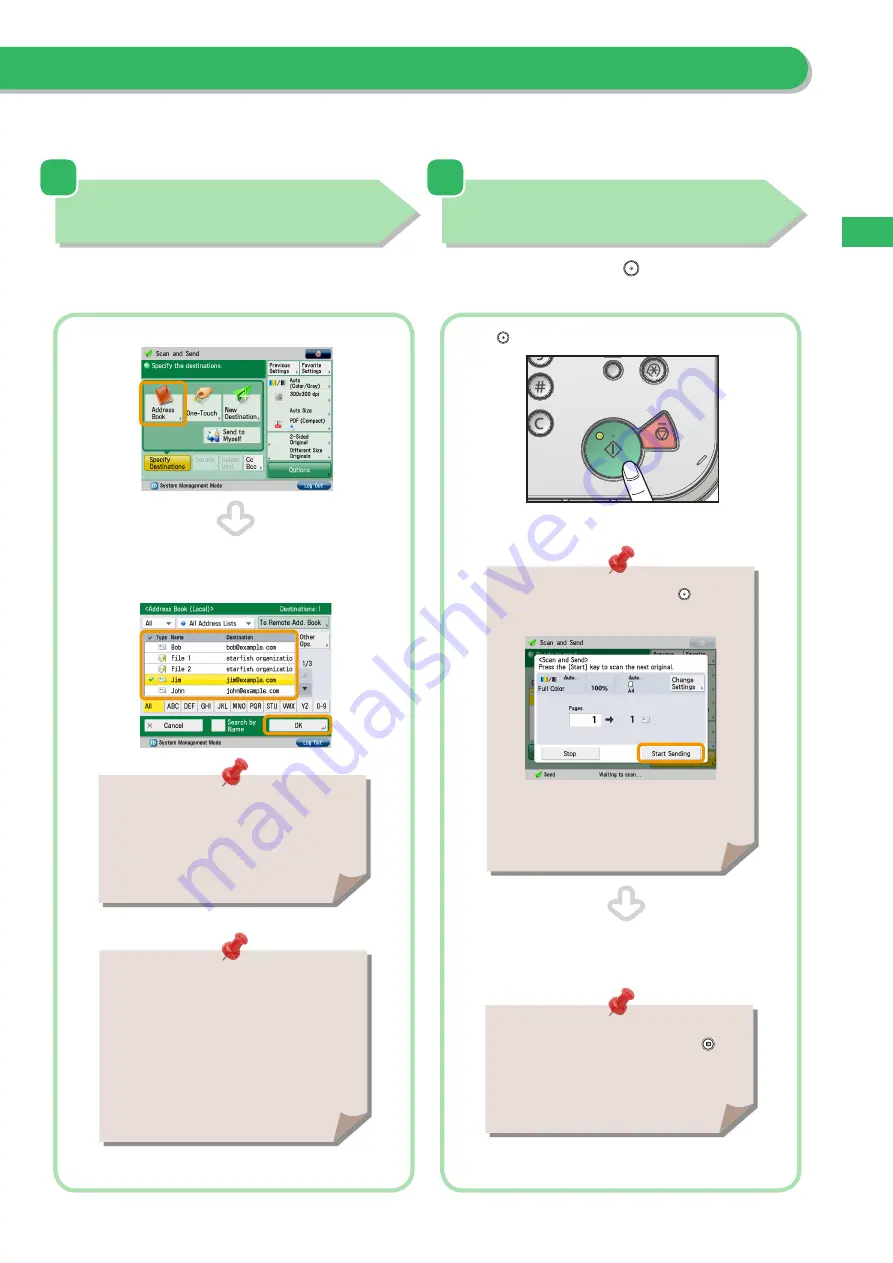
Press [Address Book].
If you are sending to only one destination, select a destination.
If you are sending to multiple destinations, select the destinations
→
press [OK].
Specify the Destination
Press [Address Book]
→
select the destination
→
press [OK].
Start Sending
After specifying the settings, press
.
Press
.
For more information on storing the destination
in the address book, see e-Manual > Scan and
Send.
If the following screen appears, press
to scan
the next original. After all originals are scanned,
press [Start Sending].
If a login service, such as Department ID
Management or SSO-H has been set, press
(Log In/Out) to log out.
You can specify the destination using the one-
touch buttons or frequently used settings. Also,
if you want to send to a new destination not
yet stored, press [New Destination]
→
enter the
destination.
When scanning is complete, remove your originals.


