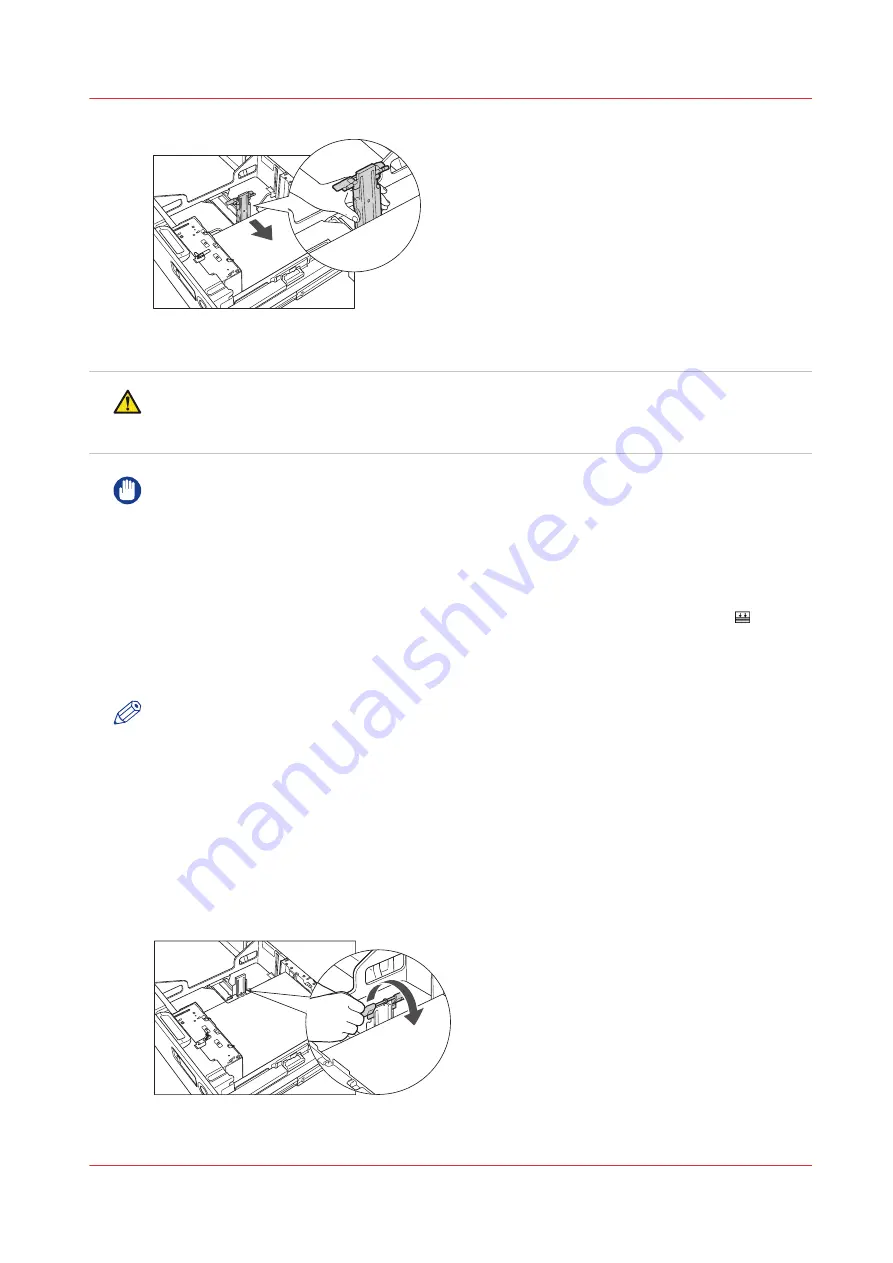
6.
Load all remaining paper whose size you want to change into the paper tray.
CAUTION
When loading paper into the paper tray, take care not to cut your hands on the edges of the
paper.
IMPORTANT
• Do not load paper into the paper tray that has been previously printed onto, as this may result
in a malfunction or damage to the copier. Always use the special feeder to feed paper when
you want to print onto the back of a sheet of paper that already has something printed on its
front side (2nd side of 2-Sided print).
• Paper which has been rolled or curled must be straightened out before loading it into the
paper tray.
• Make sure that the height of the paper stack does not exceed the loading limit mark on the
inside of the paper tray.
• Never place paper or any other items in the empty part of the paper tray next to the paper
stack. Doing so may cause paper jams.
NOTE
• If there are instructions on the package of paper about which side of the paper to load, follow
those instructions.
• When paper is loaded into the paper tray, the side facing down is the one printed on.
• If problems occur, such as poor print quality or paper jams, try turning the paper stack over,
and reload it. However, you cannot turn the texture paper and 1-Sided Coated paper over.
Change the new paper.
• When loading paper, make sure that the height of the paper stack does not exceed 20 mm /
13/16". If the height of the paper stack exceeds 20 mm / 13/16", the edges of the paper stack
may become curled or creased, and poor print quality may result.
7.
Lower the paper holder plate.
8.
Change the paper tray's size plate to match the new paper size.
Adjust the paper tray to hold a different media size
Chapter 7 - Media handling
115
Summary of Contents for imagePRESS C7011VPS series
Page 1: ...imagePRESS C7011VPS series C7010VPS series Operation guide ...
Page 8: ...Contents 8 ...
Page 9: ...Chapter 1 Preface ...
Page 15: ...Chapter 2 Main parts ...
Page 41: ...Chapter 3 Power information ...
Page 47: ...Chapter 4 Operating concept ...
Page 54: ... 20 The Add new media window Maintain the Media catalog 54 Chapter 4 Operating concept ...
Page 57: ... 24 The Add color preset window Maintain the Color presets Chapter 4 Operating concept 57 ...
Page 69: ...Chapter 5 Operator panel views ...
Page 77: ...Chapter 6 Adapt printer settings to your needs ...
Page 91: ...Chapter 7 Media handling ...
Page 155: ...Chapter 8 Carry out print jobs ...
Page 225: ...Chapter 9 Carry out copy jobs ...
Page 257: ...Chapter 10 Carry out scan jobs ...
Page 286: ...Optimize the scan quality 286 Chapter 10 Carry out scan jobs ...
Page 287: ...Chapter 11 Use the DocBox optional ...
Page 310: ...Select and print multiple jobs from the DocBox 310 Chapter 11 Use the DocBox optional ...
Page 311: ...Chapter 12 Accounting ...
Page 322: ...Enter an account ID into the printer driver 322 Chapter 12 Accounting ...
Page 323: ...Chapter 13 Add toner and staples ...
Page 341: ...Chapter 14 Maintenance and print quality ...
Page 361: ...Chapter 15 Specifications ...
Page 375: ...Chapter 16 Third Party Software ...
Page 382: ...Library for SDE Compiler 382 Chapter 16 Third Party Software ...


