Troubleshooting
188
The optional RC-V100 Remote Controller or commercially available remote control does not work.
- Make sure that the [Other Settings]
>
[REMOTE Term.] setting is set to [RC-V100] when using the optional RC-V100
Remote Controller or [Standard] when using a commercially available remote control.
- When [Camera Setup]
>
[
/
CINEMA Locked] is set to [On], a protected custom picture file is selected, or no custom
picture is selected, custom picture settings cannot be adjusted using the RC-V100. Set [
/
CINEMA Locked] to [Off]
or select an unprotected custom picture file ([C1] to [C6]) (
A
- Turn off the camcorder, reconnect the RC-V100 or other remote control and then turn the camcorder back on again.
Connections with External Devices
Video noise appears on a nearby TV screen.
- When using the camcorder in a room where a TV is located, keep a distance between the compact power adapter and
the power or antenna cables of the TV.
Playback looks fine on the camcorder but there is no image on the external monitor.
- The camcorder is not connected correctly to the external monitor. Make sure you are using the correct connection
(
A
- The video input on the external monitor is not set to the video terminal to which you connected the camcorder. Select
the correct video input.
The camcorder is connected using a commercially available HDMI cable, but there is no picture or sound from the
external monitor.
- Disconnect the HDMI cable and then restore the connection or turn the camcorder off and then on again.
The computer does not recognize the camcorder even though the camcorder is connected correctly.
- Disconnect the USB cable and turn off the camcorder. After a short while, turn it on again and restore the connection.
- Connect the camcorder to a different USB port on the computer.
- Establish a USB connection while the [AVCHD] index screen, [MP4] index screen or [Shot List] index screen is
displayed.
Wi-Fi Functions
Cannot connect with an access point.
- Wi-Fi networks with a stealth function that do not broadcast their network name (SSID) will not be detected by the
camcorder during the Wi-Fi network setup. Perform the setup manually (
A
149) or turn off the stealth function of the
access point.
- Password information is not saved with the camera settings. When you load onto the camcorder camera settings from
an SD card, all the encryption keys and passwords in the network-related settings are reset. Edit the network-related
settings as necessary (
A
152).
- The wireless signal is not strong enough or there are other devices in the vicinity interfering with the wireless signal.
Refer to
Precautions Regarding Wi-Fi Networks
(
A
Cannot establish a Camera Access Point connection with a Wi-Fi-enabled device.
- When you reset all the camcorder’s settings, all network settings are lost as well. Set up the Camera Access Point
settings again (
A
- The wireless signal is not strong enough or there are other devices in the vicinity interfering with the wireless signal.
Refer to
Precautions Regarding Wi-Fi Networks
(
A
The Playback via Browser application will not start on the Web browser.
- Make sure to activate the function on the camcorder with the [Other Functions]
>
[Playback via Browser] setting
(
A
- The URL entered into the Web browser’s address bar is incorrect. Enter the URL exactly as it appears on the
camcorder's screen.
- The SD card slot cover is open or there is no SD card in the camcorder. Check that an SD card that contains
recordings is correctly inserted into the camcorder and the SD card slot cover is closed.
The Browser Remote application will not start on the Web browser.
- Make sure to activate the function on the camcorder with the [Other Functions]
>
[Browser Remote] setting (
A
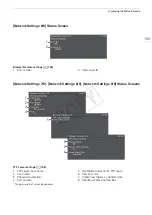
- The URL entered into the Web browser’s address bar is incorrect. Check the [Network Settings 4/9] status screen and
make sure to use the IP address assigned to the camcorder as the URL (
A
COP
Y
Summary of Contents for EOS C100 Mark II
Page 1: ...Instruction Manual HD Camcorder PUB DIE 0463 000 COPY ...
Page 12: ...12 COPY ...
Page 46: ...Adjusting the Black Balance 46 COPY ...
Page 106: ...Using Accessories 106 COPY ...
Page 124: ...Saving and Loading Camera Settings 124 COPY ...
Page 144: ...Saving Clips to a Computer 144 COPY ...
Page 162: ...Playback via Browser 162 COPY ...
Page 168: ...Photo Operations 168 COPY ...


