37
Preparing the Camcorder
Using the OLED Panel
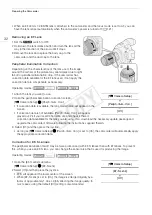
1 Pull the OLED panel 180 degrees to the left.
• The OLED panel can be pulled to the left 270 degrees so that
the screen can be viewed from the side.
2 Push the OLED panel up or down to adjust it to the
desired angle of view.
NOTES
• If you are not using the viewfinder during a long recording, we
recommend turning it off.
• While recording with the OLED panel facing toward the subject,
you can set [
£
OLED/VF Setup]
>
[OLED Mirror Image] to
[On] to flip the image horizontally so subjects can see a mirror
image of themselves.
• To set the screen to black & white, use the [
£
OLED/VF
Setup]
>
[OLED/VF B&W] setting. If you set an assignable
button to [OLED/VF B&W] (
A
107), you can press the button
to turn the black & white display on and off. When the screen is
black & white, the onscreen displays will still be in color.
• When you use a commercially available lens adapter and the
image on the screen is inverted, you can use the [
w
Other
Functions]
>
[Custom Function]
>
[Scan Reverse Rec] setting
to return the image to the correct orientation.
•
About the OLED and viewfinder screens:
The screens are
produced using extremely high-precision manufacturing
techniques, with more than 99.99% of the pixels operating to
specification. Less than 0.01% of the pixels may occasionally
misfire. On the viewfinder screen only, pixels may also light up
as white dots. This has no effect on the recorded image and
does not constitute a malfunction.
Adjusting the Viewfinder/OLED Screen
You can adjust the brightness, contrast, color and sharpness of the
viewfinder and OLED screen independently of each other. Additionally,
you can turn on the increased luminence of the OLED panel or adjust the
backlight of the viewfinder. These adjustments will not affect your
recordings.
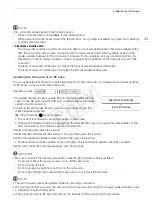
1 Open the setup menu for the viewfinder or OLED screen.
[
£
OLED/VF Setup]
>
[OLED Setup] or [Viewfinder Setup]
2 Select [Brightness], [Contrast], [Color], [Sharpness], [Luminance] or
[Backlight] and then press the joystick.
3 Adjust the setting and then press the joystick.
• Repeat steps 2 and 3 to adjust other settings as necessary.
Operating modes:
* [OLED Setup] only
**[Viewfinder Setup] only
[
£
OLED/VF Setup]
[OLED Setup]
[Viewfinder Setup]
[Brightness: ±0]
[Contrast: ±0]
[Color: ±0]
[Sharpness: 2]
[Luminance: Off]*
[Backlight: Normal]**
COP
Y
Summary of Contents for EOS C100 Mark II
Page 1: ...Instruction Manual HD Camcorder PUB DIE 0463 000 COPY ...
Page 12: ...12 COPY ...
Page 46: ...Adjusting the Black Balance 46 COPY ...
Page 106: ...Using Accessories 106 COPY ...
Page 124: ...Saving and Loading Camera Settings 124 COPY ...
Page 144: ...Saving Clips to a Computer 144 COPY ...
Page 162: ...Playback via Browser 162 COPY ...
Page 168: ...Photo Operations 168 COPY ...


