


2. Installation
44
4) Change the window view size
4-1) After the CXDI software starts, press [Alt] + [Tab] key to show the “CCR Console
Menu” prompt screen.
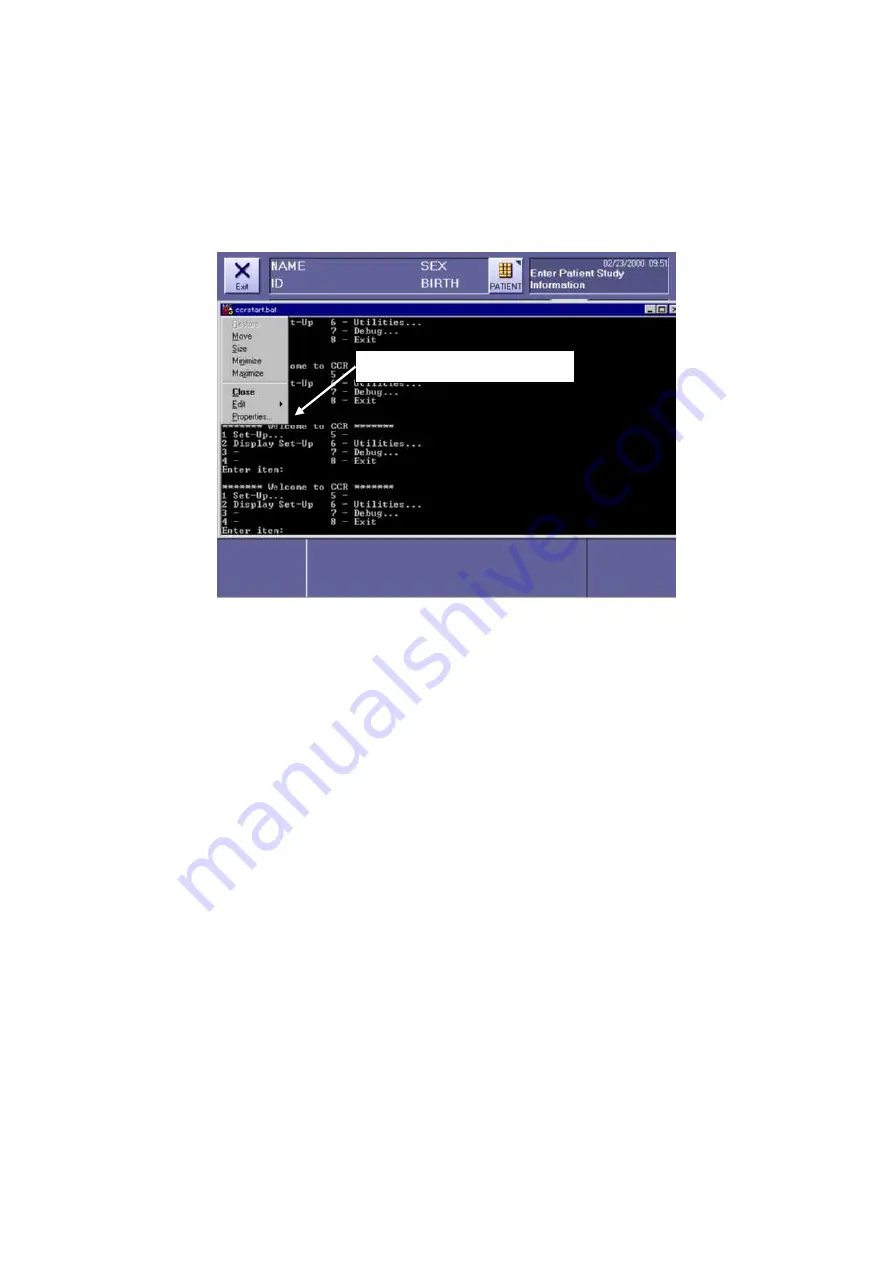
4-2) After the command prompt screen appears, click the icon (called System icon) where
is in right-top of its window.
4-3) System icon menu appears. Select Properties from the menu. [Fig 1]
[Fig 1]
4-4) Click the “Font” tab from the “ccrstart.bat” properties and change its size to “6 x 13”.
4-5) Click the “Layout” tab and change the “Height” of the “Screen Buffer Size” to 5000.
Click [OK].
4-6) The “Apply Properties to Shortcut” appears and check the item of the “Modify
shortcut which started this window”. Click [OK].
5) Delete CXDI software from the “Startup Menu Group”.
5-1) Connect the keyboard and the mouse to the control computer.
5-2) Turns the all CXDI system power on, Windows XP start.
5-3) After the CXDI software start, press [Alt] + [Tab] key to show the “CCR Console
Menu” prompt screen.
5-4) Select “8 – Exit” to close the CXDI software on the “Welcome to CCR”.
5-5) After the CXDI application software closed and Window XP Desktop appear, open
the “Taskbar & Start Menu…” with “Start Menu” tab clicking.
Start>Settings>Taskbar and Start Menu
Select the Properties item.
Summary of Contents for CXDI-55C
Page 23: ...2 Installation 7 2 CXDI System II assembly package Accessories box Power box ...
Page 115: ...2 Installation Manual 99 2 Power Box Mass 3 7 Kg Unit mm Dimension tolerance 1 Scale 1 N ...
Page 161: ...4a Canon Inc PWB 60 X RAY 1 2 SCHEMATIC DIAGRAM Rev 01 ...
Page 162: ...4b Canon Inc PWB 60 X RAY 2 2 SCHEMATIC DIAGRAM Rev 01 ...


