114
Changing the position of a sticker
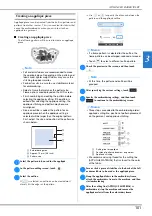
If the selected pattern or positioning stickers for connecting
the next pattern do not easily fit in the embroidering area,
follow the on-screen instructions that appear after step
m
on
page 111
in order to move the positioning stickers.
For an example, the on-screen instruction appears when you
use the embroidery frame with a size of 10 cm × 10 cm (4
inches × 4 inches) to connect patterns as shown below.
a
Refer to steps
a
through
m
of“Connecting three
patterns” on page 109 using the embroidery frame
with a size of 100 mm × 100 mm (4 inches × 4 inches)
to embroider the first pattern and to connect the
second pattern.
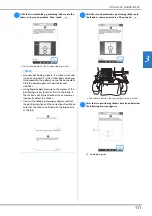
b
Following message appears in step
n
if the next
pattern or affixed positioning stickers are close to
being out of the embroidering area. Follow the
instructions and then touch
.
1
Embroidering area
1
Pattern to be embroidered next
2
Embroidery sheet
c
After the positioning stickers have been detected, the
message to inform you that it recognized the
embroidery positioning sticker appears. Touch
,
and then remove the stickers.
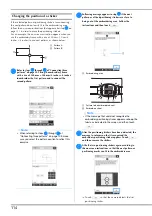
d
Affix the two positioning stickers again according to
the on-screen instructions so that the next pattern or
positioning marks can fit in the embroidery area.
Touch
so that the camera detects the first
positioning sticker.
1
Pattern A
2
Pattern B
Note
• When referring to steps
a
through
m
of
“Connecting three patterns” on page 109, make
sure you select the pattern position to reflect this
exercise.
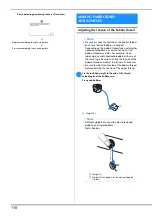
Note
• If the message that could not recognize the
embroidery positioning sticker appears, rehoop the
fabric as indicated in the screen, and then touch
.
1


