4-58
Improvement of print quality
4-1-2. White head cleaning
If a problem concerning firing of the white head side is not cleared even after performing the head cleaning, perform the
white head cleaning.
After the white head cleaning is completed, conduct the Install White Ink After Cleaning.
<TIPS>
Although the white head cleaning can begin even when the remaining volume of maintenance solution in the maintenance
solution pouch is running short, there may be cases where the pouch needs to be replaced with a new one during the cleaning
depending on such remaining volume. If the remaining volume is 500 g (17.6 oz) or less, prepare a new maintenance solution
pouch.
When the white ink pouch runs low on its remaining volume of white ink, the Install White Ink After Cleaning function can no
longer get started. Furthermore, there may be cases where the pouch needs to be replaced with a new one during the installation
process of white ink. If the remaining volume is 400 g (14.1 oz) or less, prepare a new white ink pouch.
White Head Cleaning
(1)
From the menu, select [Maintenance] > [White Head Cleaning], and press
.
<TIPS>
Perform the work operation by following the on-screen instructions.
(2)
After making sure that the waste ink tank is filled one-half or less full with waste ink, and press
.
(3)
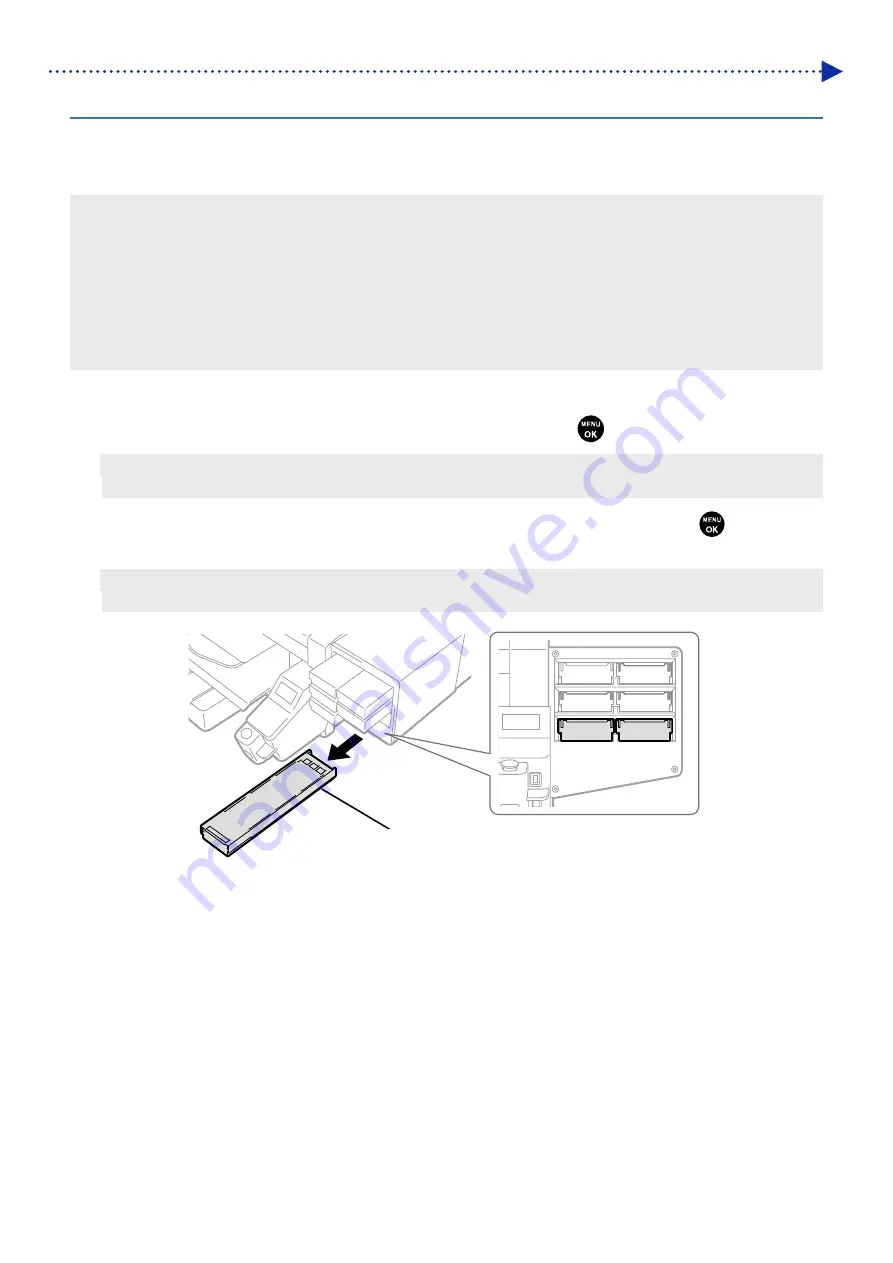
Remove the white ink cartridge from the printer.
<CAUTION>
The bottom of the cartridge may be soiled with ink. Clean the printer on a regular basis.
W12
W34
X0039
White Ink Cartridge
Summary of Contents for GTX-4
Page 1: ...GTX 4 GARMENT PRINTER Service Manual ...
Page 175: ...5 10 Regular Maintenance X0204 Cleaning conditions Pre cleaning state Post cleaning state ...
Page 186: ...5 21 Regular Maintenance X0205 Cleaning conditions Pre cleaning state Post cleaning state ...
Page 456: ...9 1 9 Block diagram Control circuitry ...
Page 463: ...Appendix Setup Manual ...


