19
CHAPTER 3: Installation
shown in Figure 3-4. (Use only the keyboard and mouse connectors that are
appropriate for your switch, and leave the others unconnected. Make sure
that your host PCs are properly attached to the switch. See your switch’s
manual for more details about attaching equipment to it.)
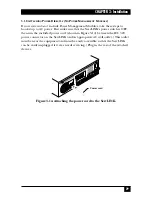
Figure 3-3. Attaching the CPU-extension cable to a CPU (a PS/2 type CPU
is shown).
Figure 3-4. Attaching the CPU-extension cable to a KVM switch with
composite user ports (the ServSwitch Multi is shown).
Mouse-Port
Connector
PC
ServLINK
ServLINK
ServSwitch
Multi
Keyboard-Port
Connector
ServSwitch Multi
User Cable
ServLINK CPU-
extension cable
From left to right, unused audio
connections, unused serial
connection, and keyboard, video,
and mouse connections
Video-Port
Connector
Summary of Contents for ServLink ACR3500A
Page 111: ...NOTES ...
Page 112: ...NOTES ...
Page 113: ...NOTES ...
Page 114: ...NOTES ...
Page 115: ...NOTES ...


