


e
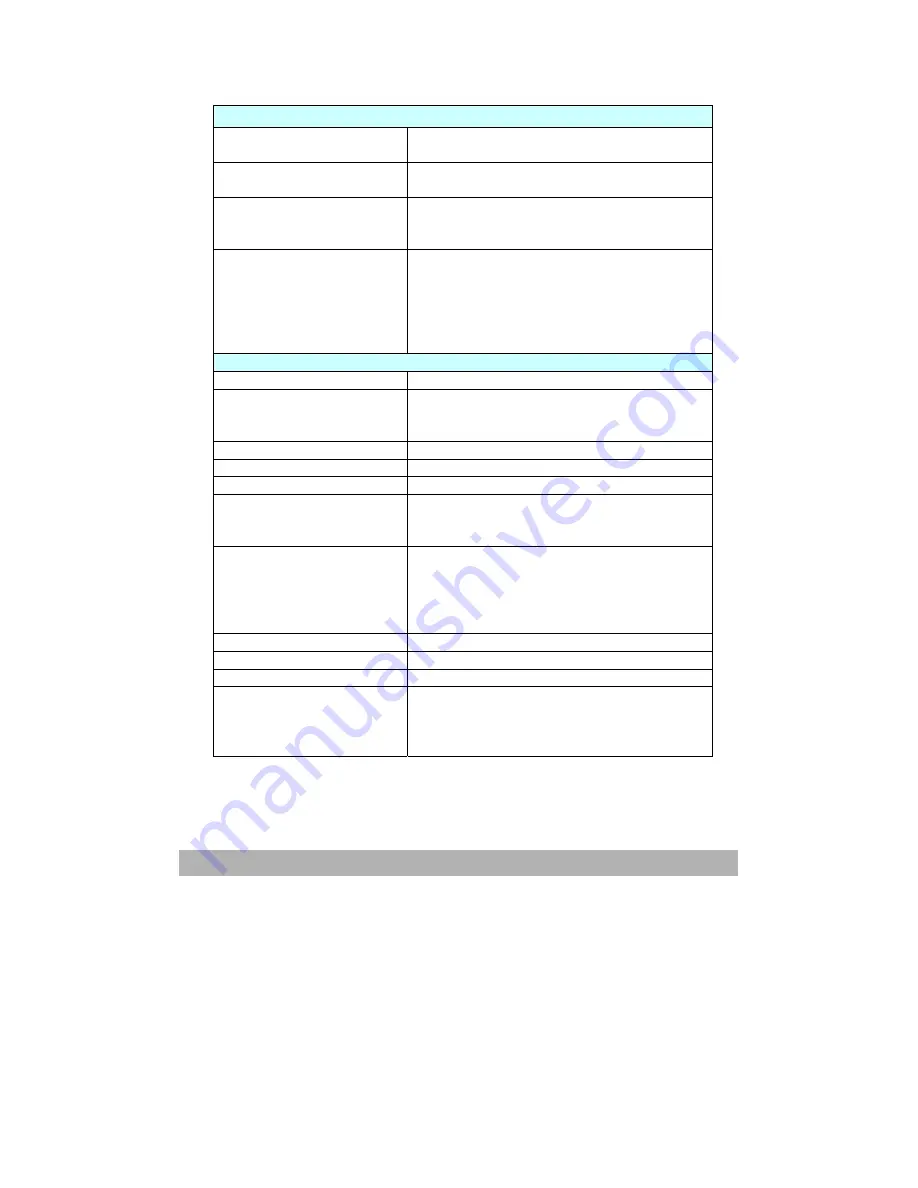
Network Specifications
Connectivity Ethernet 10BaseT/100BaseTX
auto-negotiation with RJ-45 connector
Communication Protocol TCP/IP, SMTP, HTTP, MIME, FTP, CIFS,
DHCP, DNS, LDAP
Supported Browsers
Microsoft IE 5.0 or higher
Netscape Navigator 6.0 or higher
Mozilla
Configuration
Requirement
IP address
Subnet mask
Gateway
SMTP server/POP3 server
FTP server
Web server
E-mail Specifications
Communication Protocol SMTP, MIME, POP3
File Formats
B&W
Gray/Color
PDF, TIFF, MTIFF
PDF, TIFF, MTIFF, JPEG
Default File Format
Separation Limit
1MB, 3 MB, 5MB, 10 MB, 30MB, No limit
Resolution
75, 100, 150, 200, 300, 400, 600 dpi
Default Resolution
B&W
Gray/Color
200 dpi
150 dpi
Address Book Volume
Max. Addresses
Group
No. of Addresses in
Each Group
100
20
50
Multiple Recipients Allow Yes
Security Check
Yes
Mail Server Authentication SMTP, POP3
Supported Mail Server
Application
Lotus Mail Server 5.0
MS Exchange Server 2000
RedHat 7.0 SendMail
MAC Mail Server in OS 9.04
Summary of Contents for AM6120
Page 1: ...AM6120 Color MFP...
Page 34: ...Installing Your Machine 2 6 7 Place the printer upon the installation base 26...
Page 35: ...2 7 8 Turn the lock switch to Unlocked position...
Page 37: ...2 9 11 Remove the tape and paper 12 Close the multi purpose tray...
Page 38: ...Installing Your Machine 2 10 13 Open the protective plastic bag...
Page 39: ...2 11 14 Place the AM6120 scanner to the support of the printer and move it backward...
Page 40: ...Installing Your Machine 2 12 15 Move the lock switch to Locked position...
Page 41: ...2 13 16 Turn the lock switch on the scanner to the Unlcoked position...
Page 42: ...Installing Your Machine 2 14 17 Press the release button to open the cover...
Page 43: ...2 15 18 Pull the release lever to raise the image drum 5...
Page 44: ...Installing Your Machine 2 16 19 Open the image drum 20 Remove paper and protective film...
Page 45: ...2 17 21 Close the drum and move 4 levers to the p position 5 22 Close the printer top cover...
Page 47: ...2 19 25 Insert the printing paper 26 Make sure the paper size properly fit in the tray...
Page 48: ...Installing Your Machine 2 20 27 Gently pull back the paper tray...


