


5-43
2
1
7. Take the new image drum cartridge out of its packaging
and place it on the piece of paper where the old cartridge
was placed. Keep it the same way round as the old unit.
Pack the old cartridge inside the packaging material for
disposal.
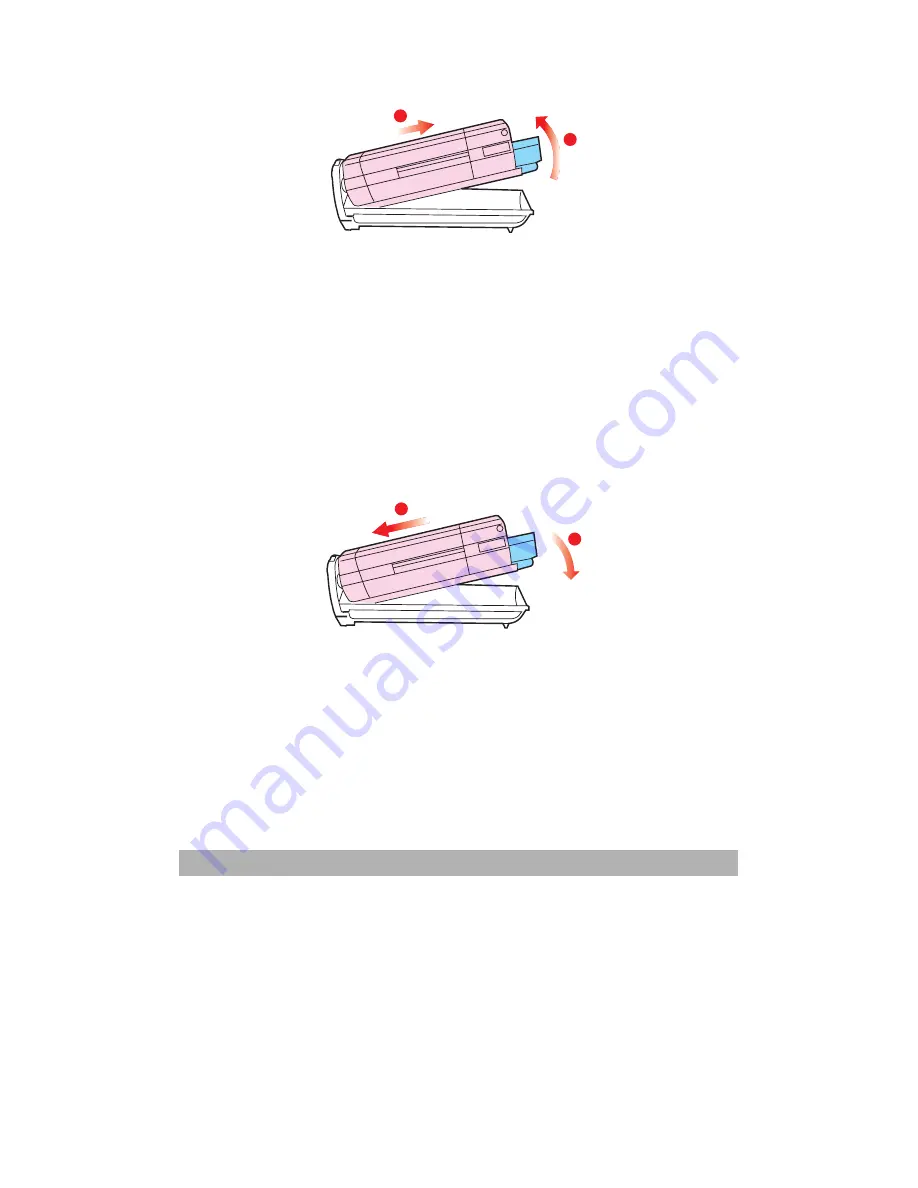
8. Place the toner cartridge onto the new image drum
cartridge as shown. Push the left end in first, and then
lower the right end in. (It is not necessary to fit a new
toner cartridge at this time unless the remaining toner
level is very low.)
2
1
9. Push the coloured release lever (1) away from you to
lock the toner cartridge onto the new image drum unit
and release toner into it.
Summary of Contents for AM6120
Page 1: ...AM6120 Color MFP...
Page 34: ...Installing Your Machine 2 6 7 Place the printer upon the installation base 26...
Page 35: ...2 7 8 Turn the lock switch to Unlocked position...
Page 37: ...2 9 11 Remove the tape and paper 12 Close the multi purpose tray...
Page 38: ...Installing Your Machine 2 10 13 Open the protective plastic bag...
Page 39: ...2 11 14 Place the AM6120 scanner to the support of the printer and move it backward...
Page 40: ...Installing Your Machine 2 12 15 Move the lock switch to Locked position...
Page 41: ...2 13 16 Turn the lock switch on the scanner to the Unlcoked position...
Page 42: ...Installing Your Machine 2 14 17 Press the release button to open the cover...
Page 43: ...2 15 18 Pull the release lever to raise the image drum 5...
Page 44: ...Installing Your Machine 2 16 19 Open the image drum 20 Remove paper and protective film...
Page 45: ...2 17 21 Close the drum and move 4 levers to the p position 5 22 Close the printer top cover...
Page 47: ...2 19 25 Insert the printing paper 26 Make sure the paper size properly fit in the tray...
Page 48: ...Installing Your Machine 2 20 27 Gently pull back the paper tray...


