Installation and Operations Manual
AT&T Proprietary (Internal Use Only)
—79—
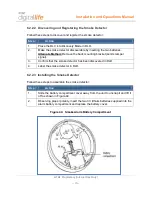
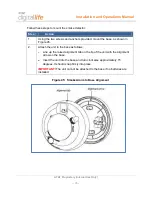
After installing or changing the batteries, reinstall your alarm. Test your alarm by using
the Test/Hush button and check that the green Power LED is on.
NOTE:
Constant exposures to high or low humidity may reduce battery life.
6.2.3.6 Testing the CO Detector
NOTE:
This unit is sealed. The cover is not removable.
WARNING:
The DLC must be placed into sensor test mode while conducting any tests. Placing the
DLC into sensor test mode for all testing helps to protect against false alarms and
unintentional central station reporting.
NOTE:
Due to the loudness of the alarm, we suggest that you place your fingers over
the sounder vent while testing your alarm.
CAUTION
: Continuous exposure to the high sound level of this alarm over an extended
period of time may cause hearing loss.
The CO Detector has one (1) test mode:
Normal CO Alarm Test.
This test mode allows
you to conduct an internal self test and tests the sounder.
6.2.3.7 Normal CO Alarm Test
1. Wait at least 10 minutes after installation to test the CO Detector.
2. Make sure the green Power LED is flashing for normal operation.
3. Set the DLC to sensor test mode.
4. Press and hold the Test/Hush button until the unit beeps two times
(approximately 5 seconds), and then release the button. If the unit is operating
properly, you will hear four quick beeps.
6.2.3.8 Troubleshooting
If the unit does not power up properly or reports low battery:
1. Make sure the batteries are fully seated within the battery compartment and the
polarity is correct.
2. Make sure that all three batteries are installed.
3. Check the battery voltage (1.5 VDC nominal per battery).

