Installation and Operations Manual
AT&T Proprietary (Internal Use Only)
—87—
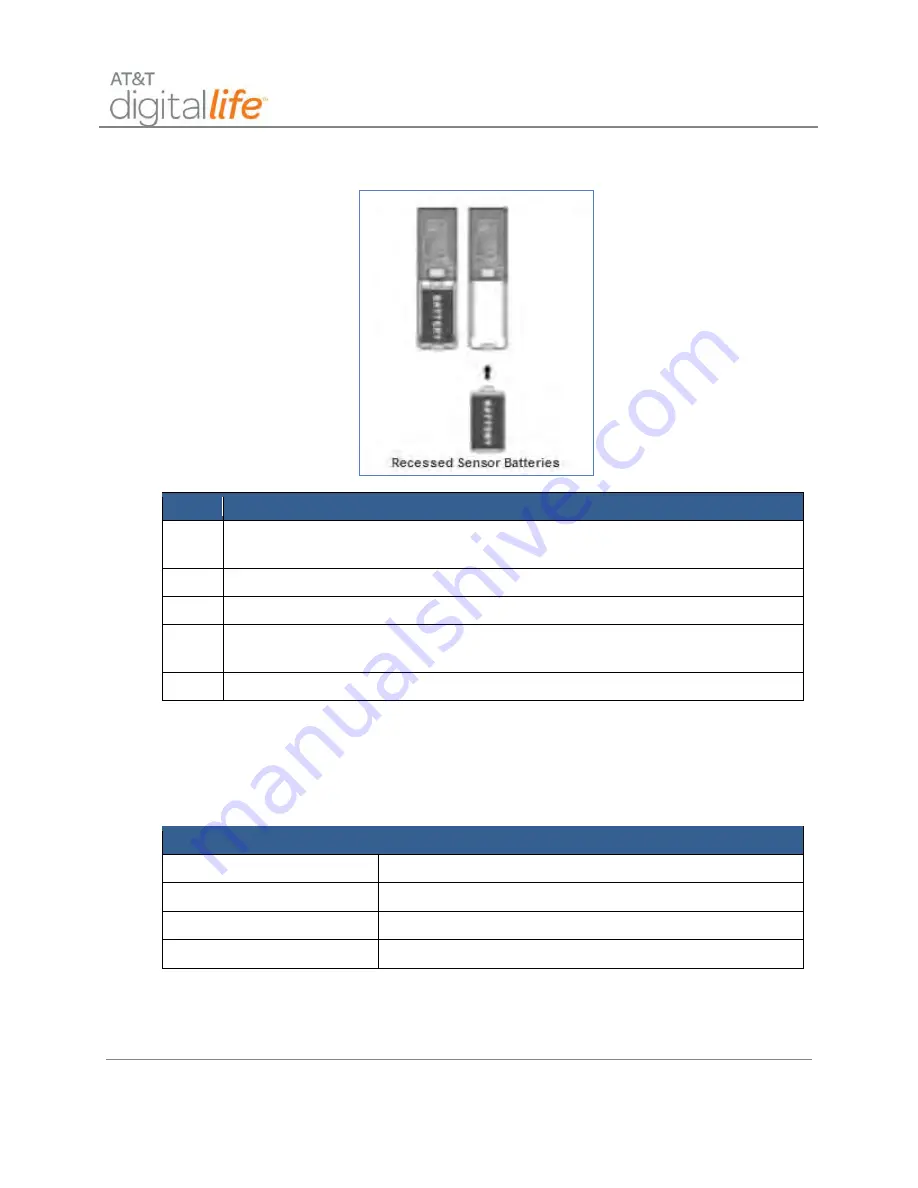
Figure 54: Installing Recessed DW Sensor
Step
Action
6.
Reinsert the transmitter assembly into its housing.
NOTE:
Make sure you properly slide the unit into the channel for proper fit.
7.
Replace the cap for the transmitter assembly.
8.
Insert the transmitter assembly into the door or window jam.
9.
Install the screws for securing the transmitter (if they were used in the initial
installation process.)
10.
Test the RDW sensor to ensure that it is working properly.
NOTE
: The RDW sensor includes low battery reporting. When the system indicates a
low battery condition, replace the battery.
6.2.5.6 Specifications—RDW Sensor
Specifications
Operating Temperature
32° to 120° F (0° to 49° C)
Operating Rel. Humidity
5 to 95%, non-condensing
Operating Frequency
433.92MHz
Battery
3-Volt CR2 Lithium Battery


