Using Help
|
Contents
|
Index
Back
180
Adobe Premiere Pro Help
Mixing Audio
Using Help
|
Contents
|
Index
Back
180
You can vary the pan setting over time in the Audio Mixer window (see
“Automating audio
changes in the Audio Mixer window” on page 190
), or in the Timeline window by applying
keyframes to a track’s Panner property (see
“Working with keyframes in the Timeline
window” on page 222
).
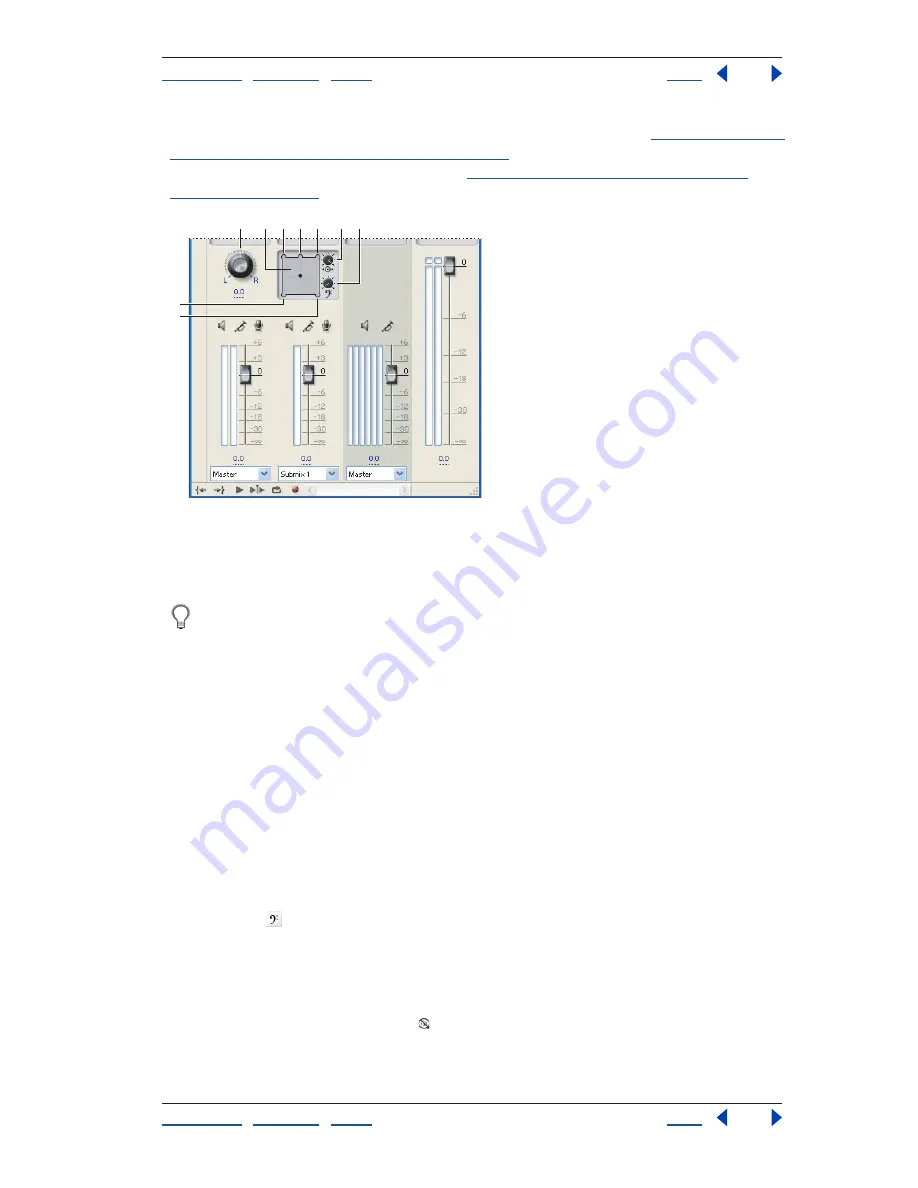
Panning and balancing controls
A.
Stereo pan/balance knob
B.
5.1 surround pan/balance tray
C.
Left channel
D.
Center channel
E.
Right channel
F.
Center percentage
G.
LFE volume
H.
Left surround channel
I.
Right surround
channel
For best results monitoring pan or balance settings, make sure that each of your
computer or audio card’s outputs is connected to the correct speaker, and make sure
that positive and negative wires are connected consistently across all speakers.
To pan or balance a track routed to a stereo track in the Audio Mixer window:
In the Audio Mixer window, do one of the following:
•
Drag the pan control knob or the value below the knob.
•
Click the value below the pan control knob, type a new value, and press Enter.
To pan or balance a track routed to a 5.1 surround track in the Audio Mixer window:
1
In the Audio Mixer window, click and drag the puck anywhere within the tray. To snap
the puck to a left, right, or center channel, drag the puck to a pocket along the edge of the
tray.
2
Adjust the center channel percentage by dragging the center percentage knob.
3
If needed, adjust the LFE (subwoofer) channel level by dragging the knob above the
Bass Clef icon
.
To pan or balance a track in the Timeline window:
1
In the Timeline window, if necessary, expand a track’s view by clicking the expansion
triangle next to the track name.
2
Click the Show Keyframes button , and choose Show Track Keyframes from the menu
that appears.
H
I
A
C
D
F
E
G
B


