Using Help
|
Contents
|
Index
Back
121
Adobe Premiere Pro Help
Assembling a Sequence
Using Help
|
Contents
|
Index
Back
121
Setting In and Out points for split edits
Ordinarily, you set one In point and one Out point for a source clip. Even if it’s a linked
clip—a clip containing video and audio tracks—In and Out points apply to both tracks of
the clip. Sometimes you want to set the video and audio In or Out points independently,
however, in order to create split edits (also known as L-cuts and J-cuts). Although it’s more
common to create split edits after clips are assembled into a rough cut, it’s possible to set
up a split edit in the Source view before adding a clip to the sequence.
To set source In and Out points for a split edit:
1
Open a clip in the Source view, and set the current time to the frame you want to set as
a video or audio In or Out point.
2
In the Source view, click the Marker button, choose Set Clip Marker, and select Video In,
Video Out, Audio In, or Audio Out.
3
Repeat steps 1 and 2 to set the remaining video and audio In and Out points. (When
you add the clip to a sequence, the video portion starts and ends at different times than
the audio.)
Setting sample-based audio In and Out points
In and Out points are set at timebase divisions—that is, between video frames. Although
frame-based edits are usually adequate for audio as well, some audio edits require greater
precision. For example, you may want to place an In point between two words in a
sentence, but the tiny division between words doesn’t conveniently fall between frames.
Fortunately, digital audio isn’t divided into frames, but into audio samples, which occur far
more frequently. By switching the Source view’s or sequence’s time ruler to audio samples,
you can set much more precise audio In and Out points.
When you switch a time ruler to audio units, drag the current-time indicator in the view’s
time ruler to navigate smoothly through the clip. (The frame forward and frame back
buttons always use video frames.) In the Source view’s time ruler, you can use the viewing
area bar to zoom into the time ruler to the sample level and view a very detailed audio
waveform. Similarly, you can use the Timeline window’s zoom tools to view an audio clip’s
waveform at the sample level.
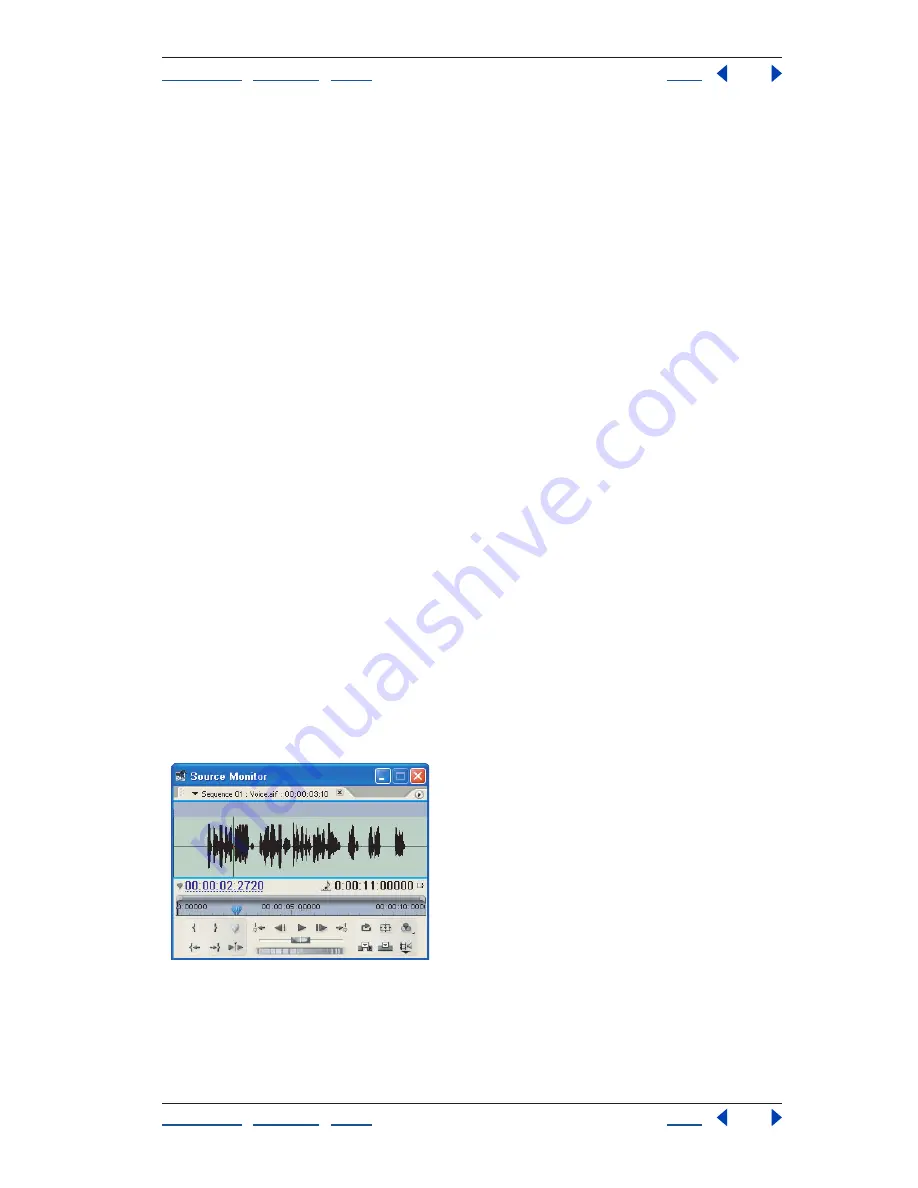
Source view of the Monitor window set to display audio units for more precise editing of an audio
clip
To use audio samples in the Source or Program view:
In the Source or Program view pop-up menu, choose Audio Units.


