


Using Help
|
Contents
|
Index
Back
31
Adobe Illustrator Help
Setting Up Artwork in Illustrator
Using Help
|
Contents
|
Index
Back
31
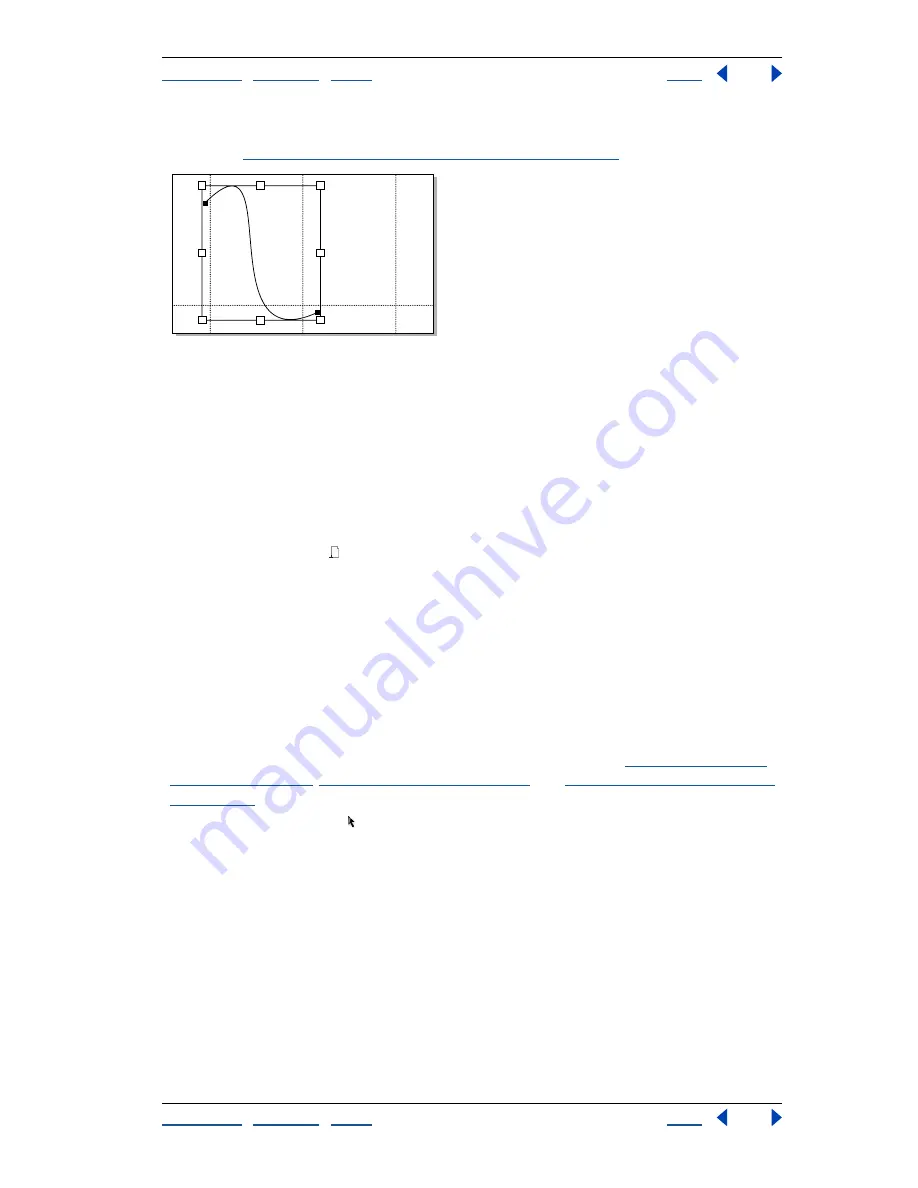
In the following illustration, the bounding box surrounds the artwork, not its direction
lines. (See
“About direction lines and direction points” on page 51
.)
Tile Imageable Areas; bounding box surrounds artwork
Moving the page boundaries
You can adjust the placement of the printable area of the page to control how artwork is
printed. This is a good way to avoid having the artwork extend past the boundaries of the
current page.
You can adjust the page from any view. You may find it easiest to choose View > Fit in
Window so you can see all of your artwork while you adjust the pages.
To adjust a page by using the page tool:
1
Select the page tool . The pointer becomes a dotted cross when you move it to the
active window.
2
Drag the page to the new location. As you drag, the page tool responds as if you were
moving the page from its lower left corner. Two gray rectangles are displayed. The outer
rectangle represents the page size, and the inner rectangle represents the printable area
of a page.
Note:
You can move the page anywhere on the artboard; however, any part of a page that
extends past the printable area boundary is not printed.
To adjust the placement of artwork by moving it in the printable area:
1
Unlock any locked objects, and display any hidden objects. (See
“Locking and hiding
objects” on page 112
,
“Locking artwork” on page 225
, and
“Hiding or displaying artwork”
on page 224
.)
2
Click the selection tool .
3
Choose Select > All.
Drag the artwork to the new position within the printable page boundaries.
About imported artwork
Placing artwork from other applications, such as Adobe Photoshop, into Adobe Illustrator
is easily performed using various Adobe Illustrator commands.
2
6
3
8
4
1
5
7


