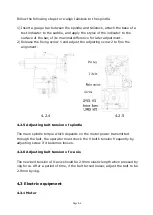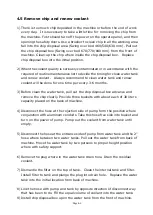
* Note whether motor is running or not.
1)
Fill clean lubricant into the oil tank up to the “MAX” marking of the oil level
indicator.
2)
The oil tank preserves clean lubricant.
3)
In case impurity remains in the oil tank so as to fail the oil feeding, please
clean the oil absorbing net immediately.
4)
Firstly, push oil feeding button to fill up the empty pipes for normal
application.
5)
The adjustment of discharge (Fig, shown) is to release the fixing bolt and
adjust it at desired figure displayed on the scale plate, so the figure is to
show the discharge C cc/cy.
6)
Oil surface below the ‘’MIN’’ limit, it is necessary to refill oil.
CESH-TYPE
FEATURES
1) This product is applied to every part of a machine which is needing to be
lubricated centralize the mounting together with proper spare parts of piping
to apply lubricants automatically by means of this machine. The oil feeding
machine provided oil feeding times with precision to improve lubricating
efficiency and lower cost.
2) Starting this machine is on “OFF”, it can avoided your re-actuated this
machine too much feeding oil.
3) For the adjustment of the dispose volume, set the “ON”and“OFF” at the
respective position for the selected discharge amount, and the operation is
simple.
4) If continued or more lubricating is required please actuate the coercive
pumping switch.
5) According to the division of timer set “ON” and “OFF times (in 3% error).
6) The pressure switch and buzzer are additional equipment at your option.
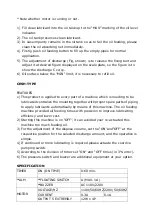
SPECIFICATION
TIMER
ON (ON TIME)
0-60 min.
*
ALM
*
FLOATING SWITCH
A (MAX. 1A )
*
BUZZER
AC 110V/220V
MOTOR
VOLTAGE/HZ
110V/50/60HZ 220V/50/60HZ
CURRENT
0.3A
0.1A
OUTPUT 5 EXTREMILY
12W x 4P
Summary of Contents for ATL 1820E
Page 5: ...1 SAFETY INSTRUCTIONS ...
Page 22: ...Page 1 17 ...
Page 24: ...2 MACHINE SPECIFICATIONS ...
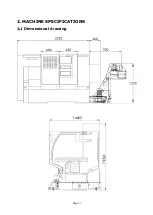
Page 25: ...Page 2 1 2 MACHINE SPECIFICATIONS 2 1 Dimensional drawing ...
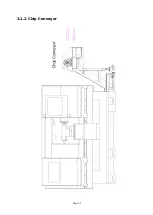
Page 27: ...Page 2 3 2 1 2 Chip Conveyor ...
Page 31: ...3 INSTALLATION ...
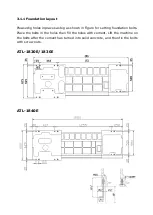
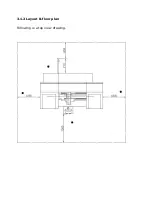
Page 34: ...3 1 2 Layout floor plan Following is a top view drawing ...
Page 43: ...4 MAINTENANCE ...
Page 55: ...5 CHUCK ...
Page 64: ...Page 7 3 7 1 HEADSTOCK 1 HEADSTOCK _ 18 SPINDLE BORE 58mm 2 ...
Page 65: ...Page 7 4 18 SPINDLE BORE 58mm 2 ...
Page 69: ...Page 7 8 7 2 BED Z AXIS TRANSMISSION ...
Page 71: ...Page 7 10 7 3 CARRIAGE CROSS SLIDE ...
Page 74: ...Page 7 13 7 4 TAILSTOCK MANUAL TAILSTOCK _ 18 ...

