Appendix B: Acer Altos G530 rack installation guide
164
9
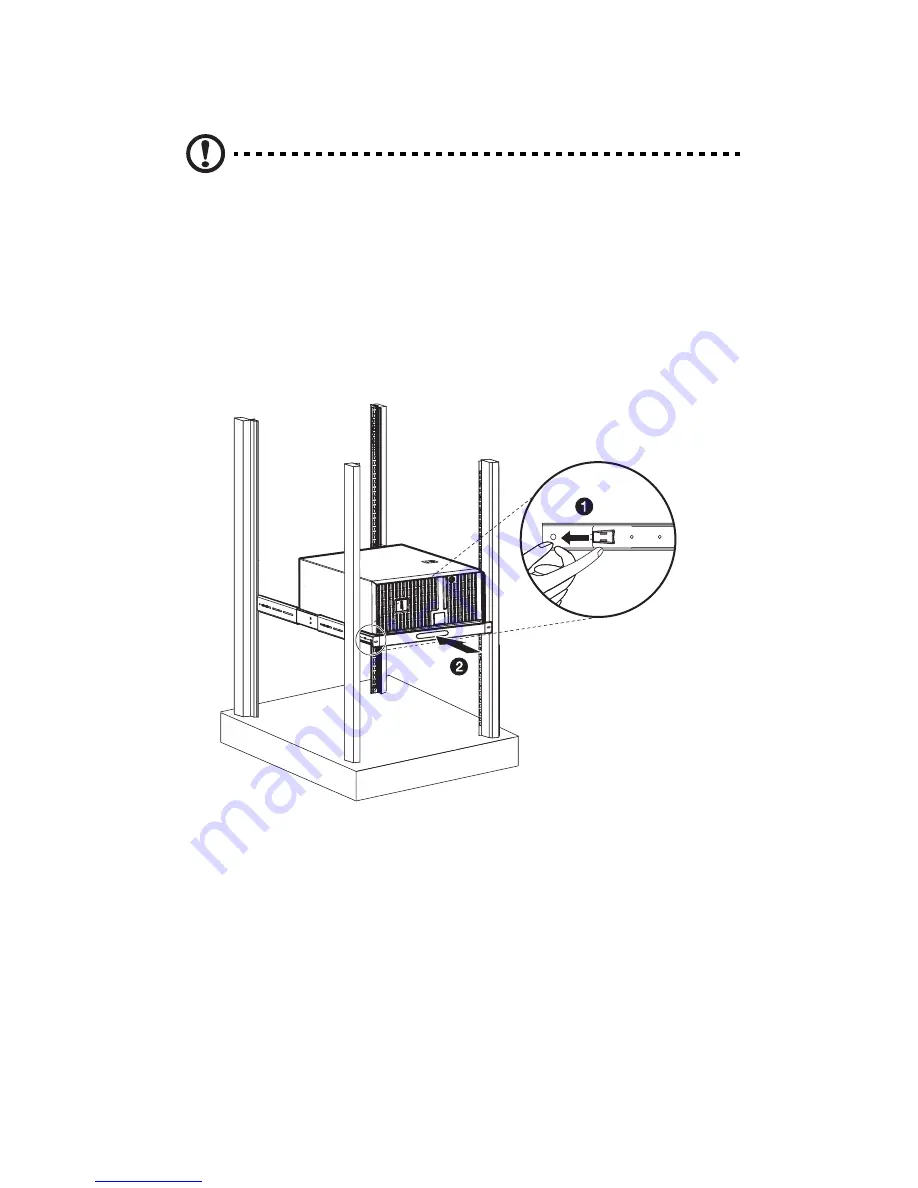
Install the server shelf assembly into the rack.
Caution!
To avoid personal injury, care should be taken when
pressing the inner rail release latches and sliding the component
into the rack.
(1) Carefully align the inner rails attached to the mounting shelf
with the fully extended mounting rails on the rack.
(2) Press the release latch on both sides of the mounting shelf
(1)
.
(3) Slide the mounting shelf into the rack, then push the
mounting shelf into the rack until you hear a click sound
(2)
.
10 Attach the cable arm to the system.
The optional cable carm allows you to tie-wrap all cables to and
from the system. As you slide the system in and out of the rack, the
cable arm collapses and extends, keeping the cables untangled
and attached to the system.
Summary of Contents for Altos G530 Series
Page 1: ...Acer Altos G530 Series User s Guide ...
Page 10: ...x Index 179 ...
Page 11: ...1 System tour ...
Page 33: ...2 System setup ...
Page 43: ...3 System upgrade ...
Page 87: ...4 BIOS setup ...
Page 131: ...5 Troubleshooting ...
Page 153: ...Appendix A System management utility ...
Page 160: ...Appendix A System management utility 150 ...
Page 161: ...Appendix B Acer Altos G530 rack installation guide ...
Page 162: ...This appendix shows you how to set up the Altos G5350 server in a rack mount configuration ...
Page 177: ...Appendix C SATA RAID configuration ...
Page 178: ...This appendix shows you how to create a RAID volume in your SATA drives ...
Page 181: ...171 c Press Ctrl Alt Del to reboot the server 8 Install an Operating System to the RAID array ...
Page 182: ...Appendix C SATA RAID configuration 172 ...
Page 183: ...Appendix D SCSI RAID configuration ...
Page 184: ...This appendix shows you how to create a RAID volume in your SCSI drives ...


