Chapter 11 Trunks
UAG4100 User’s Guide
157
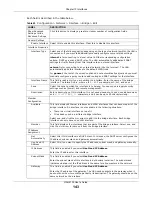
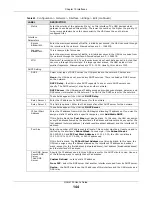
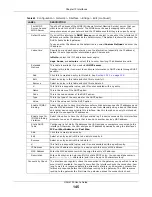
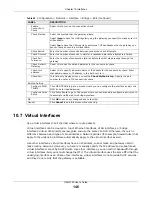
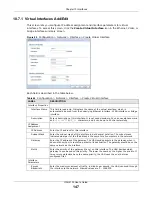
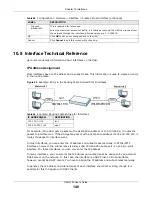
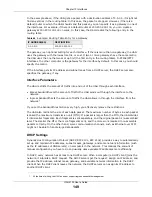
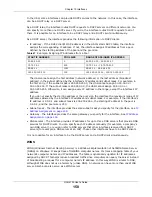
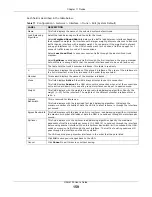
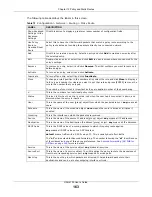
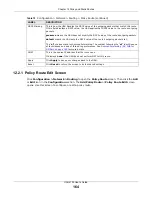
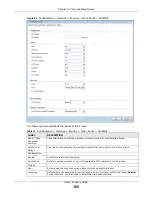
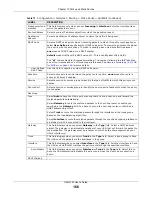
Each field is described in the table below.
Table 70
Configuration > Network > Interface > Trunk > Add (or Edit)
LABEL
DESCRIPTION
Name
This is read-only if you are editing an existing trunk. When adding a new trunk, enter a
descriptive name for this trunk. You may use 1-31 alphanumeric characters, underscores
(
_
), or dashes (-), but the first character cannot be a number. This value is case-sensitive.
Load Balancing
Algorithm
Select a load balancing method to use from the drop-down list box.
Select
Weighted Round Robin
to balance the traffic load between interfaces based on
their respective weights. An interface with a larger weight gets more chances to transmit
traffic than an interface with a smaller weight. For example, if the weight ratio of wan1 and
ppp0 interfaces is 2:1, the UAG chooses wan1 for 2 sessions’ traffic and ppp0 for 1 session’s
traffic in each round of 3 new sessions.
Select
Least Load First
to send new session traffic through the least utilized trunk
member.
Select
Spillover
to send network traffic through the first interface in the group member list
until there is enough traffic that the second interface needs to be used (and so on).
Load Balancing
Index(es)
This field is available if you selected to use the
Least Load First
or
Spillover
method.
Select
Outbound
,
Inbound
, or
Ou Inbound
to set the traffic to which the UAG
applies the load balancing method. Outbound means the traffic traveling from an internal
interface (ex. LAN) to an external interface (ex. WAN). Inbound means the opposite.
The table lists the trunk’s member interfaces. You can add, edit, remove, or move entries
for user configured trunks.
Add
Click this to add a member interface to the trunk. Select an interface and click
Add
to add a
new member interface after the selected member interface.
Edit
Select an entry and click
Edit
to modify the entry’s settings.
Remove
To remove a member interface, select it and click
Remove
. The UAG confirms you want to
remove it before doing so.
Move
To move an interface to a different number in the list, click the
Move
icon. In the field that
appears, specify the number to which you want to move the interface.
#
This column displays the priorities of the group’s interfaces. The order of the interfaces in
the list is important since they are used in the order they are listed.
Member
Click this table cell and select an interface to be a group member.
Mode
Click this table cell and select
Active
to have the UAG always attempt to use this
connection.
Select
Passive
to have the UAG only use this connection when all of the connections set to
active are down. You can only set one of a group’s interfaces to passive mode.
Weight
This field displays with the weighted round robin load balancing algorithm. Specify the
weight (1~10) for the interface. The weights of the different member interfaces form a
ratio. This ratio determines how much traffic the UAG assigns to each member interface.
The higher an interface’s weight is (relative to the weights of the interfaces), the more
sessions that interface should handle.
Ingress
Bandwidth
This is reserved for future use.
This field displays with the least load first load balancing algorithm. It displays the
maximum number of kilobits of data the UAG is to allow to come in through the interface
per second.
Note: You can configure the bandwidth of an interface in the corresponding interface edit
screen.
Содержание UAG4100
Страница 43: ...Chapter 3 Printer Deployment UAG4100 User s Guide 43 ...
Страница 118: ...Chapter 10 Interfaces UAG4100 User s Guide 118 Figure 76 Configuration Network Interface Ethernet Edit External Type ...
Страница 119: ...Chapter 10 Interfaces UAG4100 User s Guide 119 Figure 77 Configuration Network Interface Ethernet Edit Internal Type ...
Страница 129: ...Chapter 10 Interfaces UAG4100 User s Guide 129 Figure 82 Configuration Network Interface PPP Add ...
Страница 207: ...Chapter 20 UPnP UAG4100 User s Guide 207 Figure 133 Network Connections My Network Places Properties Example ...
Страница 221: ...Chapter 24 Web Authentication UAG4100 User s Guide 221 Figure 146 Configuration Web Authentication Web Portal ...
Страница 222: ...Chapter 24 Web Authentication UAG4100 User s Guide 222 Figure 147 Configuration Web Authentication User Agreement ...
Страница 267: ...Chapter 26 Billing UAG4100 User s Guide 267 Figure 184 Configuration Billing Payment Service Custom Service ...
Страница 355: ...Chapter 38 Certificates UAG4100 User s Guide 355 Figure 237 Configuration Object Certificate Trusted Certificates Edit ...
Страница 404: ...Chapter 41 Log and Report UAG4100 User s Guide 404 Figure 283 Configuration Log Report Email Daily Report ...
Страница 408: ...Chapter 41 Log and Report UAG4100 User s Guide 408 Figure 285 Configuration Log Report Log Settings Edit System Log ...
Страница 413: ...Chapter 41 Log and Report UAG4100 User s Guide 413 Figure 287 Configuration Log Report Log Settings Edit Remote Server ...
Страница 466: ...Appendix B Legal Information UAG4100 User s Guide 466 Environmental Product Declaration ...

