

Chapter 10 Interfaces
UAG4100 User’s Guide
134
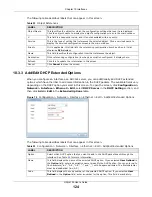
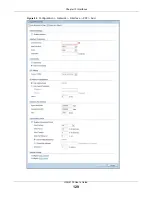
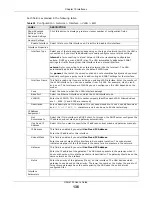
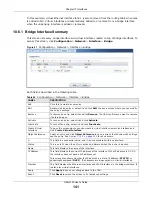
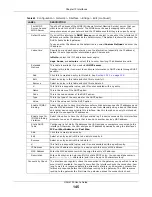
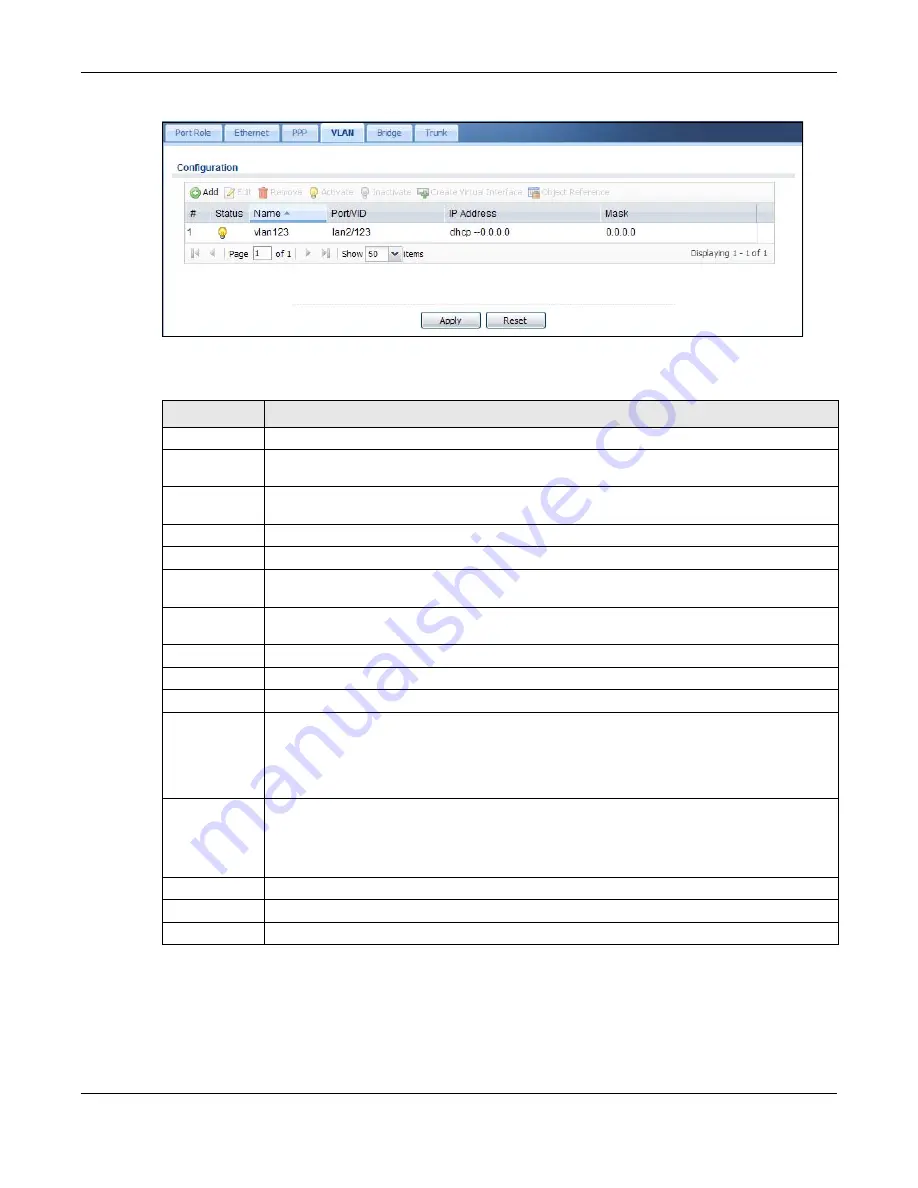
Figure 85
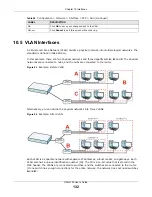
Configuration > Network > Interface > VLAN
Each field is explained in the following table.
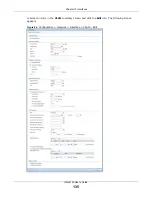
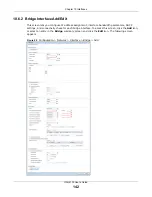
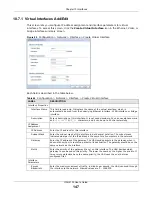
10.5.2 VLAN Interface Add/Edit
This screen lets you configure IP address assignment, interface bandwidth parameters, DHCP
settings, and connectivity check for each VLAN interface. To access this screen, click the
Add
icon
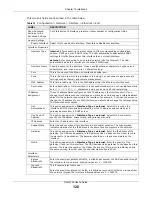
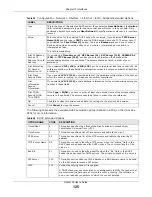
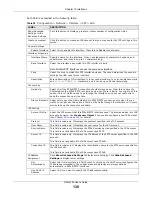
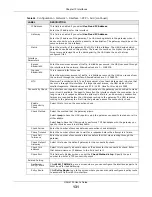
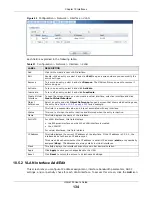
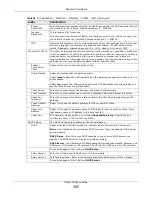
Table 57
Configuration > Network > Interface > VLAN
LABEL
DESCRIPTION
Add
Click this to create a new VLAN interface.
Edit
Double-click an entry or select it and click
Edit
to open a screen where you can modify the
entry’s settings.
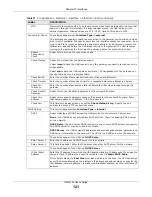
Remove
To remove an entry, select it and click
Remove
. The UAG confirms you want to remove it
before doing so.
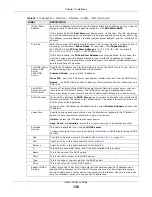
Activate
To turn on an entry, select it and click
Activate
.
Inactivate
To turn off an entry, select it and click
Inactivate
.
Create Virtual
Interface
To open the screen where you can create a virtual interface, select an interface and click
Create Virtual Interface
.
Object
References
Select an entry and click
Object Reference
to open a screen that shows which settings use
the entry. See
for an example.
#
This field is a sequential value, and it is not associated with any interface.
Status
This icon is lit when the entry is active and dimmed when the entry is inactive.
Name
This field displays the name of the interface.
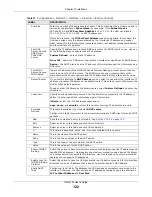
Port/VID
For VLAN interfaces, this field displays
•
the Ethernet interface on which the VLAN interface is created
•
the VLAN ID
For virtual interfaces, this field is blank.
IP Address
This field displays the current IP address of the interface. If the IP address is 0.0.0.0, the
interface does not have an IP address yet.
This screen also shows whether the IP address is a static IP address (
static
) or dynamically
assigned (
dhcp
). IP addresses are always static in virtual interfaces.
Mask
This field displays the interface’s subnet mask in dot decimal notation.
Apply
Click
Apply
to save your changes back to the UAG.
Reset
Click
Reset
to return the screen to its last-saved settings.
Содержание UAG4100
Страница 43: ...Chapter 3 Printer Deployment UAG4100 User s Guide 43 ...
Страница 118: ...Chapter 10 Interfaces UAG4100 User s Guide 118 Figure 76 Configuration Network Interface Ethernet Edit External Type ...
Страница 119: ...Chapter 10 Interfaces UAG4100 User s Guide 119 Figure 77 Configuration Network Interface Ethernet Edit Internal Type ...
Страница 129: ...Chapter 10 Interfaces UAG4100 User s Guide 129 Figure 82 Configuration Network Interface PPP Add ...
Страница 207: ...Chapter 20 UPnP UAG4100 User s Guide 207 Figure 133 Network Connections My Network Places Properties Example ...
Страница 221: ...Chapter 24 Web Authentication UAG4100 User s Guide 221 Figure 146 Configuration Web Authentication Web Portal ...
Страница 222: ...Chapter 24 Web Authentication UAG4100 User s Guide 222 Figure 147 Configuration Web Authentication User Agreement ...
Страница 267: ...Chapter 26 Billing UAG4100 User s Guide 267 Figure 184 Configuration Billing Payment Service Custom Service ...
Страница 355: ...Chapter 38 Certificates UAG4100 User s Guide 355 Figure 237 Configuration Object Certificate Trusted Certificates Edit ...
Страница 404: ...Chapter 41 Log and Report UAG4100 User s Guide 404 Figure 283 Configuration Log Report Email Daily Report ...
Страница 408: ...Chapter 41 Log and Report UAG4100 User s Guide 408 Figure 285 Configuration Log Report Log Settings Edit System Log ...
Страница 413: ...Chapter 41 Log and Report UAG4100 User s Guide 413 Figure 287 Configuration Log Report Log Settings Edit Remote Server ...
Страница 466: ...Appendix B Legal Information UAG4100 User s Guide 466 Environmental Product Declaration ...


