Channel Job
80
Reference Manual
◆
Channel link operations
•
Linking three or more channels
Hold down the link-source [SEL] key and successively press the [SEL] key of each output
channel you want to add to the link group.
•
Adding a new channel to an existing link group
Hold down any [SEL] key within the group and press the [SEL] key that you want to add
to the group.
NOTE
If the link-destination output channel is already assigned to another link group, its assignment to
the previous group will be canceled, and it will be added to the newly assigned group.
•
Removing a channel from a link group
Hold down any [SEL] key in the same link group, and press the [SEL] key for the channel
that you want to remove.
•
Changing the level balance between channels that belong to the same link group
While pressing and holding down the [SEL] key for the desired linked channel, adjust the
parameter value. You can also remove all linked channels from the same link group
temporarily. This can be helpful if you want to edit parameters that are linked to each
other while maintaining the same relative level differences. While you are holding down
the [SEL] key, the fader values will not be linked. (However, you cannot temporarily
cancel this link during the “fading” phase of a recalled scene.)
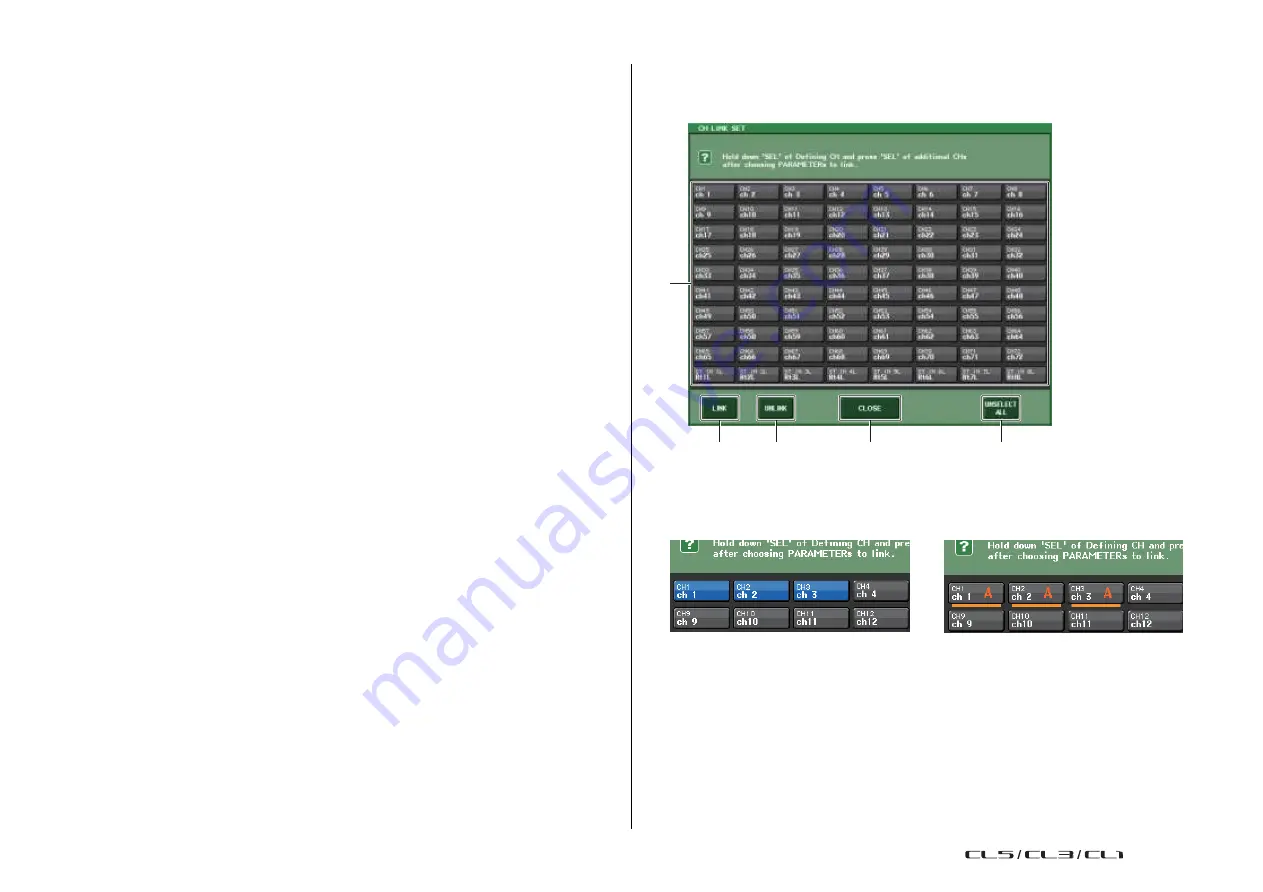
CH LINK SET window
Displayed when you press the channel display field in the CH LINK MODE window. You can
also link channels in this window.
1
2
3
5
4
1
Channel select button
Select a channel that you want to link. The selected input channel will be indicated in
blue, the selected output channel will be indicated in orange, and the alphabetical
character that indicates the link group will appear for linked channels.
When selecting a channel
When linking channels
2
LINK buttons
Link the channel selected in
,
1
.
3
UNLINK button
Cancels the link selected in
,
1
.
4
UNSELECT ALL
De-selects all selected channels.
USO
RESTRITO
Содержание CL5
Страница 257: ...Data List USO RESTRITO ...


