30
Chapter 3– Getting Started
The Workspace
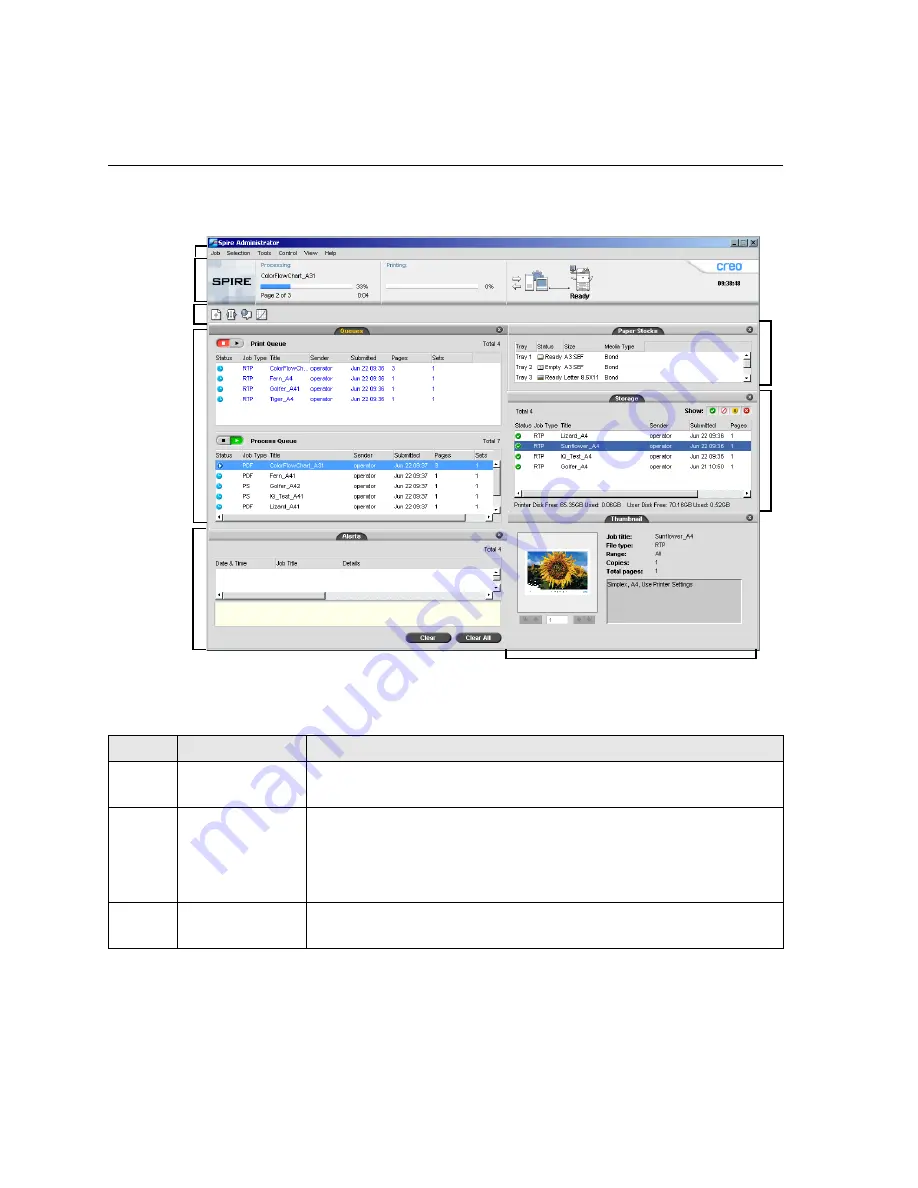
Table 4 describes the Spire CX250 color server workspace.
1
2
3
4
5
6
7
8
Table 4:
Spire CX250 color server
workspace
Item
Name
Description
1
Menu Bar
Consists of the
Job
,
Selection
,
Tools
,
Control, View,
and
Help
menus.
Click a menu name to open the corresponding menu.
2
Status Panel
Contains the logo,
Processing
status area,
Printing
status area,
server
icon,
printer
icon, and current time.
For more information on the server and printer icons, see
The Server
and Printer Monitors
on page 32.
3
Toolbar
Consists of shortcut buttons for the Import window, Resource Center,
Message Viewer, and Calibration window
Содержание CX240
Страница 2: ......
Страница 6: ......
Страница 20: ...10 Chapter 1 Welcome...
Страница 104: ...94 Chapter 5 Printing From Your Computer...
Страница 148: ...138 Chapter 7 Color Workflow...
Страница 149: ...System Administration Setting Up and Configuring the Spire CX250 Color Server 140 System Messages 169...
Страница 176: ...166 Chapter 8 System Administration 5 Locate the desired folder and click Save JDF Outputs...
Страница 184: ...174 Chapter 8 System Administration...
Страница 185: ...Setting Parameters Setting Parameters in the Job Parameters Window 176 Setting PPD File Parameters 208...
Страница 246: ...236 Appendix B Restoring the Spire CX250 Color Server Software 4 In the What not to scan area click Exclusions...
Страница 272: ...262 Spire CX250 Color Server User Guide...


