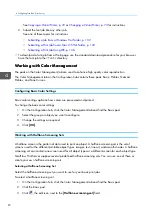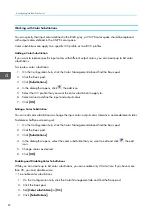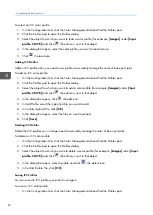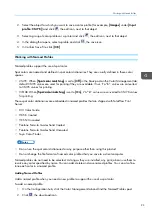
88
1.
On the Configuration hub, click Data Stream and find the Fonts pod.
2.
Click the font you want to view and click
, the view icon, to see the properties associated with
the font.
3.
Click [[O
OK
K]].
Uploading a Font
If your jobs require fonts that are not loaded in TotalFlow Print Server and are not embedded in the job,
you might need to upload those fonts.
To upload a font:
1.
On the Configuration hub, click Data Stream and find the Fonts pod.
2.
Click the font you want to upload and click
, the download icon.
3.
Click [[O
OK
K]].
Deleting Fonts
If you no longer need specific fonts that have been uploaded, you can delete them from TotalFlow Print
Server.
You cannot delete any fonts that came with TotalFlow Print Server. These fonts are also called system
fonts.
To delete a font:
1.
Click
, the stop button, to stop the printer.
2.
On the Configuration hub, click Data Stream and find the Fonts pod.
3.
Click the font you want to delete.
4.
Click
, the delete icon, to delete the font.
5.
Click [[O
OK
K]] .
6.
Click
, the start button, to start the printer.
The font is deleted the next time that you restart TotalFlow Print Server.
You can delete multiple fonts by clicking
, the multiple delete icon.
Содержание Print Server R-60
Страница 2: ......
Страница 14: ......
Страница 56: ......
Страница 62: ...2 60 ...
Страница 102: ...4 100 ...
Страница 150: ...5 148 ...
Страница 162: ...6 160 ...
Страница 172: ...7 170 ...
Страница 178: ...8 176 ...
Страница 198: ...10 196 ...
Страница 208: ...206 ...
Страница 218: ...Copyright 2015 2015 Ricoh Company Ltd All rights reserved ...
Страница 219: ......

