System Tools
Thermo Scientific
DXRxi User Guide
167
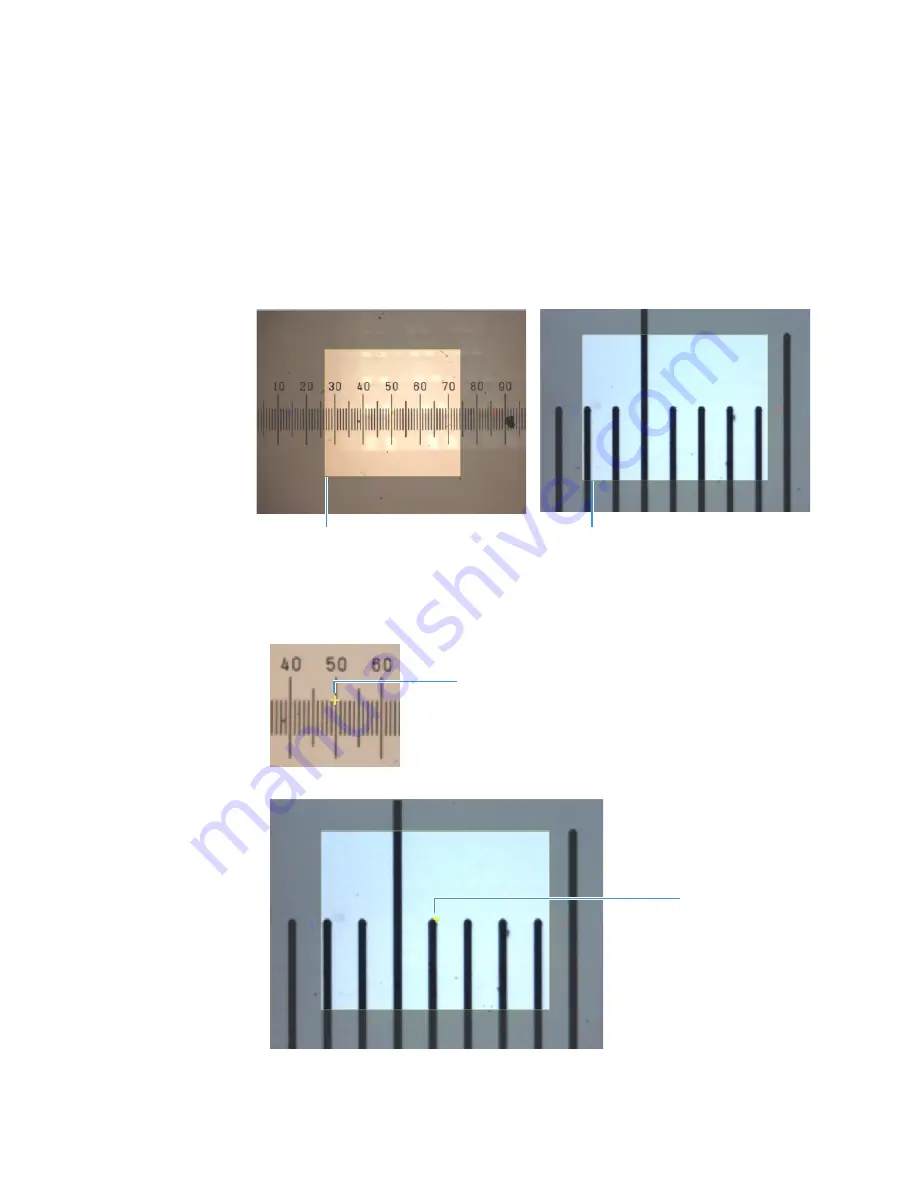
14. Adjust the edges of the light colored rectangular area in the center of the video image so
the area covers about half the screen.
We will refer to this light colored area as the “cropping” box. It contains a centering
marker and two distance markers that are used to calibrate the video image.
To adjust the cropping box, grab an edge.
Figure 105.
Cropping box adjusted to cover half of available area for two different objectives
15. Use the mouse to place the centering (yellow) marker in the video image at exactly the
point where the cross hairs in the right eyepiece meet.
Figure 106.
Centering marker correctly positioned for 10x objective
Figure 107.
Centering marker correctly positioned for 100x objective
Cropping box (10x objective)
Cropping box (100x objective)
Centering marker
(10x objective)
Centering marker
(100x objective)
Содержание DXR xi
Страница 12: ...1 Introducing the DXRxi Raman Imaging System Trademarks 6 DXRxi User Guide Thermo Scientific...
Страница 14: ...2 DXRxi Microscope Operation 8 DXRxi User Guide Thermo Scientific...
Страница 64: ...Safety Information 58 DXRxi User Guide Thermo Scientific Microscope Safety Labels or...
Страница 65: ...Safety Information Thermo Scientific DXRxi User Guide 59...
Страница 66: ...Safety Information 60 DXRxi User Guide Thermo Scientific...
Страница 67: ...Safety Information Thermo Scientific DXRxi User Guide 61...
Страница 68: ...Safety Information 62 DXRxi User Guide Thermo Scientific...
Страница 166: ...3 OMNICxi Software Operation Acquire and Analyze Data 160 DXRxi User Guide Thermo Scientific...


