Installation and Setup
Mounting Options
2-4
48iQ Instruction Manual
Thermo Scientific
Mounting in a rack includes removing the front panel and installing ears
and handles.
Equipment required:
Phillips drive, #2
1.
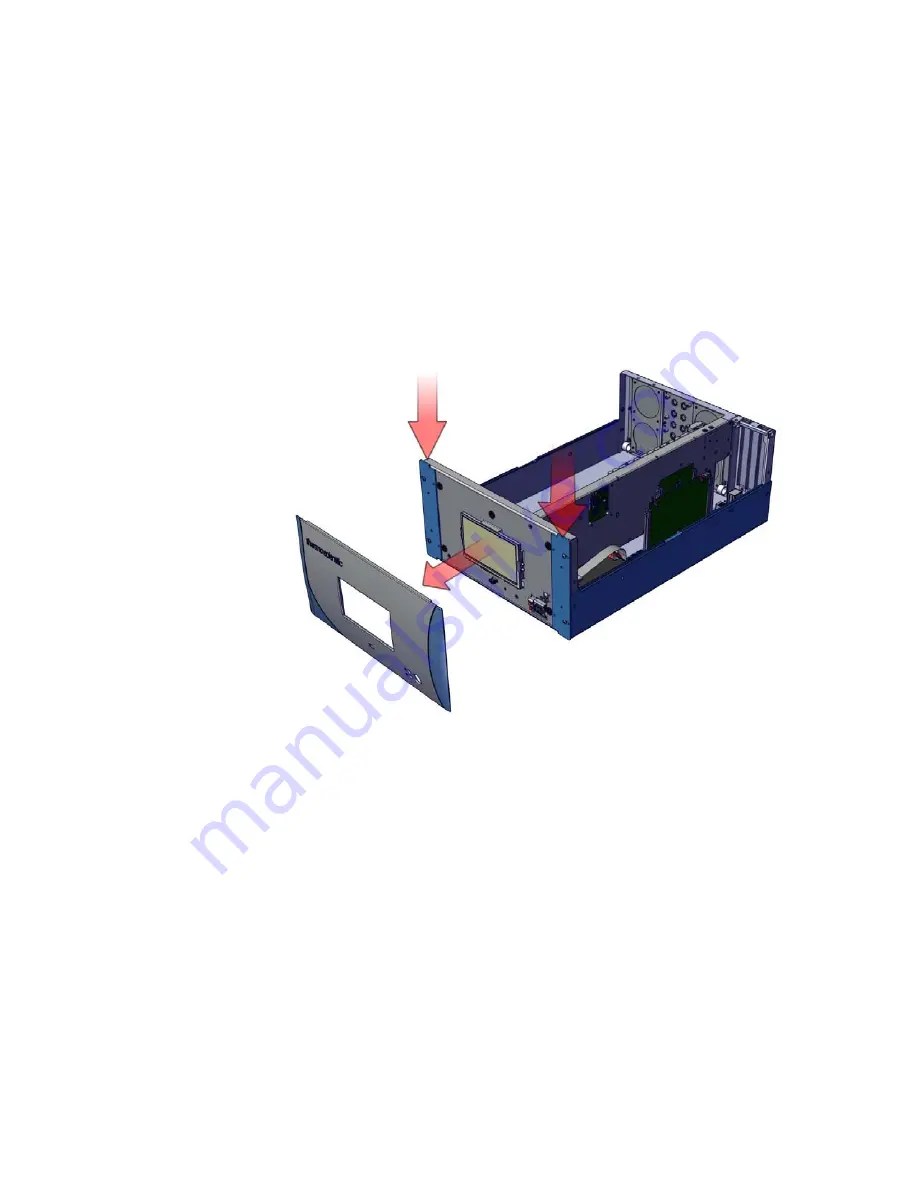
Start by gripping from the top corners of the front panel and pull
outwards. See
Figure 2–3
.
Figure 2–3.
Removing the Front Panel
2.
Unfasten the four 8-32 pan head screws.
3.
Slide ears outwards.
4.
Use the same four 8-32 pan head screws to secure it.
5.
Install the handles with the four 8-32 flat head screws that came with
the handle kit on the backside. See
Figure 2–4
.
Rack Mount
Содержание 117080-00
Страница 1: ...48iQ Instruction Manual Carbon Monoxide Analyzer 117080 00 1Sep2019 ...
Страница 2: ......
Страница 18: ......
Страница 28: ......
Страница 36: ...Operation Instrument Display 3 8 48iQ Instruction Manual Thermo Scientific ...
Страница 154: ......
Страница 165: ...Calibration Calibration Thermo Scientific 48iQ Instruction Manual 4 11 ...
Страница 174: ...Maintenance Pump Rebuilding 5 4 48iQ Instruction Manual Thermo Scientific Figure 5 2 Pump Rebuilding ...
Страница 184: ......
Страница 192: ...Servicing Fan Replacement 7 8 48iQ Instruction Manual Thermo Scientific Figure 7 8 Replacing the Fan ...
Страница 220: ...Servicing DMC Optical Bench 7 36 48iQ Instruction Manual Thermo Scientific Figure 7 40 Filter Wheel ...
Страница 230: ...Servicing DMC Optical Bench 7 46 48iQ Instruction Manual Thermo Scientific Figure 7 48 IR Source Cable Disconnect ...
Страница 252: ......
Страница 278: ......
Страница 290: ......
Страница 291: ......


