3.2. CONNECTING AN ANTENNA
3.2 Connecting an antenna
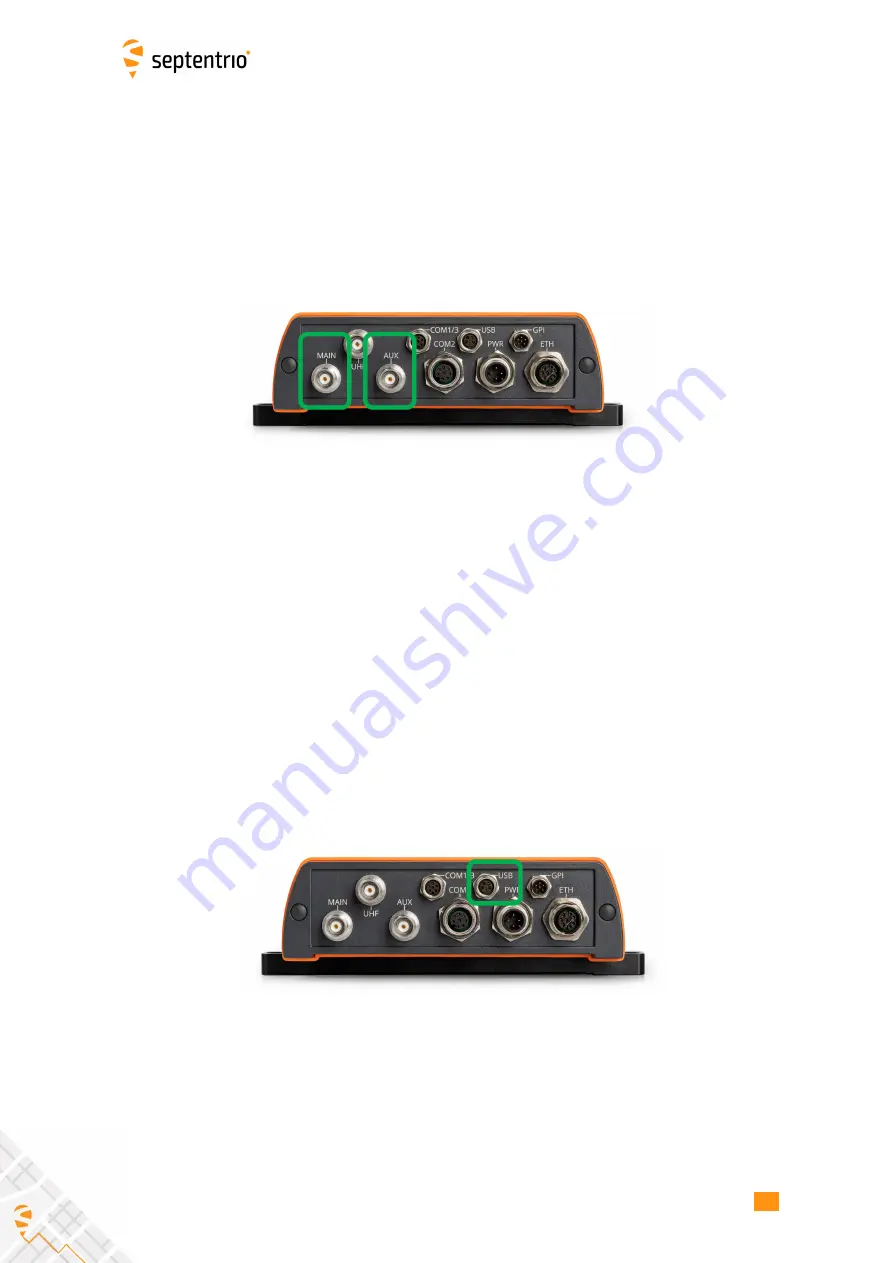
The rear panel of the AsteRx-U3 has two TNC connectors for GNSS antennas: one for the
main antenna and one for an auxiliary antenna for heading applications. To get started,
connect an antenna via an antenna cable to the main antenna connector of the AsteRx-U3
indicated in Figure 3-3. An overview of the antennas which are directly compatible with
the receiver can be obtained using the
lstAntennaInfo
command. For more information
regarding these and other commands, please refer to the Firmware Reference Guide.
Figure 3-3:
Rear-panel main and auxiliary antenna connectors
3.3 Connecting to the AsteRx-U3 via the Web
Interface
You can connect to the receiver on any device that supports a web browser using the
receiver’s on board Web Interface. The connection can be made using either USB or Ethernet.
The following sections describe each of the connection methods.
3.3.1 Using the USB cable
Connect the USB cable to the connector labeled ’USB’ on the rear panel of the AsteRx-U3 and
indicated in Figure 3-4.
Figure 3-4:
Rear panel USB socket
The
fi
rst time that the USB cable is connected to a device, you may be prompted to allow
installation of drivers which can take several minutes. When the drivers have been installed,
it is recommended to unplug then re-plug in the USB cable on your device to fully activate
the drivers.
19
Содержание AsteRx-U3
Страница 1: ...AsteRx U3 User Manual ...
Страница 14: ...2 3 ASTERX U3 DESIGN Figure 2 4 Mounting brackets fitted to the AsteRx U3 14 ...
Страница 39: ...4 1 HOW TO CONFIGURE THE ASTERX U3 FOR RTK Figure 4 6 Correctly configured cellular modem 39 ...
Страница 79: ...8 4 HTTP HTTPS Figure 8 7 Uploading a certificate to the receiver 79 ...


