Advanced Features
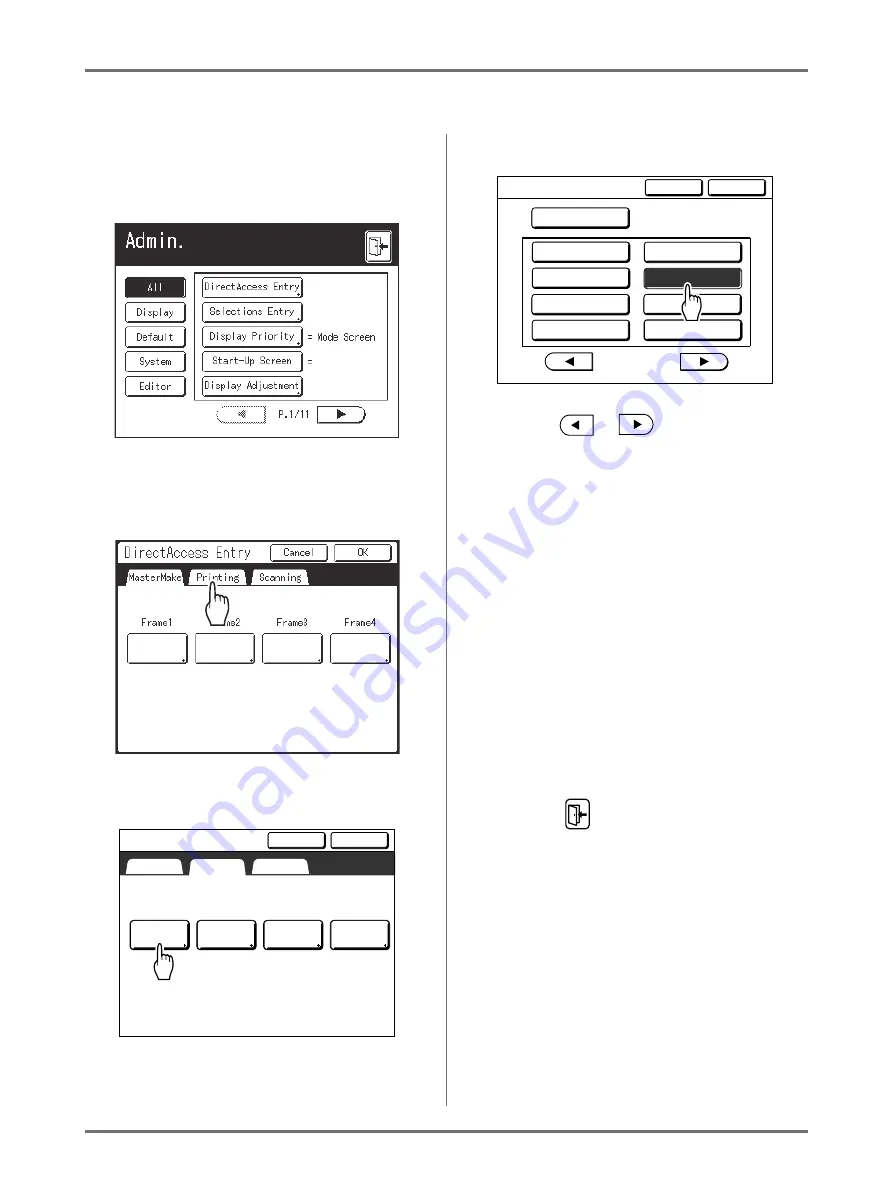
Setting Up Direct Access Area and Selections Tab [DirectAccess Entry] [Selections Entry]
177
In the following steps, the registration on DirectAccess Entry and Selections Entry are explained at the same time.
1
Touch [DirectAccess Entry] or
[Selections Entry] on the Admin.
Screen.
2
Select a mode tab to store new but-
tons.
3
Select a button to assign a function.
If the button has a function already assigned to it,
the newly selected function will overwrite the pre-
vious function.
4
Select a function to assign.
Note:
• Touch
or
to display more func-
tions, if necessary.
• To remove a function accidentally assigned,
touch
[No Entry]
.
• Functions already assigned are grayed out and
not available for selection.
• Some functions display only when optional
devices are installed.
5
Touch [OK].
Returns to DirectAccess Entry Screen or Selec-
tions Entry Screen. The selected functions are
added.
To add more functions, or to replace a button with
another function, repeat steps 2-5.
6
Touch [OK].
Returns to the Admin. Screen. “Direct Access”
area or “Selections” Screen is updated.
7
Touch
.
Returns to the Master Making Basic Screen or
Print Basic Screen.
Rogo (SE)
Multi-Up
D-Feed
Check
No Entry
No Entry
Frame1
Frame2
No Entry
Frame3
No Entry
Frame4
MasterMake
Printing
Scanning
Cancel
OK
DirectAccess Entry
Multi-Up
D-Feed
Check
Function List
Cancel
OK
P .
No Entry
Renew Page
Idling Action
3/4
Confidential
Paper Feed Adj.
D-Feed Check
Ink Saving
Interval
Auto Page Renewal
Содержание SE 9380
Страница 1: ......
Страница 2: ......
Страница 97: ...Functions for Master Making Checking the Print Image Prior to Making Master Preview 95...
Страница 203: ...Storing Original Data and Use Method Copying Moving Stored Data 201...
Страница 223: ...Maintenance Cleaning 221...
Страница 257: ...Troubleshooting Troubleshooting 255...
Страница 263: ...Appendix Specifications 261...
Страница 268: ...266 056 36003 001...


