Advanced Features
Using Job Memory Functions [Job Memory]
141
Storing Job Memory
1
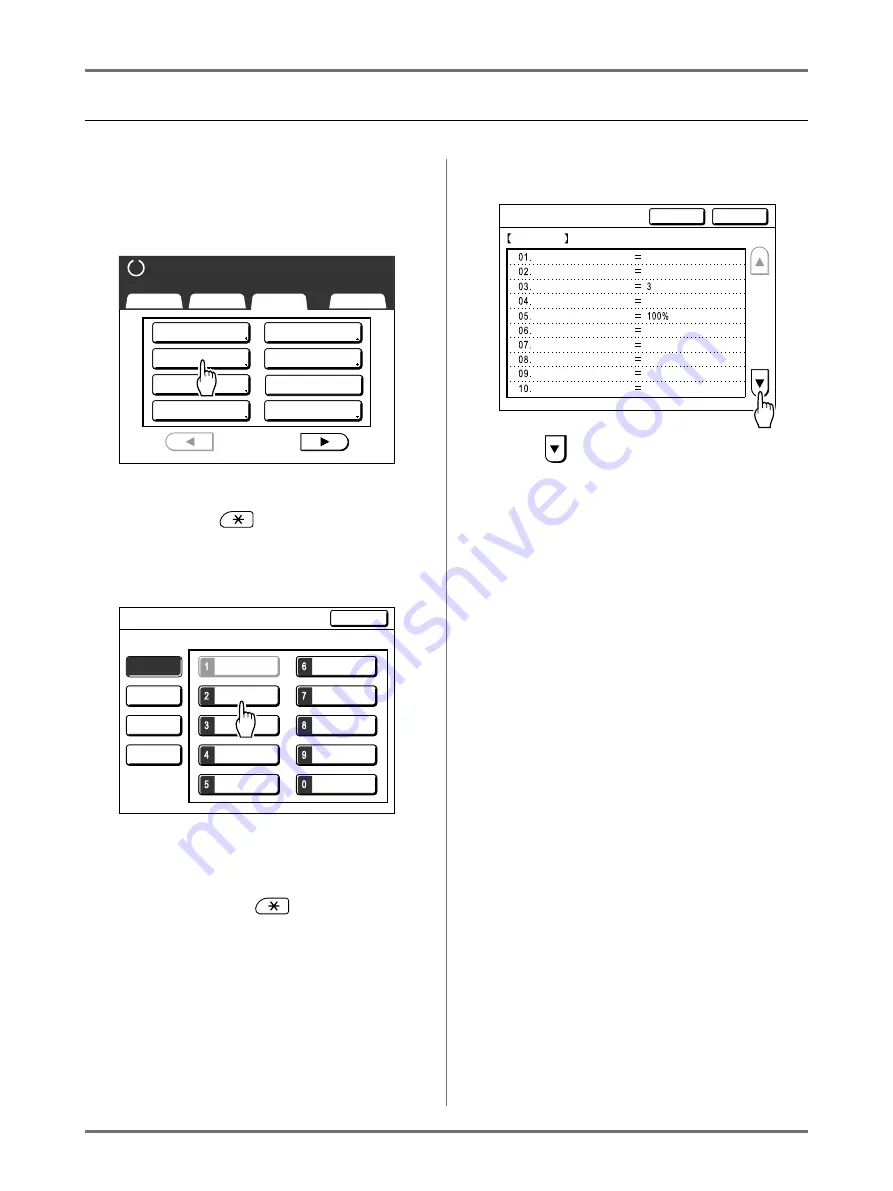
Set various settings for a print job.
2
Touch [Job Memory] on the Func-
tions Screen.
Note:
• Job Memory Screen can also be invoked by
pressing the
key on the Print Quantity
Keys.
3
Touch an unused button.
Unused buttons are displayed with a solid line.
Used buttons are grayed out and are not avail-
able.
Note:
• If you pressed the
key to open the
screen, first touch
[Register]
then select an
available button.
4
Confirm settings.
Touch
and scroll down to check all items.
Note:
• To change a setting, touch
[Cancel]
and start
over again. (Return to step 1.)
5
Touch [OK].
Returns to the Job Memory Screen. Settings are
updated.
Each job memory can be named for your conve-
nience. See step 2 in
“
Renaming a Job Memory
”
(
2 Up
Basic
Selections
Functions
Admin.
P .
Program
Book Shadow
1/4
Job Memory
Dot Process
Multi-Up Print
Contrast Adj
Tone Curve
Ready to Make Master
M-6
M-2
M-7
M-3
M-8
M-4
M-9
M-5
M-10
Job Memory
Rename
C l e a r
R e t r i e v e
S e l e c t a R e g i s t e r F r a m e f o r a B u t t o n
R e g i s t e r
C l o s e
M-1
R e g i s t e r
P.
Status Check
Cancel
OK
M-2
Photo
OFF
1 / 4
OFF
OFF
OFF
Auto
OFF
OFF
Image
Dot Process
Contrast
Ink Saving
Size
Paper Size
Max. Scan
Book Shadow
Multi-Up Print
Содержание SE 9380
Страница 1: ......
Страница 2: ......
Страница 97: ...Functions for Master Making Checking the Print Image Prior to Making Master Preview 95...
Страница 203: ...Storing Original Data and Use Method Copying Moving Stored Data 201...
Страница 223: ...Maintenance Cleaning 221...
Страница 257: ...Troubleshooting Troubleshooting 255...
Страница 263: ...Appendix Specifications 261...
Страница 268: ...266 056 36003 001...


