176 C
OMMAND
C
ENTER
S
ECURE
G
ATEWAY
A
DMINISTRATOR
G
UIDE
System Log
traps, which include notifications for the status of the CC unit itself, such as a
hard disk failure, and
Application Log
traps for notifications generated by events in the CC
application, such as modifications to a user account. To enable traps by type, check the boxes
marked
System Log
and
Application Log.
Individual traps can be enabled or disabled by
checking their corresponding checkboxes Use
Select All
and
Clear All
to enable all traps or
clear all checkboxes. Refer to the MIB files for the list of SNMP traps that are provided
⎯
see
section
MIB Files
.
6.
Type the
Trap Destination
Host
IP address and
Port
number used by SNMP hosts in the
Trap Destinations
panel. Default port is
162
.
7.
Type the
Community
string and
Version
(
v1
or
v2
) used by SNMP hosts in the
Trap
Destinations
panel.
8.
Click
Add
to add this destination host to the list of configured hosts. To remove a host from
the list, select the host and click
Remove
. There is no limit to the number of managers that
can be set in this list.
9.
When SNMP traps and their destinations are configured, click
Update Trap Configuration.
Configure Security
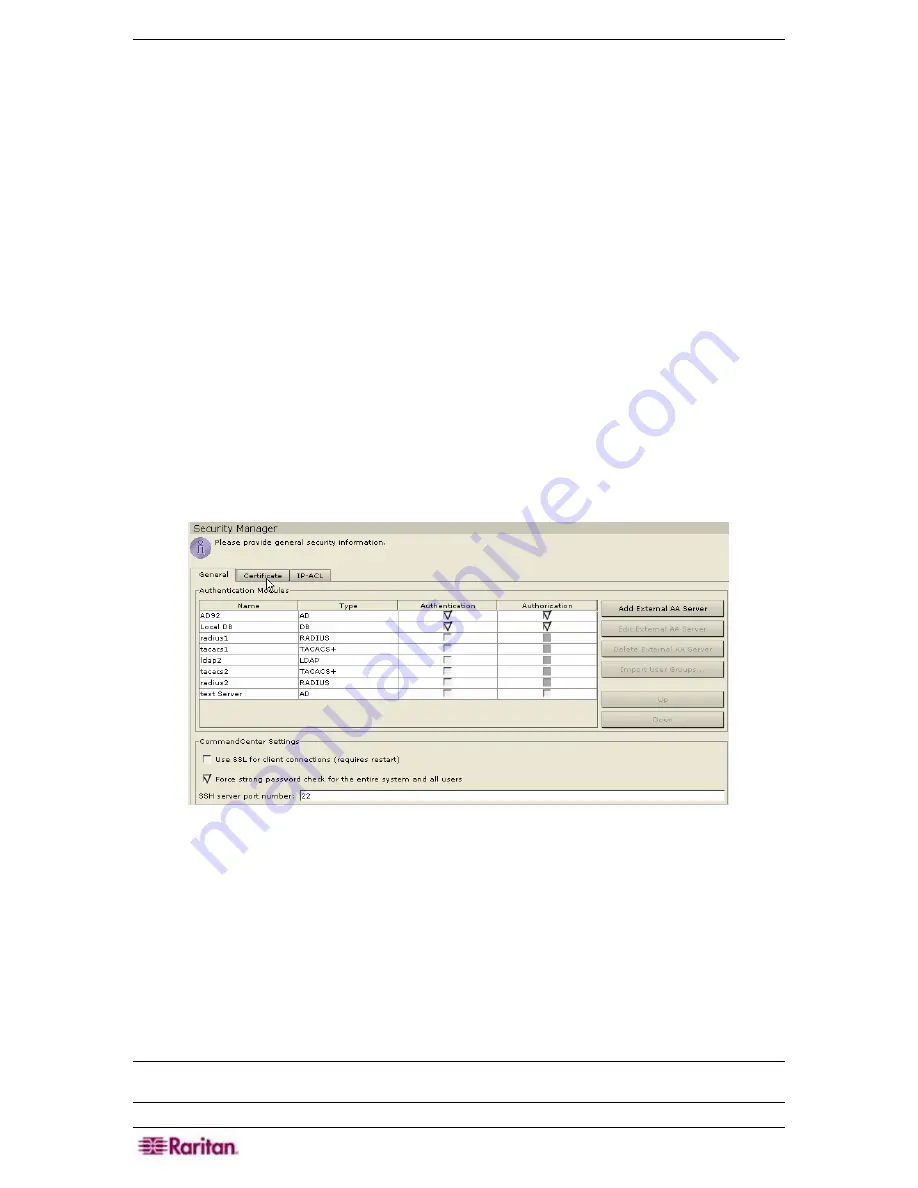
The General properties allow you to configure SSL for client connections, enable strong
passwords, enable user lockout, and set the order of your authentication databases.
1.
On the
Setup
menu, click
Security Manager
.
When the
Security Manager
screen appears,
click on the
General
tab.
Figure 213 Security Manager General Screen
2.
Check the
Use SSL For Client Connections
check box if you want SSL encrypted
connections to CC-SG. A restart of CC-SG is required after making a change.
3.
Check the
Force strong password check
for the entire system and all users
check box, if
needed – see the next section. For strong passwords, minimum length is 6 characters and for
non-strong passwords, minimum length is 4 characters.
4.
Type the port number for accessing CC-SG via SSH. Please see
SSH Access to CC-SG,
later
in this chapter, for additional information.
5.
Click
Update
to update the changes.
6.
Click
Close
to close the
Security Manager
screen.
Note: For information on the ordering of the authentication databases, please see Chapter 9:
Configuring Remote Authentication for additional information.
Содержание Command Center CC-SG
Страница 2: ...This page intentionally left blank...
Страница 16: ......
Страница 34: ...18 COMMANDCENTER SECURE GATEWAY ADMINISTRATOR GUIDE...
Страница 64: ...48 COMMANDCENTER SECURE GATEWAY ADMINISTRATOR GUIDE...
Страница 122: ...106 COMMANDCENTER SECURE GATEWAY ADMINISTRATOR GUIDE...
Страница 168: ...152 COMMANDCENTER SECURE GATEWAY ADMINISTRATOR GUIDE...
Страница 252: ......
Страница 254: ...238 COMMANDCENTER SECURE GATEWAY ADMINISTRATOR GUIDE...
Страница 258: ...242 COMMANDCENTER SECURE GATEWAY ADMINISTRATOR GUIDE...
Страница 260: ...244 COMMANDCENTER SECURE GATEWAY ADMINISTRATOR GUIDE...
Страница 268: ...252 COMMANDCENTER SECURE GATEWAY ADMINISTRATOR GUIDE 255 80 5140 00...
Страница 269: ...APPENDIX G FAQS 253...


