52
User Manual Version 3.1
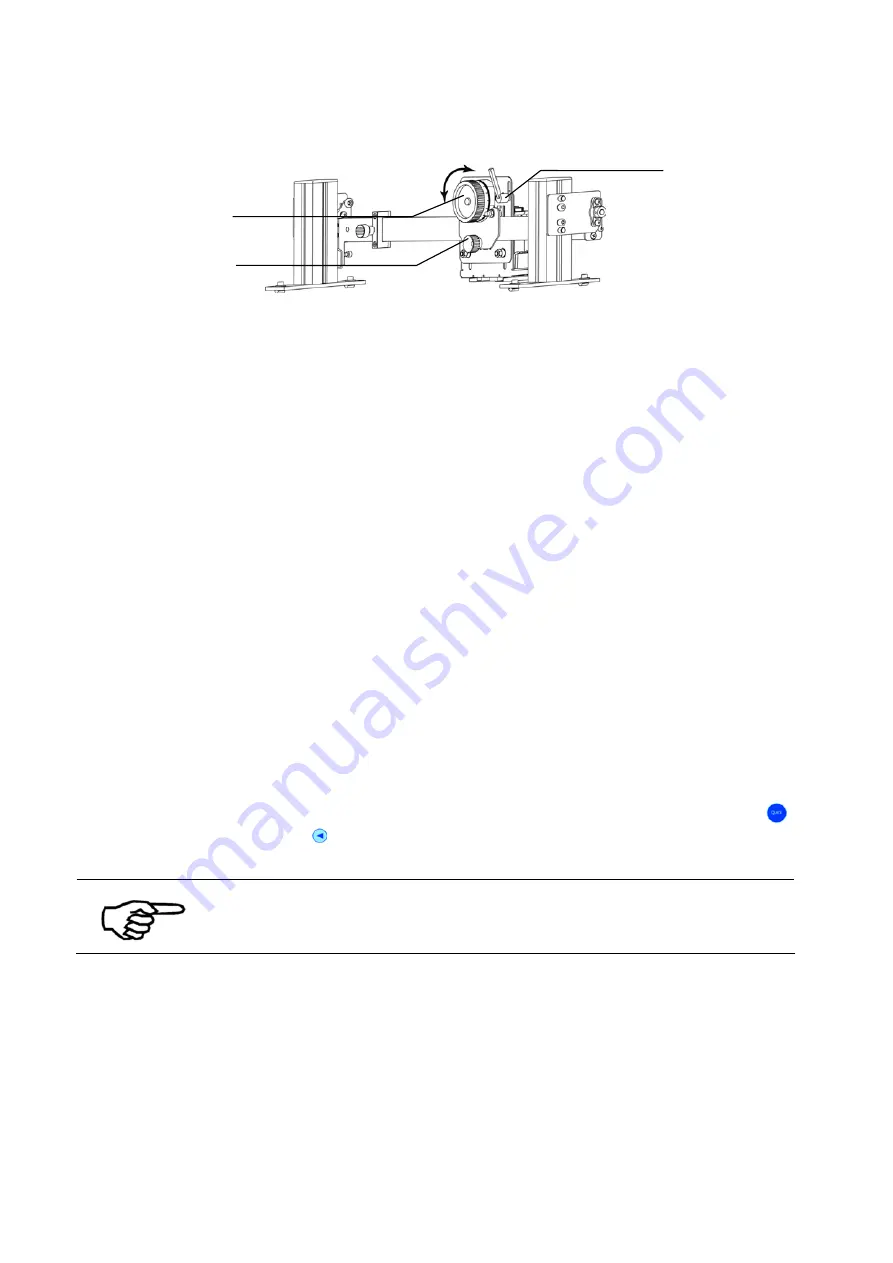
Figure 28: Print unit, height adjustment
To adjust the printer to the material thickness, perform the following steps:
1.
Open the knurled screw of each print unit and position them in the middle of the belt
and above the stream of products. Fix the screw to lock the vertical print position.
2.
Measure the thickness of the material to be printed on.
3.
Lift or lower each print units to a value that is slightly higher than the actual
measured material (e.g. your material has a thickness of 6.35 mm / 0.25”, then set
the print units to 8 mm / 0.3”).
To lift or lower the print units open the clamp lever and turn the scaled adjustment
wheel. The numbers on the hand wheel refer to millimeters, the graduation lines
refer to 1/10 mm.
4.
Put one piece of the material onto the transport belt.
5.
Move the material under the print units, by turning the transport belt by hand.
6.
Now lower the print unit carefully, until the correct distance is adjusted.
7.
Test your setting by carefully moving the material underneath the print units by
turning the transport belts by hand. The material must be able to pass, unhampered
and without making any scratching or rattling noises, under the print units. If not, lift
the print units again slightly with the adjustment wheel.
8.
Remove the material from the printer.
9.
Test the thickness adjustment by performing a
PapRun
. To do this, hit the Quick
key and the Arrow left key (Run Paper) together and turn on the transport system.
Unused print units
Position the unused print units out of the range of the transported
products to avoid a damage of the cartridges.
Pos: 73 /Bedienungsanleitungen/Geräte spezifisch/Drucker/AS-Orbit/5.10_Ü3_How to perform a speed measurement_AS-Orbit @ 2\mod_1266336226533_912.doc @ 12202 @ 3
Scaled
adjustment wheel
Knurled screw
Clamp lever
Содержание AS-Orbit
Страница 1: ...User guide AS Orbit Address Printer ...
Страница 224: ...9204009J C 12 04 2021 ...


