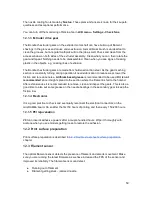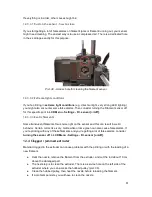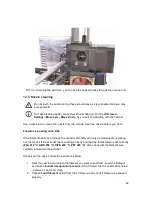
3. Push the
acupuncture needle
into the nozzle again and repeat these steps a few
times more. When the filament is extruded properly, the nozzle is clear.
None of the filament is going through the nozzle
If none of the filament is going through, then most likely, your hotend got clogged. In order to
fully clear it, please follow these instructions:
1. Heat up the nozzle to 250 °C for PLA or 270°C for ABS jams.
2. Wait 3-5 minutes and then go to
LCD Menu - Load filament.
If you cleared the clog
and the filament went through, simply lower the temperature to normal and re-do load
filament again.
3. If the filament loads successfully, you can resume printing.
12.6 Replacing / changing the nozzle
If you are replacing the
Olsson Ruby nozzle
, please visit this website for
instructions, otherwise you might damage it!
http://support.3dverkstan.se/article/66-the-olsson-ruby-instructions-for-use
.
Preheat the nozzle (
LCD menu - Settings - Temperature - Nozzle
) and set the temperature
to at least 200°C. Heating the nozzle is crucial for removing the old nozzle and putting in a
new one.
1) Move the extruder body upwards to get to the nozzle end
(LCD menu - Settings -
Move axis > Move Z - Set the height by rotating the LCD knob and then
confirm)
.
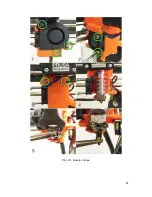
2) Unscrew the screw on the
fan
mouthpiece
and the two screws on the
print fan
and
remove both parts
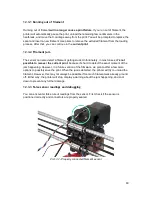
(Pict. 40, part 1)
.
3) Remove the two front screws on the
nozzle fan (Pict. 40, part 2).
4) Unscrew the two screws holding the
extruder cover
(Pict. 40, part 3)
. Even though
the nozzle itself is directly accessible, we recommend removing the extruder cover to
get access to the heating element.
5) Now the whole nozzle body is accessible
(Pict. 40, part 4)
.
6) Hold the heating element with a spanner (size 17) and unscrew the nozzle
(Pict. 40,
part 5)
.
Be careful, the nozzle is still hot!
When the new nozzle is inserted, tighten it while the nozzle is preheated. While tightening do
not forget to hold the heating element with the spanner. Re-assemble the extruder, insert the
filament and you are ready to print.
Be careful, the nozzle is hot during this whole process and can cause burns!
Be careful around the hotend thermistor leads, you can break them easily.
Be careful and don’t apply force to the nozzle or heater block, you can bend
the heatbreak easily.
It is a good practice to run
6.2.9 First layer calibration
after changing the nozzle!
63
Содержание i3 MK2.5
Страница 1: ......
Страница 9: ...Pict 1 Original Prusa i3 MK2 5 printer upgrade Pict 2 Description of Original Prusa i3 MK2 5 9 ...
Страница 64: ...Pict 40 Nozzle change 64 ...


