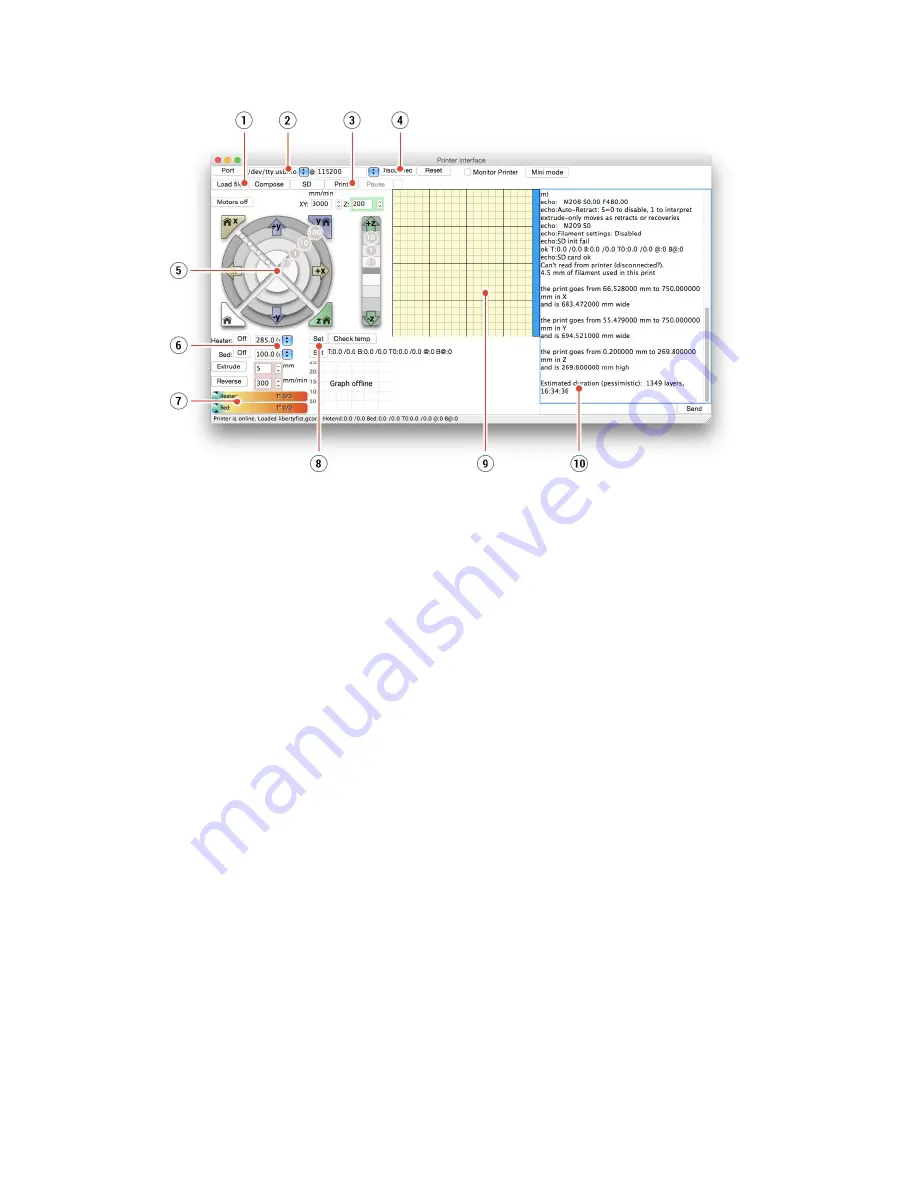
Pict. 22 - Pronterface
1.
Load file
button is used to
load
the desired
model
. The
model
must be in a *
.gcode
file format.
2. Choose the port by which the
printer
is connected to the computer (mostly
/usbmodem
for Mac, COM1, COM2, etc for Windows PC).
3. The
button starts the
printing
process.
4. The
Disconnect
button disconnects the
printer
from the computer.
5. Printer controls. Here you can manipulate the
printer
axes.
6. Setting the
nozzle
and bed temperatures.
7. Thermometer.
8. Confirming the set temperatures,
heating
starts.
9. 2D
process preview.
10. Info panel. Estimated
time, axis position and other info are displayed after
loading
the
model
.
7.2.12 Temperatures
By default, the printer shows the heatbed and hotend temperatures on the LCD screen. If
you want also to check the temperature measured inside P.I.N.D.A. probe, you can do so in
the
LCD Menu -
Support – Temperature
menu. The same menu is available during the
print. The thermistor embedded in the P.I.N.D.A. 2 probe tip is used to compensate for
temperature drift to ensure perfect first layer no matter the material.
35
Содержание i3 MK2.5
Страница 1: ......
Страница 9: ...Pict 1 Original Prusa i3 MK2 5 printer upgrade Pict 2 Description of Original Prusa i3 MK2 5 9 ...
Страница 64: ...Pict 40 Nozzle change 64 ...

