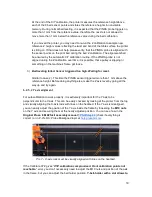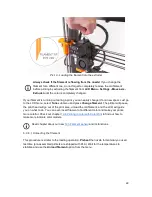
make a 1 mm adjustment to both the front and the back.
Loosen the Y belt holder
screws, push the belt holder part towards the Y motor and retighten the screws.
6.2.6 Calibrate Z
Calibrate Z
is located in the
LCD Menu - Calibration - Calibrate Z
.
It is always done with
the steel sheet on.
It should be performed whenever you move the printer to a different
location. It saves the heights of all 9 calibration points in nonvolatile memory. Stored
information is used every time mesh bed leveling is called during a print. When the
measured values are vastly different from the stored values, the print is canceled because it
is a good indicator something is wrong. Calibrate Z is a part of the routine Calibrate XYZ so
there’s no need to run it after a successful Calibrate XYZ.
It is a good practice to run this procedure every time you travel with the printer or the printer
is shipped the geometry might change slightly and cause an error.
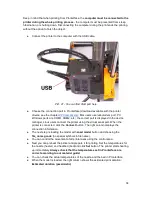
At the start of the Z calibration procedure the printer homes X and Y axis. After that, Z axis
will begin to move up until both sides touch the printed parts at the top.
Please make sure the Z axis went all the way up and you heard a rattling sound as the Z
stepper motors skip steps. This procedure ensures, that 1) the X axis is perfectly horizontal,
2) the print nozzle is in a known distance from the print bed. In case the Z carriage did
not
touch the end stoppers, the printer could not possibly know the height of the print nozzle
above the print bed and it could therefore crash into the print bed during the Z calibration
procedure.
The Z calibration procedure also prompts you to
"Please clean the nozzle for calibration.
Click when done."
If this advice is not followed and there is a plastic debris on the print nozzle, then the debris
may touch the print bed or even push the print bed away from the PINDA probe, so the
PINDA probe will not trigger properly and the calibration will fail.
6.2.7 Mesh bed leveling
Mesh bed leveling can be found in
LCD Menu - Calibration
. It is the same procedure which
is performed before every print. It is also the same procedure that happens in the second
round of XYZ calibration.
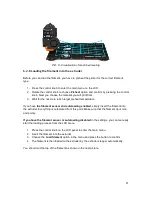
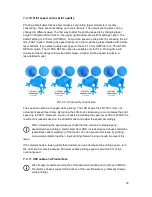
The PINDA probes 9 points in a grid manner on the sheet plate (whether it is powder coated
or smooth PEI does not matter) and measures the distance to the sheet. These points are
interpolated and used to create a virtual mesh of the bed. During printing, if the bed is
slightly warped, the probe will still precisely follow the surface according to its measured
mesh. The deviation limit for the compensation is +-50μm (or 0.05 mm).
20
Содержание i3 MK2.5
Страница 1: ......
Страница 9: ...Pict 1 Original Prusa i3 MK2 5 printer upgrade Pict 2 Description of Original Prusa i3 MK2 5 9 ...
Страница 64: ...Pict 40 Nozzle change 64 ...

