4–10
Troubleshooting
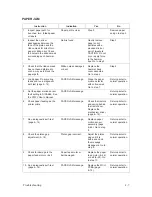
SHUTTLE STALL
Instruction
Indication
Yes
No
1.
Check that forms thickness
adjustment lever is not
closed too tightly; this can
jam the ribbon and shuttle.
Forms thickness
adjustment lever is set
correctly.
Step 2.
Readjust the
setting of the
forms thickness
adjustment lever.
Go to step 2.
2.
Run a diagnostic self–test
(page 4–14) and check for
shuttle obstruction.
SHUTTLE STALL
message.
Remove the
obstruction and go
to step 3.
Return printer to
normal operation.
3.
Check the magnetic pickup
sensor for proper gap and
output (page 5–20), and a
broken or loose connector.
SHUTTLE STALL
message.
Replace the MPU
(page 6–42). Go
to step 4.
Return printer to
normal operation.
4.
Run a shuttle/ribbon test.
SHUTTLE STALL
message.
Step 5.
Return printer to
normal operation.
5.
Check for a broken or
damaged shuttle belt.
Belt is damaged.
Replace the
shuttle belt (page
6–48). Go to step
6.
Step 6.
6.
Run a shuttle/ribbon test.
SHUTTLE STALL
message.
Replace one at a
time until the
message
disappears:
mechanism driver,
MCU, or DCU
PCBA (page
6–72). Go to step
7.
Return printer to
normal operation.
7.
Run a shuttle/ribbon test.
SHUTTLE STALL
message.
Replace the
shuttle motor
(page 6–44) and
go to step 8.
Return printer to
normal operation.
8.
Run a shuttle/ribbon test.
SHUTTLE STALL
message.
Replace the
shuttle assembly
(page 6–18).
Return printer to
normal operation.
STACKER
Instruction
Indication
Yes
No
1.
Check for proper paper
stacking when using the
power paper stacker.
STACKER message.
Clear the paper
exit path.
Return printer to
normal operation.
Содержание P9012
Страница 1: ...P N 132305 001 Rev E P9012 Multifunction Line Printer...
Страница 49: ...2 31 Principles of Operation Power Supply PCBAs 1 3 SHORT OPEN Figure 2 21 Power Supply PCBA...
Страница 53: ...2 35 Principles of Operation PAPER FEED MOTOR TRACTORS PAPER TRANSPORT Figure 2 26 Paper Feed Components...
Страница 58: ...2 40 Principles of Operation...
Страница 84: ...4 18 Troubleshooting...
Страница 107: ...5 23 Alignments and Adjustments 1 Screw 2 MPU Arm 1 2 Figure 5 9 Magnetic Pickup Phasing Adjustment...
Страница 118: ...5 34 Alignments and Adjustments...
Страница 203: ...6 85 Replacement Procedures This page intentionally left blank...
Страница 214: ...6 96 Replacement Procedures...
Страница 217: ...A 3 Power Paper Stacker Maintenance Printer Rear Power Paper Stacker Figure A 1 Power Paper Stacker...
Страница 236: ...A 22 Power Paper Stacker Maintenance...
Страница 246: ...D 2 Torque Table...
Страница 254: ...Index 6...
Страница 255: ......
Страница 256: ...132305 001 Rev E...


