User Manual For CYCLONE
FX
Programmers
3
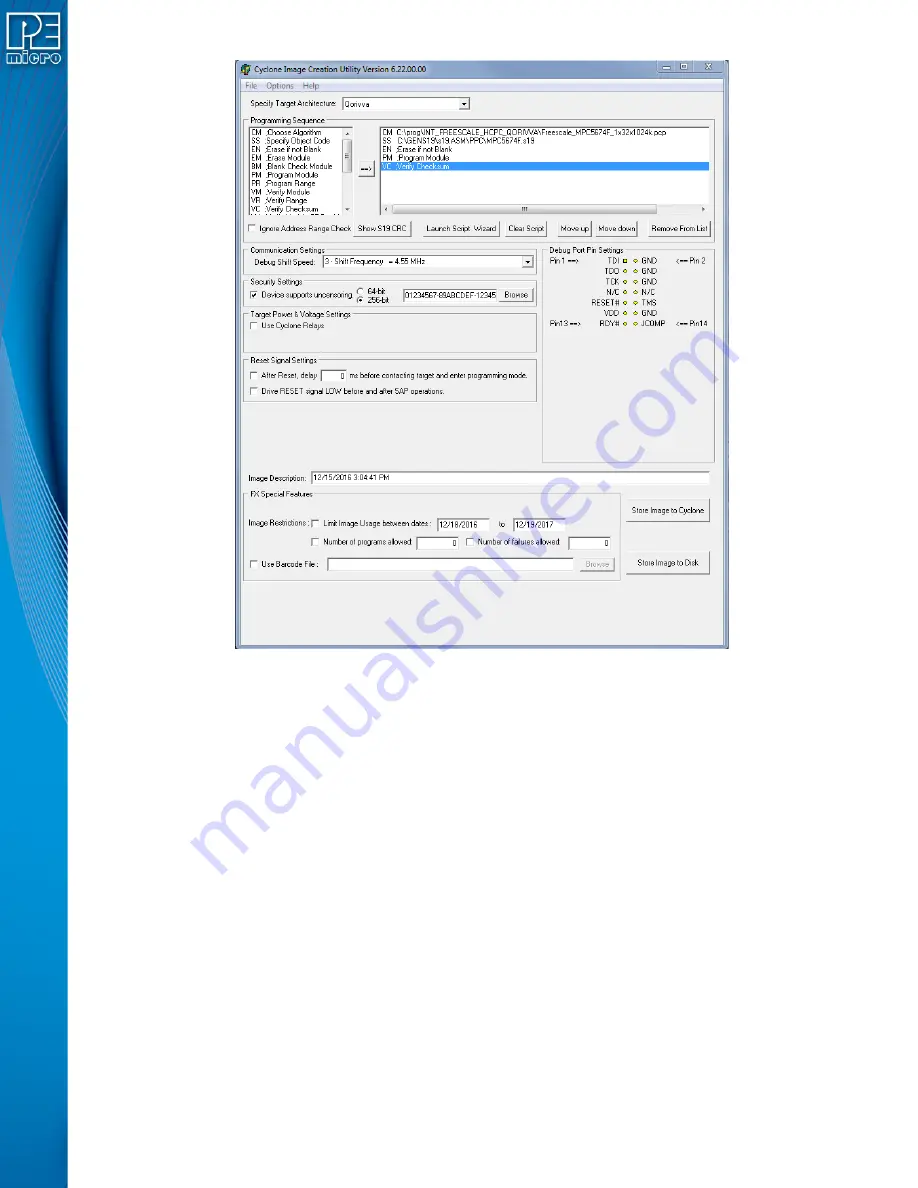
Figure 2-1: Cyclone Image Creation Utility (Qorivva Selected)
b. In the Cyclone Image Creation Utility, select your CPU manufacturer and architecture
from their respective drop-down lists.
c. Click the “Launch Script Wizard” button. Follow the pop-up screens to specify a pro-
gramming algorithm and target object file. The programming algorithm, target object
file, and default programming sequence will then show up in the programming
sequence listbox.
d. Specify the auxiliary setup and hardware setup, such as Communication Mode, Com-
munication Rate, Target Power, and Voltage Settings.
e. Type an Image Description for your SAP image. The default description is a time
stamp.
f.
Click the “Store Image to Cyclone” button.
g. The Cyclone Control GUI will pop up. Use the drop-down box to select the Cyclone to
which the image will be saved, then click the “Connect” button. Finally click "Apply
Changes" and the image information will be stored on the Cyclone you selected. Your
SAP image has now been created.
Step 4.
Execute SAP Image
The SAP image stored on your Cyclone can now be programmed to the target with one button
press. Once your target is connected to the Cyclone, press the “Start” button of the Cyclone unit
and wait for programming operations to finish. During this process, the LCD screen will show the
status of operations. Note that the menu option described in


