96
Writing to CDs/DVDs (B's Recorder/B's CLiP)
z
After formatting the disk, if the disk does not mount (is not recognized), remove it, and
insert it again.
z
Eject the formatted disks as described below.
When ejecting the disk while the icon is displayed on the noti-
fication area
z
Right-click the
icon and click [Eject].
Only eject disks as described above.
z
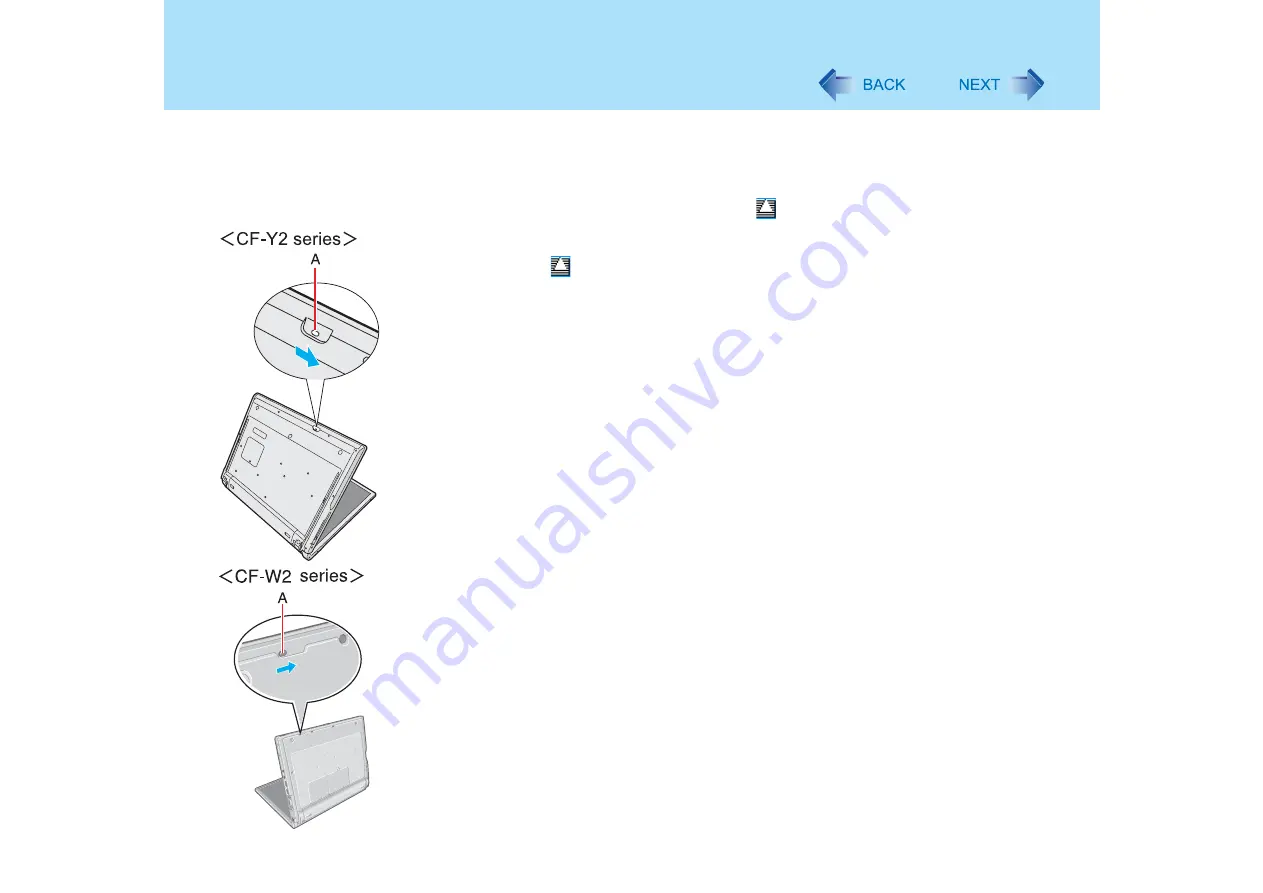
If you cannot eject the disk even after attempting the operation described above, shut
down Windows. After the power is off, insert a pointed object (e.g., the bent-out tip of a
paper clip, or the tip of a ballpoint pen) into the emergency hole (A) and move it in the
direction of the arrow.
To disable B's CLiP when it is not used
z
Make the settings following the steps below
A
Log-on to Windows with the administrator authority.
B
Click [start] - [All Programs] - [B.H.A] - [B's CLiP] - [B’s Config].
C
Add a check mark for [Disable B’s CLiP] at [System configuration], and click
[OK].
D
When a message appears asking if you want to restart your computer, click
[Yes].
• To start using B’s CLiP again, remove the check mark from [Disable B’s CLiP] using
step
C
described above, and click [OK].
When accidentally deleted B’s Recorder or B’s CLiP
z
If you uninstall the software accidentally, also re-install it following the steps below
A
Log-on to Windows with the administrator authority.
B
Set the Product Recovery DVD-ROM in the DVD MULTI drive.
C
Click [start] - [Run] and input [d:\bha\setup.exe]
, then click [OK].
Follow the onscreen instructions.
• When the message that requires the serial number appears during the installation, input
the serial number that is located under "Dealing with Problems (Summary)" /
"Reinstalling B’s Recorder/B’s CLiP” in the
Operating Instructions


