U
SING YOUR FAX MACHINE ON THE INTERNET
61
SETTING UP YOUR FAX MACHINE FOR THE
INTERNET
In reply to your request for registration, the Customer
Support Centre will send you a letter of confirmation
containing the provider number and your user name
(account number and PIN) which you must enter on
your fax machine. This document also contains the
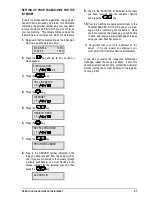
instructions for a correct set up, which are as follows:
1.
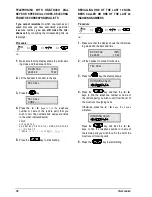
Make sure that the display shows the initial wait-
ing mode, and the date and time.
RX ON FAX 100%
01-06-00 15:25
2.
Press the
key and the “9” key on the nu-
meric keypad.
9 INSTALLATION
/1-9
3.
Press the
key.
TEL. LINE SETUP
4.
Press the
key.
INTERNET
5.
Press the
key.
REGISTR. SEND
6.
Press the
key.
SET FAX PROVIDER
7.
Press the
key.
PROVIDER NUMBER
_
8.
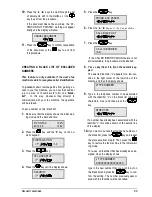
Type in the SERVER number indicated in the
reply you have received from the Customer Ser-
vice (if you are connected to the network through
a private switchboard, you must first key in the
access number for the external line) and then
press the
key.
ACCOUNT ID
_
9.
Type in the ACCOUNT ID indicated in the reply
you have received from the Customer Service
and press the
key.
10.
Your fax machine connects automatically to the
Fax2Net SERVER, which will send you a mes-
sage via fax, confirming the connection. Once
you have received this message, you will be able
to send and receive e-mail messages and faxes
using your new Fax2Net account.
,
Remember that your ID is registered on the
server. If, for any reason, you change it, you
must inform the Customer Service immediately.
If you do not receive the connection confirmation
message, repeat the set up procedure. If even this
second attempt does not work, contact the Customer
Service, calling the number indicated in the registra-
tion reply letter.

