- 27 -
2. Setting Up
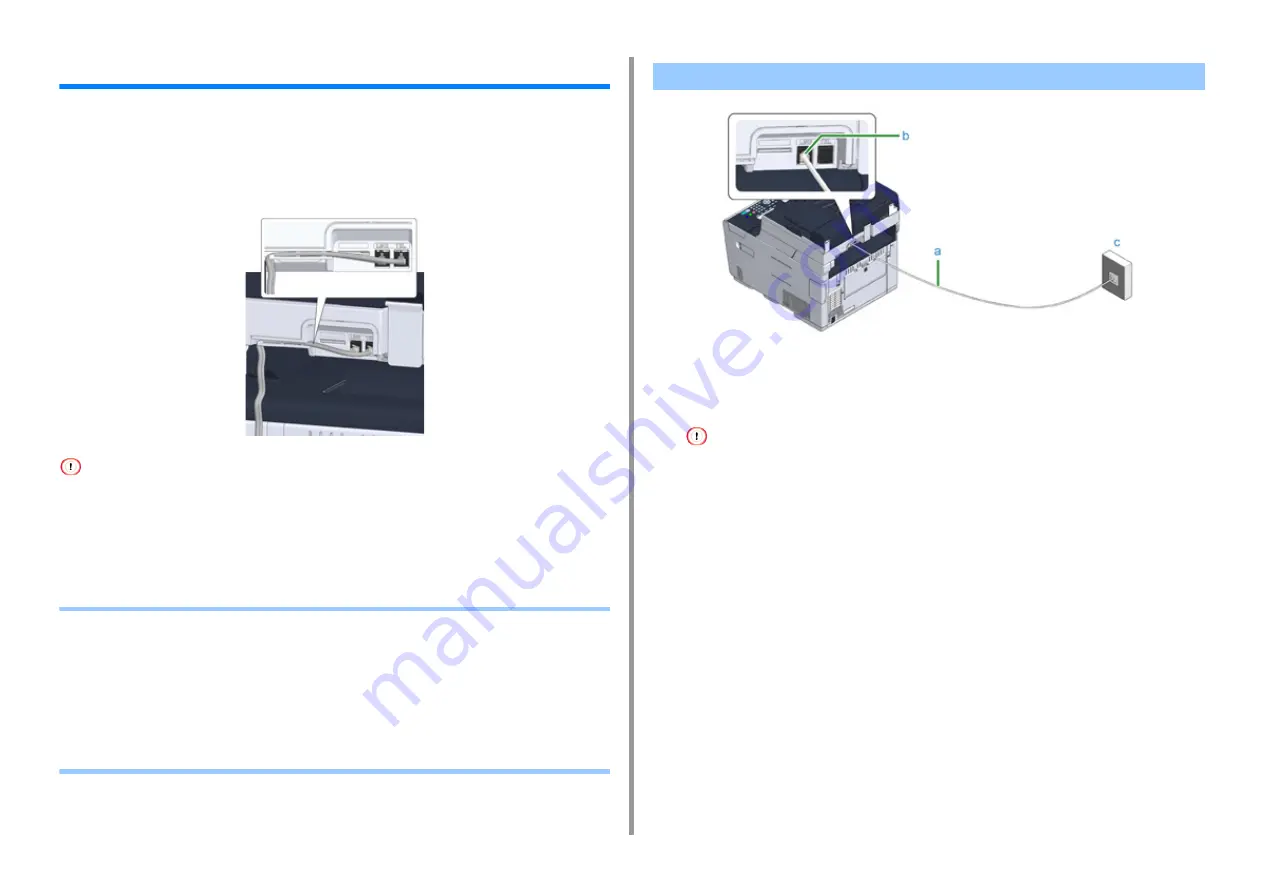
Connecting a Telephone Line
This section describes how to connect a telephone cable for fax transmissions.
The telephone line connection method varies depending on your environment. Connect the
telephone cable that suits your environment by referring to the illustrations in this manual.
Set the telephone cable in the recess of the machine so that it is not to be loose.
• Always use the telephone cable which comes with the machine. Using another telephone cable may cause a
malfunction.
• If a fax transmission or reception fails, set [Super G3] to [OFF].
• You cannot connect an ISDN line directly. To connect, use a terminal adapter (TA) and connect to the LINE connector
of the machine.
• Connecting to the Public Line (If Using Only for Faxes)
• Connecting to the Public Line (If Connecting a Telephone to the Machine)
• Connecting the Optical IP telephone
• Connecting to the ADSL Environment
• Connecting PBX, Home Telephone or Business Phone
• Connecting as an Extension Telephone
• Connecting a CS Tuner or Digital Television
1
Plug one end of the included telephone cable (a) into the LINE connector (b)
of the machine and the other end into a public line (analog) (c).
Keep the cover of the "TEL connector" inserted.
Connecting to the Public Line (If Using Only for Faxes)
Содержание MC563
Страница 1: ...MC563 ES5463 MFP User s Manual ...
Страница 16: ... 16 2 Setting Up Side view when the additional tray unit is installed ...
Страница 21: ... 21 2 Setting Up 13 Hold the handle B to close the scanner unit ...
Страница 34: ... 34 2 Setting Up 1 Plug the power cord into the power connector 2 Plug the power cord into the outlet ...
Страница 40: ... 40 2 Setting Up 7 Replace the paper cassette into the machine Push the paper cassette until it stops ...
Страница 55: ... 55 2 Setting Up 10 Click Complete 11 Click Next If the following dialog box is displayed click Yes ...
Страница 81: ...4 Copy Copying Cancelling Copying Specifying the Number of Copies ...
Страница 85: ...5 Scan Sending Scanned Data as an E mail Attachment Saving Scanned Data in a Shared Folder Cancelling Scanning ...
Страница 95: ... 95 6 Print 5 Change the settings in each tab to suit your needs 6 Click OK 7 Click Print on the Print screen ...
Страница 107: ... 107 6 Print Supply Levels Panel Item Description 1 Consumables Displays the remaining amount of consumables ...
Страница 108: ...7 Fax Basic Operations of Fax Functions Setting for Receptions ...
Страница 199: ...46590302EE Rev2 ...


