background image

Command Toolbar Icons Explained

Print job

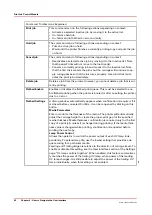
This command can do the following actions depending on context:
• Activates a selected inactive job by moving it to the active list.
• Un-holds a held job.
• Un-holds an job that had an error currently.

Hold job

The command can do following actions depending on context:
• Puts an active job on hold.
• Waits until the printer finishes a currently printing copy and puts the job

on hold.

Cancel job

The command can do following actions depending on context:
• Deactivates a selected active job by moving it to the inactive list. Note

that Special Prints will not move to the inactive list.

• Cancels a currently printing job and moves it to the inactive list. Note

that the first click cancels the print, but the carriage will continue to ap-
ply curing passes so that the ink cures properly. A second click termi-
nates the print job immediately.

Delete job

Deletes a job from the printer. However, you cannot delete a job that is cur-
rently printing.

Flatbed Enable

Enables or disables the flatbed print queue. This must be selected to ena-
ble flatbed printing when the printer is booted or after re-setting the printer
due to an error.

Flatbed Settings

A dialog window automatically appears when confirmation is required. If it
is closed before you select Confirm, it can be reopened by clicking on this
button.

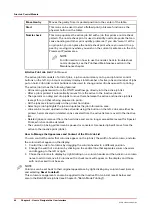
Media Parameters

Enter or confirm the thickness of the media. The printer will automatically
adjust the carriage height to create the proper print gap for the specified
media thickness. Media thickness confirmation is required only for the first
copy of a print job, unless it is changed during printing. If the media thick-
ness value is changed while printing, confirmation is requested before
printing the next copy.

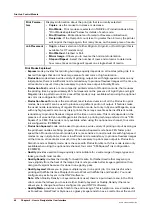
Lamp Power Control

Allows the operator to control the power output of each UV lamp inde-
pendently. To extend lamp life, use the lowest setting that provides ade-
quate curing for a particular media.
Leading and Trailing Edge are relative to the direction of carriage travel. To
enable or disable this setting, see the User Interface section of the Settings
page "Tie lamp controls together". When enabled, this feature automatical-
ly matches the power of the trailing UV lamp, when power of the leading
UV lamp changes. It is still possible to adjust the power of the trailing UV
lamp individually, when this setting is not enabled.

4

Print Job Control Module

42

Chapter 4 - How to Navigate the User Interface

Océ Arizona 1200 Series

Содержание arizona 1240 GT

Страница 1: ...User guide Oc Arizona 1200 Series Revision 3010121377...

Страница 2: ...Oc OC MAKES NO WARRANTY OF ANY KIND WITH REGARD TO THE CONTENTS OF THIS PUBLICATION EITHER EXPRESS OR IMPLIED EXCEPT AS PROVIDED HEREIN INCLUDING WITHOUT LIMITATION THEREOF WARRANTIES AS TO MARKETABIL...

Страница 3: ...e Software 38 Print Job Control Module 40 Maintenance Tasks 48 Counters Module 49 Settings Module 50 Tools and Utilities Module 53 Software Update Module 55 Chapter 5 How to Operate Your Oc Arizona Pr...

Страница 4: ...or White Ink 114 White Ink Workflow Overview 115 Varnish Workflow Overview 118 Configure ONYX Software for White Ink 120 White Ink ONYX Media Profiles 122 How to Prepare White Ink Varnish Print Jobs 1...

Страница 5: ...in White Ink 177 Clean the Printhead Nozzles 178 Replace UV Lamp Filter 181 Remove Ink from the Table 183 Empty Ink Waste Trays 184 Fill Coolant Bottle 186 Clean Gantry Rails 187 Change Ink Filter 189...

Страница 6: ...Contents 6 Oc Arizona 1200 Series...

Страница 7: ...Chapter 1 Introduction...

Страница 8: ...icians can be dispatched to your site to conduct repairs Service visits are paid for by the customer either under a maintenance agreement by purchase order or prepayment Time and material rates are ch...

Страница 9: ...ification requested by the customer or mandated by the Oc Display Graphics Systems Service and Support Group The service technician who installs the printer will also provide training for the operator...

Страница 10: ...Media Weight Maximum 34 kg m 7 lbs ft Nozzle Drop Volume Variable droplet sizes 6 to 42 picolitres User Interface LCD flat panel monitor and mouse on a user positioned podium Curing System UV curing...

Страница 11: ...Chapter 2 Product Compliance...

Страница 12: ...na products are available from the Oc Downloads website http global oce com support Electromagnetic Compliance EMC WARNING This is a Class A product In a domestic environment this product may cause ra...

Страница 13: ...RoHS EN 50581 2012 ___________________________________ Recycling and Environmental Protection The symbol on the left below indicates that this product is not to be disposed of with your household was...

Страница 14: ...ds X 0 0 0 0 0 O indicates that the content of the toxic and hazardous substance in all the homogeneous materials of the part is below the concentration limit requirement as described in GB T26572 X i...

Страница 15: ...Chapter 3 Safety Information...

Страница 16: ...Safety The operator must wear nitrile gloves a protective apron and safety glasses with side shields when handling inks Read and practice safety guidelines as outlined in the MSDS for each ink Post th...

Страница 17: ...e thickness of the media in use and set the carriage height correctly for that media Avoid printing at a height greater than measured as this causes excessive emissions of UV light and ink mist Flush...

Страница 18: ...be avoided When heated compounds from the skin can form permanent etching on the surface of the UV bulb A contaminated bulb may fail prematurely Ozone As a UV lamp warms up it briefly passes through...

Страница 19: ...printer Storage Scrap UV discharge lamps may be stored for one year before being shipped for recycling DISPOSAL RECYCLING LAMP BULBS MUST BE RECYCLED OR DISPOSED OF ACCORDING TO LOCAL MUNICIPAL STATE...

Страница 20: ...enance Station is located under the carriage and provides access to perform Printhead Maintenance and swab printheads Carriage and Gantry motion motors are disabled and UV lamps are turned off if they...

Страница 21: ...irradiance Emission Category according to 7 1 of EN12198 1 2000 Special restrictions and protective measures are essential when the machine is used in the workplace Wear Safety Gloves Located on the m...

Страница 22: ...age near the two UV lamps Caution For Continued Protection Against Fire And Elec tric Shock Replace Only With Same Type and Ratings of Fuse Caution Disconnect Power Before Changing Fuse Refer to the s...

Страница 23: ...hine is turned off 6 Line Voltage Present Warning Moving Gantry If the green beacon light on top of the carriage is on the gantry may start moving at any time 7 Moving Gantry No Step Do not step on th...

Страница 24: ...when using the printer IMPORTANT The photos in the following table illustrate situations that must be avoided when operating your printer Situations and Actions to Avoid How NOT to use the printer Av...

Страница 25: ...l display and you will have to use the mouse to click Reset on the user interface LCD display 13 Hot UV Lamps When the Maintenance Station is open to per form printhead mainte nance do not touch the U...

Страница 26: ...Do not rest your hands in this area during daily print head maintenance as this process causes the car riage to move up and down 15 IGUS Hazard Avoid placing fingers hands or other objects in the IGU...

Страница 27: ...se operator safety However in order to maintain some machine operations and functionality certain compromises are required The following table documents some of these residual hazards By making the op...

Страница 28: ...the printer power is off 18 Carriage Guard and Gantry Rails A high risk crushing pinch hazard is created by the table and the gan try 19 Table Gantry Pinch hazard A high risk crushing pinch hazard is...

Страница 29: ...carriage moves up or down 21 Carriage Vertical Movement Pinch Hazard A high risk shearing haz ard is created by the gan try and the gantry rail This photo shows the view from the bottom Do not place...

Страница 30: ...ail This photo shows anoth er view from the bottom Do not place fingers or hands in this area 23 Gantry Shear Hazard A high risk shearing haz ard is created by the car riage and the gantry frame 24 Ga...

Страница 31: ...azard Heat hazard the UV lamp assembly and the sur rounding carriage guard can be hot The Carriage Guard is an aluminum fence around the perimeter of the car riage If the guard is not properly seated...

Страница 32: ...ith the Media Roll Option Situation and Action to Avoid How NOT to use the Roll Media Option Avoid these Situations For Your Personal Safety Do not place your hands near any of the media shafts or the...

Страница 33: ...tors when the printer is printing or when the dual foot controls are pressed Do not place your hand on the Media Roll motor enclosure when the green beacon light is On as the gantry may move at any t...

Страница 34: ...Roll Media Safety Awareness 34 Chapter 3 Safety Information Oc Arizona 1200 Series...

Страница 35: ...Chapter 4 How to Navigate the User Interface...

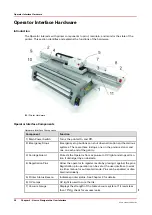
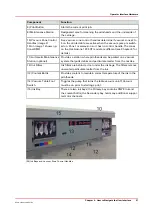
Страница 36: ...ch end of the gantry 3 Carriage Guard Protects the Operator from exposure to UV light and stops all mo tion if dislodged by an obstacle 4 Registration Pins Allow the operator to register media by plac...

Страница 37: ...ation where printheads can be parked on a vacuum system that pulls debris and particulate matter from the nozzles 12 Ink Filters Ink filters are behind a door under the ink bags The filters remove unw...

Страница 38: ...d to select either numeric characters from a virtual keypad or alphanumeric characters from a virtual keyboard These virtual input screens are displayed on the interface LCD monitor when data entry is...

Страница 39: ...time after a bulb is changed Counters Counters Tab Provides information about the amount of ink consumed the amount of media printed total printing time and the number of print jobs star ted Printer...

Страница 40: ...to report image and printer status Print Job Control Components of the Print Job Control Module Job Control Panels Component Function 1 Job and Printer Status Displays the status and progress of print...

Страница 41: ...ation area contains offsets print mode information number of copies and overprints and the name of the ONYX profile used The image to be printed is also displayed Jobs can be moved up or down in the l...

Страница 42: ...inter due to an error Flatbed Settings A dialog window automatically appears when confirmation is required If it is closed before you select Confirm it can be reopened by clicking on this button Media...

Страница 43: ...the next copy Refer to Customer Application Bulletin 45 Batch Mode Operation on the DGS website https dgs oce com for more details and examples Ink Temperature Control This icon controls the ink heate...

Страница 44: ...s being prepared to print All the jobs are stored locally on the printer hard drive Selecting a job highlights the job and updates the job information area Jobs can be moved up down in the active list...

Страница 45: ...count summary displays the total number of inactive jobs The list can be sorted by clicking on the appropriate column header The icons in the first column reflect the job type and status and can be u...

Страница 46: ...t printer there may sometimes be insufficient nozzle redundancy to produce flawless images all the time on all media This mode depends on the presence of an extra Cyan and Magenta ink channel a printi...

Страница 47: ...he workflow Fine Art is used when details are important and speed is not an issue It is a good choice if your image contains text or fine details and also solid colors High Definition provides higher...

Страница 48: ...costs will increase NOTE If you have not performed your daily Printhead Maintenance a dialog box appears with a query to Perform or Postpone this task If you choose to perform Printhead Maintenance t...

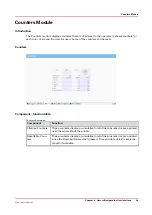
Страница 49: ...nters Explained Component Function Lifetime Counters These counters display a cumulative total of ink consumed or area printed over the whole life of the printer Resettable Coun ters These counters di...

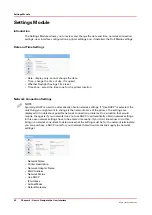
Страница 50: ...ht want to change is the network name of the printer The settings are displayed to troubleshoot possible network connection problems One situation that would require changes is if your network does no...

Страница 51: ...er Interface Settings Settings Available The user interface allows you to change the following features Language Measurement Units Hold on queue Delete jobs without confirmation Tie lamp controls Prin...

Страница 52: ...eft not printed above the image Bottom Margin Specifies the distance to be left not printed below the image Media Move on Unload Specifies the amount of media moved on unload in the selected measureme...

Страница 53: ...e Ship print the table ruler prints the Nozzle Check print and the Media Advance Correction Factor print Special Prints of Interest to the Operator The Ship print is used to determine that the printer...

Страница 54: ...de Print is printed directly on the table Note that some of the special prints are meant for service technicians only and are not for use by the printer operator Shutdown Use the Shutdown icon when yo...

Страница 55: ...esentative will either install the upgrade or provide you with the upgrade file in some circumstances Illustration How to Upgrade the Firmware and Software Your dealer or service representative will a...

Страница 56: ...Software Update Module 56 Chapter 4 How to Navigate the User Interface Oc Arizona 1200 Series...

Страница 57: ...Chapter 5 How to Operate Your Oc Arizona Printer...

Страница 58: ...ation to printer safety and operating procedures This User Manual is not a substitute for official training Onyx ProductionHouse Training Maximum performance from the printer requires a properly train...

Страница 59: ...tialization messages and then the Print Job Control module screen appears The initialization is complete when the top left panel of the display shows Ready Your printer is now ready for use How to Pow...

Страница 60: ...crash with the media Set the Printer to Flatbed Select the Flatbed button on the toolbar to prepare the printer This is required only when the printer is initially started or if it is reset due to an...

Страница 61: ...um Holes Not Covered With Media To hold the media to the table it is important to completely cover active vacuum holes with a masking material The masking material should not be thicker than the media...

Страница 62: ...vely all the vacuum table holes must be covered Manual Vacuum Valve for Zone Control 32 Vacuum Zone Control Handles Vacuum Zone Control Handles The valve handles determine the state of the vacuum zone...

Страница 63: ...ne is properly masked the gauge will read at 20 Hg 68 kPa or higher Small leaks can reduce this number and therefore the efficiency of the vacuum Porous media can also degrade the vacuum effect If the...

Страница 64: ...ns and media dimensions associated with the factory set metric vacuum zones The name of the zone indicates which vacuum handle controls that zone except 1 as that zone is always on The metric configur...

Страница 65: ...With no media present print the zone map directly onto the printer table 35 Vacuum Zones Metric GT Print the Metric Zone Map Chapter 5 How to Operate Your Oc Arizona Printer 65 Oc Arizona 1200 Series...

Страница 66: ...nches However the imperial design can provide an additional boundary at 49 2 x 98 4 inches the maximum supported media size for the product Shipped from the factory the area between these two boundari...

Страница 67: ...create your own map if desired Procedure 1 Select the Special Prints tab in the printer software 2 Scroll to Vacuum Zones Imperial GT and add it to the print job list 3 With no media present print th...

Страница 68: ...tart button or Start print icon is pushed to continue printing the next image For example If you want to collate 3 print jobs J1 J2 J3 and print two 2 sets the print order of the collated batch job wo...

Страница 69: ...selected images within the rectangle that represents the media in the Preview pane NOTE Placement of images can be changed at any time by editing the batch job or by clicking the to the left of the b...

Страница 70: ...e name of a batch job in the Active Job list to see the images it contains Select an image to move it by dragging with the mouse You can also click the Edit Batch icon to open the editor to make chang...

Страница 71: ...r of copies is achieved Step and Repeat printing is also possible on prints that are set up for the Roll Media Option In this case the grid is also shown in the Preview and is centered on the paper if...

Страница 72: ...the grid in the Preview area and get from it an idea of how your requested copies fit on the media If the number of copies exceeds the size of the media you will see how many media sheets are require...

Страница 73: ...ou monitor the nozzle check and printhead nozzle plates Perform additional printhead maintenance if required to prevent ink from partially curing gelling on the printhead nozzle plates How to Handle S...

Страница 74: ...d ink Media Adhesion Some media have better adhesion quality than others Factors such as the amount of ink used and the amount of curing energy from the UV lamps can affect adhesion For more informati...

Страница 75: ...tration pins will be in the Up position waiting for the operator to load media Once the operator has registered media and initiated the table vacuum switch for the selected zone the pins used to regis...

Страница 76: ...ll table mode both groups in Zone A vertical in Zone B Linked to vacuum zone A and B 2 up mode both groups in either Zone A or Zone B Determine which pins are active by checking or un checking them on...

Страница 77: ...another button allows the user to completely disable the pins Pins are automatically re enabled on the next printer power up so they go through usual initialization process NOTE If initialization fail...

Страница 78: ...Media Registration 78 Chapter 5 How to Operate Your Oc Arizona Printer Oc Arizona 1200 Series...

Страница 79: ...Chapter 6 Operating the Oc Arizona 1200 XT...

Страница 80: ...those for the Oc Arizona 1200 Series GT 42 XT Printer Hardware Label Hardware Description 1 Vacuum Gauges for A and B Zones 2 Print Start Button 3 Print Origin for A Zones 4 Print Origin for B Zones...

Страница 81: ...vacuum zones It is possible to change the configuration from metric to imperial in the field by a qualified service technician the technician who installs your printer can do this if needed There are...

Страница 82: ...ocation use the table rulers or the registration pins to help with placement see Media Registration NOTE To place media at the print Origin B Origin A is the default you need to set that up either in...

Страница 83: ...ual Origin it can still be made active after the job is sent to the print job queue as explained below Procedure 1 Add your image to the active print job queue and then select it 2 Enter 2 or more cop...

Страница 84: ...and wait in the Center Zone until the vacuum is On and then will also require that you press the Start button 7 If additional copies of the print were indicated in Step 2 then repeat Steps 5 to 7 in a...

Страница 85: ...Chapter 7 Roll Media Option...

Страница 86: ...cuum platen media gimbal and a take up media drive This system accurately advances the roll of media during printing The roll media is positioned with a high resolution media encoder This ensures accu...

Страница 87: ...ady movement of the media 9 Vacuum Platen Holds the roll media in place while an image is printed 10 Gimbal Maintains alignment of the media on the take up shaft 11 Capstan Determines the location of...

Страница 88: ...tenance section If an image exceeds the 5mm border requirement printing will not be allowed to proceed Maximum Media Thickness This value is not officially specified It is theoretically possible for t...

Страница 89: ...nds media onto supply shaft Unlocks media supply shaft Advance media from supply shaft Unlocks take up shaft Initialized Rewinds media n a Advances media n a Unload before media cut Important Don t to...

Страница 90: ...ss the Roll Media Manager Click on the Roll Manager icon in the command toolbar of the Print Job module The Roll media manager is displayed Roll Media Manager Menu Roll Media Manager Functions Icon Fu...

Страница 91: ...be entered and you can also set the Tension and any step corrections required You can create a new media or edit an existing one by changing the param eter values and then saving them under a new medi...

Страница 92: ...dia unrolls from the top of the shaft see the diagram below This allows you to print on the back side of the media Before you begin It is very important that the media is wound properly onto the core...

Страница 93: ...of the shaft to lock and unlock the core locks 45 Unlock the Media Shaft Core Locks 2 To unlock the media shaft core locks 1 turn counter clockwise with the supplied 5mm hex key 2 3 Slide a new roll...

Страница 94: ...surface and unlock the media shaft locks with the 5mm hex key 9 Slide an empty media core that is at least as long as the supply media width onto the take up shaft 10 Roughly center the core and then...

Страница 95: ...it NOTE For Print Side Out the media unrolls from the bottom the supply shaft For Print Side In the media unrolls from the top of the supply shaft 3 Wait for the gantry to move part way across the ta...

Страница 96: ...edia onto the core The media should have a clean straight edge prior to taping First tape the center of the media to the core and then tape both ends of the media 50 Tape Media to the Take up Roll Cor...

Страница 97: ...ore proper alignment is hard to achieve with the standard method Procedure 1 Load the roll on the media shaft and begin the load procedure as described in steps 1 to 5 in the standard method to the po...

Страница 98: ...d advance the media until the cut area is wound onto the core across the width of the roll and verify with the ruler that the supply and take up edges are at the same location NOTE Important Use the s...

Страница 99: ...ls 5mm hex key Procedure 1 Click on the Roll Manager icon to bring up the Roll Media Manager 2 Select the Unload icon in the Roll Media Manager to release the tension 3 Cut the media using the cutter...

Страница 100: ...on job 54 ONYX Page Size Roll Option Set a Hold on a Roll Job Procedure 1 To ensure that your roll media print job is held and not automatically printed click on the box in front of Hold for printer o...

Страница 101: ...OTE The Hold for operator is not selected in this illustration since the box is unchecked If you want to initiate a hold click it to select Set a Hold on a Roll Job Chapter 7 Roll Media Option 101 Oc...

Страница 102: ...appearance of backlit images Note Attention Caution IMPORTANT The red Emergency stop buttons do NOT stop the media transport when you print on roll media they only stop gantry and carriage movement If...

Страница 103: ...n you create a new media it takes the current values as default and automatically creates a unique media name based on the existing name NOTE Any changed parameter in the dialog window will be applied...

Страница 104: ...a click Close to exit the Media Manager 10 Click on the Roll icon in the menu bar of the Job Control module to activate the RMO print queue the icon will change from yellow to green Result Any print j...

Страница 105: ...ia edge on the feed and take up rolls are aligned within 1mm Using the Media Step Correction Factor In the Roll Media Manager menu you can select the field Step Correction and enter a value from 0 to...

Страница 106: ...to have to have fuzzy edges you can sometimes minimize the problem by cutting or burning the debris off Required tools A package of edge detectors is included in the Accessory kit that ships with the...

Страница 107: ...m the double sided tape on the back of the protector 5 Place the bent edge of the protector into the media cut guide but do not press down on the tape yet 6 Slide the protector towards the media edge...

Страница 108: ...fiber and other debris However it is important to keep the platen and cutting guide areas clean as indicated in the Roll Media maintenance section How to Deal with Wide Media If you use media of the m...

Страница 109: ...Chapter 8 Static Suppression Option...

Страница 110: ...ly reduced by an increase in print environment humidity While most media will print without difficulty at humidity levels between 30 and 50 thermoplastics will print more successfully when humidity is...

Страница 111: ...h the ionizer bar is 38mm 1 5 inches Procedure 1 Turn off the printer power switch 2 Press down on the ionizer bar first from one end and then the other to release the bar from all four brackets 60 Re...

Страница 112: ...h 6 Make sure the bracket is level an then tighten the bracket mount screw 7 Repeat Steps 2 to 5 until all four mounts are reversed Result The printer can now use media with a maximum thickness of 38m...

Страница 113: ...Chapter 9 How to Manage a White Ink Workflow...

Страница 114: ...e present in order for the printer to function properly IMPORTANT Daily maintenance is important even when white ink is not being actively used Failure to perform daily maintenance can result in nozzl...

Страница 115: ...rint job selected in the Job Control module of the printer software click the Layers button to activate a graphical representation of the Print Layers that allows you to verify the layer order 63 Prev...

Страница 116: ...to use this technique All of these methods can also be used either alone or in conjunction with each other to create the desired output results For example you may generate the spot layer information...

Страница 117: ...ation also involves printing onto a transparent or translucent material A day night print can be viewed either front lit or backlit This is achieved by printing color data on two separate layers with...

Страница 118: ...ta A Printer Flood Fill is like an auto fill that is done by the printer where varnish data fills the entire bounding box the rectangular area that defines the total perimeter of the image Varnish Spo...

Страница 119: ...tocols in order for the ONYX RIP Queue software to process the data as desired This method may be the best choice if the desired varnish spot data includes complicated selections or if data is being c...

Страница 120: ...low data there are options in the software that must be configured It also explains how you need to use specific ONYX media profiles to prepare white ink print jobs NOTE Step 1 and 2 below are require...

Страница 121: ...ked 65 Turn off Two Stage Processing ONYX software will now accept print jobs with white ink or varnish data To prepare a print job for white ink you need to use an ONYX media profile media model as s...

Страница 122: ...s viewed 2nd surface or as middle layer for a day night application Print modes other than Quality Layered mode can also be used to print only white ink or areas of white ink in an image as long as th...

Страница 123: ...rinter Flood Fill Configuration ONYX Spot Layer Tool generate the white spot data in ONYX ProductionHouse or Thrive Spot Data pre defined spot data is created in image editing application such as Adob...

Страница 124: ...s used when an image is rectangular in shape and requires a white flood fill The printer itself provides the flood fill rather than the ONYX Spot Layer Tool or an image editing application so no addit...

Страница 125: ...r is optional and serves two purposes If you want to preview the media color in Preflight you can set the media color either from the image or from the color dialog menu If you have areas in your imag...

Страница 126: ...r When you check this option the underlay and mask fill sliders lock together and are set at 100 You can change the opacity for the flood fill by moving either of the sliders Underlay Fill Opacity Thi...

Страница 127: ...ge in Illustra tor so that it will be recognized by the Spot Layer Tool and then printed as white by the printer Download Application Bulletin 22 from the Customer Support web site https dgs oce com H...

Страница 128: ...o activate the tool 5 Select the spot channel you will use to create data then use the explanations of the Spot Layer Tool options at the beginning of this section to help you use the tool How to Acce...

Страница 129: ...re your source image to use a spot ink channel The spot data must be designed entirely on a separate channel either as a spot channel layer or a custom spot color to be recognized by the Onyx RIP The...

Страница 130: ...ion How to Name Your Spot Data Opacity Set the opacity to 10 Edit the channel COLOR by double clicking on the swatch Set the spot color in PhotoShop to a color similar to the spot ink in your printer...

Страница 131: ...uch as Illustrator save it as a PSD file in order for all channel information to be carried over The white spot color is printed in the order it appears in the Channels palette with the spot channel p...

Страница 132: ...o The first step in the white ink workflow is to prepare your source image to use the spot channel The spot data must be designed entirely on a separate channel either as a spot channel layer or a cus...

Страница 133: ...e drop down menu to select Spot Color Swatch Color Use the sliders to adjust the swatch color You can make this color any value that will help you see the design better 5 Click OK to save your changes...

Страница 134: ...erprint Spot Data in Illustrator Set Up Overprint By default when you print opaque overlapping colors the top color knocks out cuts a hole in the area of colored image underneath Overprinting prevents...

Страница 135: ...k preview that approximates how transparency and overprinting will appear in output 2 In the Attributes panel select Overprint Fill Overprint Stroke or both NOTE While it is possible to set Overprint...

Страница 136: ...ge data not to be obliterated by spot flood To properly view the image ensure that Overprint Preview is selected See images below for a representation of how this will appear NOTE When processing this...

Страница 137: ...ent This step is necessary in order to make use of all channel data contained in the file 88 Embed File 89 Embed Placed 3 Note the information contained in the layers palette for file before and after...

Страница 138: ...is particular case the complexity of the selection path may dictate it s creation in PhotoShop and Illustrator may be better used for simpler objects Procedure 1 First select your clipping path and ma...

Страница 139: ...nal setup Make sure that when you save the file Preserve Overprints is enabled It is also possible and sometimes preferable to print directly from Illustrator to Rip Queue For instructions on how to d...

Страница 140: ...w box is selected and select Fill swatch located at the bottom of the Illustrator toolbar This will fill the box with color By double clicking on this swatch a dialog box will open allowing for color...

Страница 141: ...may make desired output results more clear As well if English is not your native language use a name that is more meaningful in your language to be more effective Please do not use the name White as t...

Страница 142: ...ick on Spot Channel Replacement box 97 Spot Channel Replacement 4 Enter the new name in PostScript Spot Color Name in Spot 1 space 5 Click OK to save your settings How to Name Your Spot Data in Illust...

Страница 143: ...es for white ink are available for download from the DGS website https dgs oce com How to Print a Simple Job Using White Ink Procedure 1 Open an image of your choice with an ONYX media profile that us...

Страница 144: ...en the bottom layer should be a CMYK data layer and the middle and top layers white flood layers 5 Put the printer back online in ONYX RIP Queue and send the job to the printer 6 Print the job White I...

Страница 145: ...ite ink does not mix well with the other ink colors For Quality Layered print mode jobs 1 Create spot data in a design application NOTE Not required if only printing white ink using a printer generate...

Страница 146: ...rinter settings of a processed job in RIP Queue right click the job and edit print settings Editing the print settings for a job displays the following dialog Layer Definitions The layers are identifi...

Страница 147: ...om layer definition allows customer ink color to data mapping and advanced options for the selecting the printer flood level or mirroring the data There are five color channels C M Y K and W and six d...

Страница 148: ...e other ink colors 1 Create spot data in a design application See section How to Create Spot Data 2 Open the job in ONYX workflow software using any print mode other than Quality Layered with an ONYX...

Страница 149: ...models for varnish are available for download from the Customer Support section of the DGS website https dgs oce com These media models are documented later in this chapter see How to Use Media Models...

Страница 150: ...5 Put the printer back online in ONYX RIP Queue and send the job to the printer 6 Print the job Varnish QuickStart 150 Chapter 9 How to Manage a White Ink Workflow Oc Arizona 1200 Series...

Страница 151: ...except High Definition HD can be used when printing varnish Tip To print varnish on top of a HD print mode image use a composite job batch and print the first job in HD print mode and the second job u...

Страница 152: ...e method for printing varnish was correctly specified in the ONYX media profile or quickset 7 Send the job to the printer and print it How to Print Varnish Jobs 152 Chapter 9 How to Manage a White Ink...

Страница 153: ...cleaning If you use the Varnish option frequently we recommend that you take steps to minimize contaminants by isolating the printer from dusty conditions Some tips for minimizing airborne dust and d...

Страница 154: ...nce there is little benefit in trying to clean the media after printing the image data and prior to printing the varnish The surface of the media must be free from dust and dirt particles With the med...

Страница 155: ...t decoration Fortunately the Arizona printer blank space skipping feature skips over areas in the print that do not contain varnish and greatly improves the net productivity of spot applications Some...

Страница 156: ...a smooth high gloss use a smooth coated media as it will allow the varnish to flow well NOTE If you gloss coat a rough media it may be difficult to fill in the surface and achieve a smooth high gloss...

Страница 157: ...Chapter 10 Ink System Management...

Страница 158: ...the otherwise costly waste of usable ink Ink changes are performed without mess or spills keeping the environment around the printer clean Ink changes can be performed during printing this prevents wa...

Страница 159: ...stored correctly Inks must be stored within a temperature range of 5 30 C 41 86 F Exposure to extreme temperatures will reduce the expected life of the ink Do not use ink that is past the expiry date...

Страница 160: ...in your eyes Be sure to read the section on Safety Guidelines for Ink Materials before handling UV inks Also read the SDS sheets available from the Oc Downloads website for more information on ink sa...

Страница 161: ...Chapter 11 Troubleshooting...

Страница 162: ...edy Otherwise note the exact error message and associated error number and what the printer was doing before the error then place a service call If Problems Persist If problems persist perform the fol...

Страница 163: ...Chapter 12 Printer Maintenance...

Страница 164: ...s which can lead to sensitization upon prolonged or repeated exposure to skin Oc recommends that contaminated gloves are removed and replaced with new gloves Operator Maintenance Schedule Maintenance...

Страница 165: ...mm 24 3 x 2 9 inches 2 Select the Nozzle Check icon at the right end of the Command Toolbar to place the nozzle check into the Active Print Job list you can also add a Nozzle Check to the active prin...

Страница 166: ...cribed in the next section to correct the nozzle dropouts NOTE Do Printhead Maintenance or optional AMS on the required color channels if more than 2 nozzles outs exist in a single printhead 2 or more...

Страница 167: ...that need recovering remove the nozzle check print from the vacuum table and place it on the floor under the carriage in the maintenance area Make sure it is in the correct orientation so the colors...

Страница 168: ...ng on Purge In the example below all ink channels are selected 5 Press Purge button 1 to begin a standard ink purge of the selected channels The carriage will lower to its purge height To achieve a Lo...

Страница 169: ...wly along the entire length of each printhead at a speed of approximately 8mm per second 8 seconds per printhead The suction head slides on stainless steel strips on the printhead It may be necessary...

Страница 170: ...ses in the picture below A single swab can be used for each color channel or use it until the swab becomes saturated with ink 11 Slide the maintenance station drawer back to its closed position The ca...

Страница 171: ...temperature If the temperature is low activate the ink heater by clicking the icon and then monitor the temperature display Procedure 1 Select the Maintenance tab and then the Automatic Maintenance i...

Страница 172: ...rocedure 1 Click on the Maintenance Tab and then select Clean AMS from the Maintenance Tools in the upper right side of the display 2 Remove the AMS cover plate by inserting an object such as the hand...

Страница 173: ...ink deposits IMPORTANT It is extremely important that you NOT apply too much downward pressure on the suction head If you press down more than 2mm 0 078in then it will no longer perform printhead mai...

Страница 174: ...installed Equipment Dust cloths Keep the Horizontal Surfaces Clean A buildup of dust and debris on these surfaces can transfer to the underside of the carriage and printheads during printing This can...

Страница 175: ...rriage or printheads you may need a light to evaluate their condition All light sources emit varying amounts of UV ultraviolet light UV light cures the UV based ink used in your printer If the undersi...

Страница 176: ...ted 104 Cleaning the metal plate between printheads 6 Reposition the wipe so that a clean area is exposed 7 Proceed to the next space between printheads and slide the clean area of cloth along the met...

Страница 177: ...the printer sit idle for an extended period of time It has been demonstrated that leaving flush on the printhead nozzle face plates helps minimize the amount of maintenance required to recover nozzles...

Страница 178: ...ual date of receipt of the bottle and the date of expiry two years after receipt CAUTION Discard the bottle if it shows any sign of wear or physical damage cracking or leaking or at expiry NOTE To pre...

Страница 179: ...he carriage in the maintenance area Make sure it is in the correct orientation so the colors are aligned The print represents a projection of the jetting performance of each printhead This makes it ea...

Страница 180: ...her printheads 6 Perform Automatic Printhead Maintenance again This ensures that no alcohol or flush is left in the nozzles 7 Once finished all residual flush and ink in the gaps around the head shoul...

Страница 181: ...er temperature causing premature failures of internal components and lamp bulbs How to Replace the UV Lamp Filter It is not necessary to shut the printer power off the while replacing the UV lamp filt...

Страница 182: ...the lamp assembly and set aside 4 Place a new filter on top of the lamp assembly 5 Replace the magnetic lamp filter cover on top of the lamp assembly Replace UV Lamp Filter 182 Chapter 12 Printer Main...

Страница 183: ...es not show any sign of ink color How to Remove Cured Ink 1 Scrape any cured ink from the surface of the table with a scraper or a razor blade in a holder 2 Use a vacuum cleaner to remove the scraped...

Страница 184: ...below the ink spit catcher It accumulates waste ink from printhead spitting 106 1 Purge Waste Tray 2 Spit Waste Tray When to do Empty both waste trays weekly Equipment Coth or paper towel An empty sem...

Страница 185: ...ean as some ink can remain inside and drip out later when the printer is in motion NOTE Tip You can also use a funnel or a long piece of tubing that allows you to place the container on the floor for...

Страница 186: ...nd lines We suggest that you order more coolant from your sales representative so that you will have some when you need to top up the system Procedure 1 Unscrew the nipple from the coolant bottle lid...

Страница 187: ...nd clean the rails and bearings at least once a month If you notice any dirt or ink on the gantry rails or an accumulation of debris on the grey rail bearing shields clean them immediately Equipment P...

Страница 188: ...lated next to the bearing shields It is only necessary to clean the outside bearing shields When removing debris always wipe away from the shields 3 Wipe any debris from the gantry rails Do this gentl...

Страница 189: ...ant to change the filter on schedule and before these symptoms occur damage to the ink system may result NOTE Ink filters contain air that must be released If you don t bleed the filters you will see...

Страница 190: ...Push on the top of the ink filter enclosure door and it will flip forward to open and provide access to the filters 111 Remove Ink Filter Enclosure Cover Change Ink Filter 190 Chapter 12 Printer Maint...

Страница 191: ...tube valve Keep the cloth wrapped around the end of the bleed tube so that any ink spay is contained 5 Pull the target ink filter out of its metal retainer clip 6 Unscrew the bleed tube cap from the o...

Страница 192: ...ce a service call You will be notified by the printer UI when it is necessary to change or bleed a filter When to do New ink filters contain air that must be released Also after a period of use all in...

Страница 193: ...ink as it comes in 3 Pull the plunger out until ink is seen in the syringe If there is excessive air more than one syringe full of air may be extracted In this case close the stopcock before disconne...

Страница 194: ...NT The same syringe can be used to bleed all the ink channels if they are done in succession The syringe cannot be stored and reused as the ink chemistry will degrade the syringe If only some of the i...

Страница 195: ...ritation and sensitization Replace both lamp bulbs after 500 hours of use to help ensure that the UV ink is fully and evenly cured Note Attention Caution CAUTION The UV lamps and the carriage may be h...

Страница 196: ...y NOTE Accessing the Replace UV Bulb window will open the lamp assembly shutters so that the bulbs will be easily accessible later in this procedure 3 Lift and remove the safety guard from the carriag...

Страница 197: ...ilter off of the lamp assembly and set aside 6 Open the lamp assembly by lifting on the hinged cover and rotating toward the carriage Change Both UV Lamp Bulbs Chapter 12 Printer Maintenance 197 Oc Ar...

Страница 198: ...re attached to each end of the bulb and using index fingers lift up on the ceramic bulb ends 9 Dispose of the old bulb per local regulations 10 Clean the lamp shutter and bulb with the alcohol wipe in...

Страница 199: ...ck to exit 19 Dispose of the old UV lamp bulbs according to local environmental regulations for products that contain mercury CAUTION LAMP S INSIDE THIS PRODUCT CONTAIN MERCURY AND MUST BE RECYCLED OR...

Страница 200: ...O Maintenance The following table provides our recommended maintenance activities Frequency will depend on environmental conditions and operator work habits How to clean the capstan is explained in de...

Страница 201: ...ng with ink or liquid solvents If a significant amount of ink has spilled consider donning an apron or smock IMPORTANT The only way to remove cured ink is if the area can be scraped without causing da...

Страница 202: ...only Ivory Detergent If you are uncertain about a detergent try it out in a 50 1 solution on a small area at the end of the capstan 3 Wet the cloth in the cleaning solution and wring out excess liqui...

Страница 203: ...ded Nitrile gloves safety goggles with side shields several absorbent clothes and Isopropyl Alcohol 95 pure Procedure 1 Put on gloves and goggles 115 Ink Spill on Capstan How to Remove Uncured Ink on...

Страница 204: ...and wipe up the remaining ink 117 Wet fresh cloth with alcohol NOTE It may be difficult to tell whether or not all the ink has left the surface Continue to wet and wipe the capstan surface until the c...

Страница 205: ...n follow the procedure listed above for Removing Solid Debris When the capstan is kept clean and its rubber surface free of blemishes or defects you will be ensured of accurate media transport and opt...

Страница 206: ...How to Remove Uncured Ink on the Capstan 206 Chapter 12 Printer Maintenance Oc Arizona 1200 Series...

Страница 207: ...Appendix A Application Information...

Страница 208: ...esion Application Bulletin 7 About Media Models and Application Notes Application Bulletin 8 How to Hold Media Flat on the Printer Table Application Bulletin 9 How to Handle Media after Printing Appli...

Страница 209: ...ort Website Application Bulletin 43 Roll Media Option Tips and Troubleshooting Application Bulletin 44 Oc UV Adhesion Promoters Application Bulletin 45 Batch Mode Operation Application Bulletin 46 Enh...

Страница 210: ...ce with the Oc Arizona printers It is offers suggestions or solutions for dealing with various situations Since this information is subject to change and more new material is added as it becomes avail...

Страница 211: ...Maintenance Station 36 Maintenance Station 165 167 Material Safety Data Sheets 158 Measurement Units 51 Media Adhesion 74 Media shaft 86 Media Storage 73 Media Storage 73 media thickness 60 Metric Va...

Страница 212: ...midity 110 111 Static Suppression 110 111 suction head 167 T Thermal Expansion 74 Training 58 U Upgrade 38 User Interface Settings 51 UV Flush 158 V Vacuum Gauge 63 Vacuum Overlay 62 Vacuum Pump Timeo...

Отзывы: