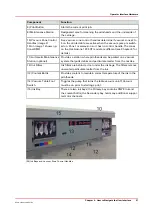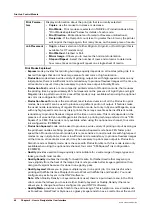
Move Gantry
Moves the gantry from its parked position to the center of the table.
Start
This icon can be used to start a flatbed print job (same function as the
physical button on the table).
Nozzle check
This icon populates the active job list with a job that prints a nozzle check
pattern. The nozzle check print is used to identify nozzle dropouts that can
cause banding and other print quality problems. If you don't want it at the
origin point, you can place the nozzle check print where you want it to ap-
pear by moving it anywhere you wish on the current media area in the Job
Placement Preview area.
NOTE
For information on how to use the nozzle check to troubleshoot
nozzle dropouts, see the Printhead Maintenance section in the
Maintenance chapter.
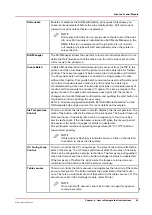
6) Active Print Job List
(Print Queue)
The active job list consists of a list of jobs, a job count summary on top and job order control
buttons on the left. A job count summary displays total number of active jobs and number of jobs
put on hold. Job order control buttons can be used to change order of jobs queued for printing.
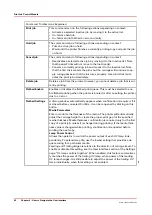
The active job list has the following features:
• All incoming jobs issued from the ONYX workflow go directly into the active job list.
• After a job is printed it automatically moves from the active to the inactive job list.
• The operator can drag and drop jobs to move them between the active and inactive job lists
(except for a job that is being prepared to print).
• All the jobs are stored locally on the printer hard drive.
• Selecting a job highlights the job and updates the job information area.
• Jobs can be moved up/down in the active list using the button on the left. Jobs can either be
printed, held, canceled or deleted. Jobs canceled from the active list are moved to the inactive
list.
• Deleted jobs are removed from the hard drive and are no longer accessible (except for Special
Prints, which cannot be deleted).
• The current job being printed can be paused or canceled. A canceled job will move from the
active to the inactive print job list.
How to Manage the Appearance and Content of the Print Job List
You can control the order that columns appear on the job list, the width of each column, and also
the columns that appear on the display.
1. Control the order of columns by dragging the column header to a different position.
2. Change the width of a column by clicking on the vertical line that separates column headers
and dragging to the left or right.
3. Chose the columns to display by right-clicking on a column header and then click on a column
name to add or remove it. Columns with a check mark will appear on the display and those
with no check will not be seen.
NOTE
Columns can be set back to their original appearance by right-clicking any column head (name)
and selecting
Reset to default
.
This column management can also be applied to the Inactive Print Job List (see 8) below and
also to the Batch Mode job list (see Chapter 5, "Batch Mode Printing").
Print Job Control Module
44
Chapter 4 - How to Navigate the User Interface
Océ Arizona 1200 Series
Содержание arizona 1240 GT
Страница 1: ...User guide Oc Arizona 1200 Series Revision 3010121377...
Страница 6: ...Contents 6 Oc Arizona 1200 Series...
Страница 7: ...Chapter 1 Introduction...
Страница 11: ...Chapter 2 Product Compliance...
Страница 15: ...Chapter 3 Safety Information...
Страница 34: ...Roll Media Safety Awareness 34 Chapter 3 Safety Information Oc Arizona 1200 Series...
Страница 35: ...Chapter 4 How to Navigate the User Interface...
Страница 56: ...Software Update Module 56 Chapter 4 How to Navigate the User Interface Oc Arizona 1200 Series...
Страница 57: ...Chapter 5 How to Operate Your Oc Arizona Printer...
Страница 78: ...Media Registration 78 Chapter 5 How to Operate Your Oc Arizona Printer Oc Arizona 1200 Series...
Страница 79: ...Chapter 6 Operating the Oc Arizona 1200 XT...
Страница 85: ...Chapter 7 Roll Media Option...
Страница 109: ...Chapter 8 Static Suppression Option...
Страница 113: ...Chapter 9 How to Manage a White Ink Workflow...
Страница 157: ...Chapter 10 Ink System Management...
Страница 161: ...Chapter 11 Troubleshooting...
Страница 163: ...Chapter 12 Printer Maintenance...
Страница 206: ...How to Remove Uncured Ink on the Capstan 206 Chapter 12 Printer Maintenance Oc Arizona 1200 Series...
Страница 207: ...Appendix A Application Information...

