SETUP PROCEDURE
3-10
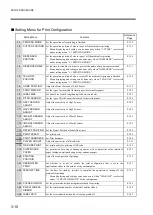
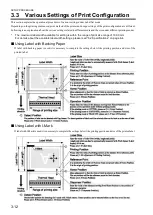
Setting Menu for Print Configuration
Setting Menu
Contents
Reference
Page
1-1 PRINTING MODE
Set the operations after printing is finished.
P.3-14
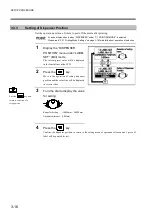
1-2 CUTTER POSITION
Set the operation position of where to cut off the media after printing.
* Menu displaying and setting can be done only when “CUTTER” is selected
under setting menu “1-1 PRINTING MODE”.
P.3-15
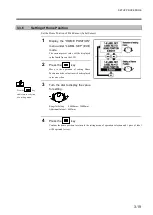
1-3 DISPENSER
POSITION
Set the operation position of where to peel off the media after printing.
* Menu displaying and setting can be done only when “DISPENSER” is selected
under setting menu “1-1 PRINTING MODE”.
P.3-16
1-4 DISPENSER TIME
Set the time for stand-by in order to peel off the media after printing is finished.
* Menu displaying and setting can be done only when “DISPENSER” is selected
under setting menu “1-1 PRINTING MODE”.
P.3-17
1-5 TEAR OFF
POSITION
Set the operation position of where to tear off the media after printing is finished.
* Menu displaying and setting can be done only when “TEAR OFF” is selected
under setting menu “1-1 PRINTING MODE”.
P.3-18
1-6 HOME POSITION
Adjust the Detect Position of Pitch Sensor.
P.3-19
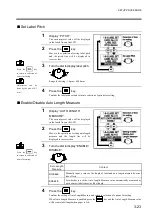
1-7 PRINT METHOD
Set the type of print media (thermal paper /heat-transfer paper).
P.3-20
1-8 LABEL SIZE
Set Label Size (width, length and pitch between labels).
P.3-21
1-9 PITCH SENSOR
Set the type of Pitch Sensor that is used for detecting label.
P.3-24
1-10 GAP1 SENSOR
ADJUST
Adjust the sensitivity of Gap1 Sensor.
P.3-25
1-11 GAP2 SENSOR
ADJUST
Adjust the sensitivity of Gap2 Sensor.
P.3-25
1-12 I-MARK1 SENSOR
ADJUST
Adjust the sensitivity of I-Mark1 Sensor.
P.3-25
1-13 I-MARK2 SENSOR
ADJUST
Adjust the sensitivity of I-Mark2 Sensor.
P.3-25
1-14 DETECT POSITION
Set the Detect Position of label (front /rear).
P.3-28
1-15 PRINT SPEED
Set print speed.
P.3-29
1-16 PRINT DARKNESS
Set Print darkness.
P.3-30
1-17 PLATEN ADJUST
Adjust the perimeter of Platen Roller.
P.3-31
1-18 QR CODE PRINT
Set print quality for printing of QR code.
P.3-32
1-19 CONTINUOUS
PAPER
Set permission for using continuous paper as well as adjust the value related to
paper feeding operations during using continuous paper.
P.3-33
1-20 PRINTING
POSITION
Adjust the start position of printing.
P.3-35
1-21 DESIGNATED
Set whether to, or not to, enable the print configuration that is set in the
applications either in this printer or in your computer.
P.3-37
1-22 TEAR OFF TIME
Set the time for stand-by in order to complete the operation of tearing off the
media after printing.
* Menu displaying and settings can be done only when “TEAR OFF” is selected
under “1-1 PRINTING MODE” of the setting menu.
P.3-38
1-23 PULSE DIVISION
Set the print method when using thermal head for printing.
P.3-39
1-24 PAIR of LABEL &
RIBBON
Set the combination number of the label and the ribbon.
P.3-40
1-25 LABEL SKIP
Set the error condition when label is being peeled off.
P.3-41
Содержание DURA SI600
Страница 1: ...THERMAL PRINTER INSTRUCTION MANUAL ...
Страница 2: ......
Страница 19: ...BEFORE OPERATION 1 3 Rear View ...
Страница 20: ...BEFORE OPERATION 1 4 Operating Panel ...
Страница 36: ...BEFORE OPERATION 1 20 ...
Страница 48: ...BASIC OPERATIONS 2 12 ...
Страница 54: ...SETUP PROCEDURE 3 6 3 1 3 Menu Flow of Setting Mode ...
Страница 166: ...INSTALLING AND REMOVING THE OPTIONAL UNIT 5 12 ...
Страница 167: ...INSTALLING AND REMOVING THE OPTIONAL UNIT 5 13 ...
Страница 174: ......
Страница 175: ...P N A2302B SECOND VERSION ...


