MAINTENANCE
4-5
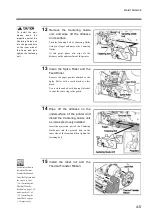
12
Remove the Centering Guide
unit, and wipe off the dirtiness
on its surface.
Turn the fastening bolt of Centering Guide
with your finger and remove the Centering
Guide.
At this point, please also wipe off the
dirtiness on the undersurface of the printer.
13
Clean the Spike Roller and the
Feed Roller.
Remove the paper powder attached to the
Spike Roller with a tooth brush or other
brush.
Use a cloth soaked with isopropyl alcohol
to wipe the conveying roller gently.
14
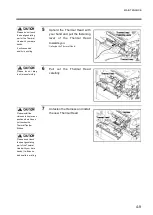
Wipe off the dirtiness on the
undersurface of the printer and
install the Centering Guide unit
as it was previously installed.
Insert the projection part of the Centering
Guide unit into the grooved hole on the
inner side of the frame and then tighten the
fastening bolt.
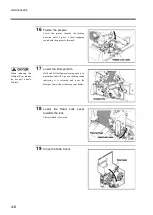
15
Install the label roll and the
Thermal Transfer Ribbon.
For details of how to
install the Thermal
Transfer Ribbon and
Label Roll, please read
the steps 6 to 10 of
“1.4.1 Installing the
Thermal Transfer
Ribbon” on page 1-10
and steps 6 to 11 of
“1.5.1 Installing the
Label Roll” on page
1-14 respectively.
To install the part,
please
insert
the
projection part of the
Centering Guide unit
into the grooved hole
on the inner side of
the frame and then
tighten the fastening
bolt.
Содержание DURA SI600
Страница 1: ...THERMAL PRINTER INSTRUCTION MANUAL ...
Страница 2: ......
Страница 19: ...BEFORE OPERATION 1 3 Rear View ...
Страница 20: ...BEFORE OPERATION 1 4 Operating Panel ...
Страница 36: ...BEFORE OPERATION 1 20 ...
Страница 48: ...BASIC OPERATIONS 2 12 ...
Страница 54: ...SETUP PROCEDURE 3 6 3 1 3 Menu Flow of Setting Mode ...
Страница 166: ...INSTALLING AND REMOVING THE OPTIONAL UNIT 5 12 ...
Страница 167: ...INSTALLING AND REMOVING THE OPTIONAL UNIT 5 13 ...
Страница 174: ......
Страница 175: ...P N A2302B SECOND VERSION ...

