BEFORE OPERATION
1-7
1.3 Installation Procedure
Here is an explanation of how to connect the cables, how to connect power source and how to disconnect power source.
1.3.1
Connecting Cables
When connecting this printer to the computer that sends print command, please follow the
instructions given below.
1
Set the printer on a stablized level place.
2
Connect the Power Cord to the
printer.
Plug the Power Cord into Power Source
Connector.
3
Connect the Connecting Cord to
the printer.
Please prepare a Connecting Cord supported
by the interface installed to the printer and
plug it in.
Any question about the optional units,
please contact the shop where you bought
this printer or our customer window.
4
The connection cord is installed
to the cord clamp.
The front end of the cord clamp is
inserted into the fixing part.
Pull the front end of the cord clamp and
fix the connection cord.
E.g., When USB Board is installed
Please set the printer in
a stablized level place.
Otherwise it cannot
produce clear print.
When connect the printer
to your computer, please
turn the power switch as
OFF before you start.
Connecting Cord is not
standard accessory.
Please prepare it
separately.
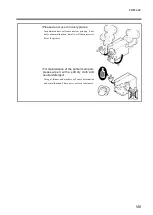
Please don’t over tighten
the cord clamp.
Otherwise, the wire may
get broken.
Содержание DURA SI600
Страница 1: ...THERMAL PRINTER INSTRUCTION MANUAL ...
Страница 2: ......
Страница 19: ...BEFORE OPERATION 1 3 Rear View ...
Страница 20: ...BEFORE OPERATION 1 4 Operating Panel ...
Страница 36: ...BEFORE OPERATION 1 20 ...
Страница 48: ...BASIC OPERATIONS 2 12 ...
Страница 54: ...SETUP PROCEDURE 3 6 3 1 3 Menu Flow of Setting Mode ...
Страница 166: ...INSTALLING AND REMOVING THE OPTIONAL UNIT 5 12 ...
Страница 167: ...INSTALLING AND REMOVING THE OPTIONAL UNIT 5 13 ...
Страница 174: ......
Страница 175: ...P N A2302B SECOND VERSION ...


