background image

A - 14

Operator’s Manual

  A  Barcode Reader

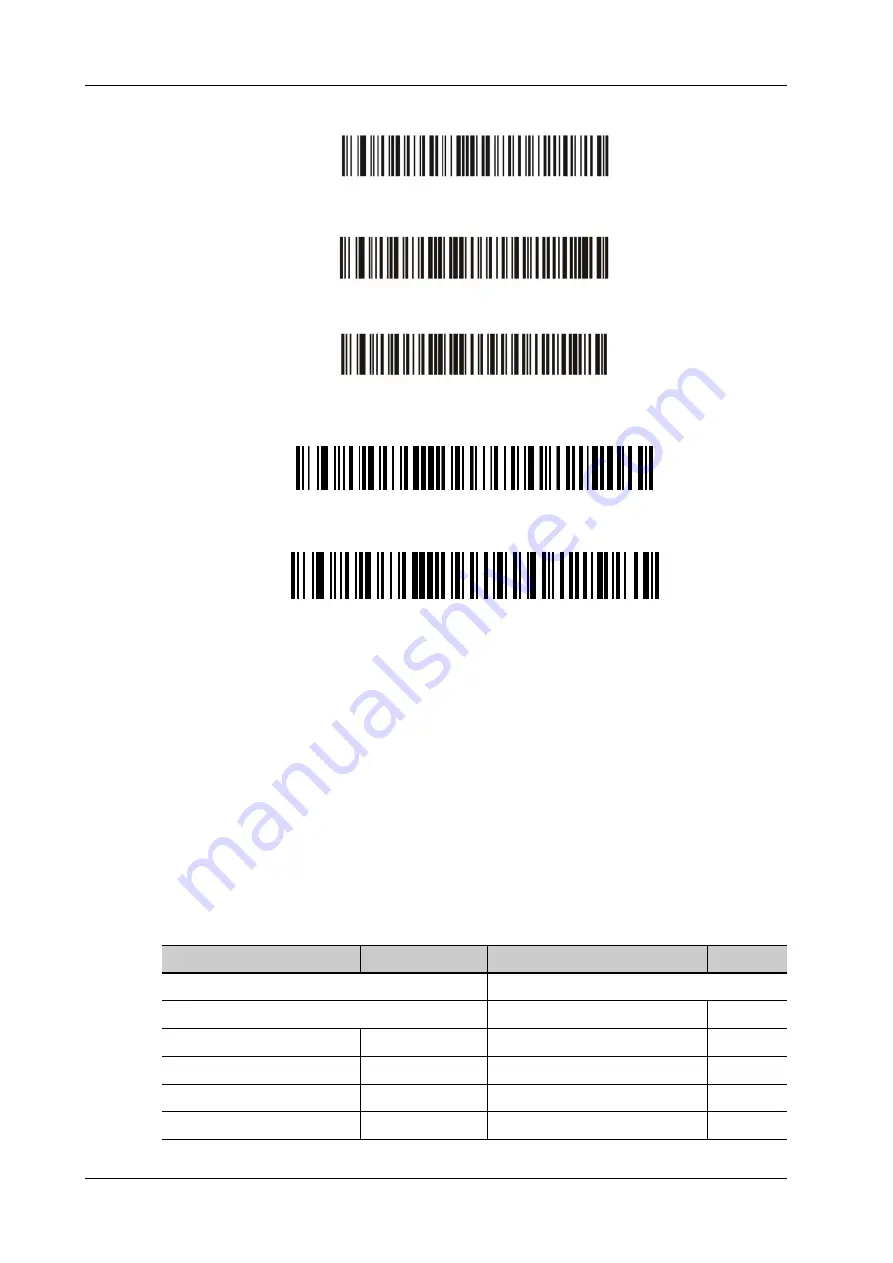
a.

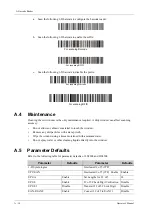
Scan the following 1-D barcode to configure the barcode reader:

b.

Scan the following 1-D barcode to enable the suffix:

c.

Scan the following 1-D barcode to disable the prefix:

A.4

Maintenance

Cleaning the exit window is the only maintenance required. A dirty window can affect scanning 
accuracy.

Do not allow any abrasive material to touch the window.

Remove any dirt particles with a damp cloth.

Wipe the window using a tissue moistened with ammonia/water.

Do not spray water or other cleaning liquids directly into the window.

A.5

Parameter Defaults

Refer to the following table for parameter defaults of LS2208 and DS4308.

For scanning Barcode

For scanning RFID

For scanning Barcode

For scanning RFID

Parameter

Defaults

Parameter

Defaults

1-D Symbologies

Interleaved 2 of 5 (ITF)

UPC/EAN

Interleaved 2 of 5 (ITF)  Enable

Enable

UPC-A

Enable

Set Lengths for I 2 of 5

14

UPC-E

Enable

I 2 of 5 Check Digit Verification Disable

UPC-E1

Disable

Transmit I 2 of 5 Check Digit

Disable

EAN-8/JAN 8

Enable

Convert I 2 of 5 to EAN 13

Disable

Содержание Anesus ME7T

Страница 1: ...MX7 MX7T Vaus7 Zeus ME7 Anesus ME7 Anesus ME7T MX8 MX8T Vaus8 ME8 Diagnostic Ultrasound System Operator s Manual Basic Volume ...

Страница 2: ......

Страница 3: ...e used only for informational or editorial purposes They are the property of their respective owners This posting serves as notice under 35 U S C 287 a for Mindray patents http www mindrayna com patents Responsibility on the Manufacturer Party Contents of this manual are subject to change without prior notice All information contained in this manual is believed to be correct Mindray shall not be l...

Страница 4: ... or damage caused by force majeure such as fire and earthquake Malfunction or damage caused by improper operation or repair by unqualified or unauthorized service people Malfunction of the instrument or part whose serial number is not legible enough Others not caused by instrument or part itself Customer Service Department Important Information It is the customer s responsibility to maintain and m...

Страница 5: ...ator error or accidents This manual contains warnings regarding foreseeable potential dangers but you shall also be continuously alert to dangers other than those indicated Mindray shall not be liable for damage or loss resulting from negligence or ignorance of the precautions and operating instructions described in this operator s manual If a new manager takes over this system be sure to hand ove...

Страница 6: ...uttons on the control panel items in the menus buttons in the dialog boxes and some basic operations Buttons angular brackets indicate buttons knobs and other controls on the control panel or on the keyboard Items in menu or buttons in dialog box square brackets indicate items in menus on the soft menu or buttons in dialog boxes Click Items or Buttons move the cursor to the item or button and pres...

Страница 7: ...ication 2 1 2 3 Safety Classifications 2 1 2 4 Product Specifications 2 2 2 4 1 Imaging Mode 2 2 2 4 2 Power supply 2 2 2 4 3 Environmental Conditions 2 2 2 4 4 Dimensions and Weight 2 3 2 5 Product Differences 2 3 2 6 System Configuration 2 4 2 6 1 Standard Configuration 2 4 2 6 2 Probes and Needle guided Brackets Available 2 4 2 6 3 Options 2 4 2 6 4 Peripherals Supported 2 6 2 6 5 Parts that ca...

Страница 8: ... Connecting a Probe 3 6 3 5 2 Disconnecting a probe 3 7 3 6 Connecting USB Devices 3 7 3 7 Connecting the Footswitch 3 7 3 8 Installing a Printer 3 8 3 8 1 Connecting a Graph Text Printer 3 8 3 8 2 Connecting a Video Printer 3 8 3 8 3 Connecting a Wireless Printer 3 9 4 Setup 4 1 4 1 System Preset 4 2 4 1 1 Region 4 2 4 1 2 General 4 2 4 1 3 Image Preset 4 4 4 1 4 Application 4 4 4 1 5 OB 4 6 4 1 ...

Страница 9: ...ings 4 39 4 10 Maintenance 4 39 4 10 1 Option 4 40 4 10 2 Exporting Setup Data 4 40 4 10 3 Importing Setup Data 4 40 4 10 4 Probe Check 4 40 4 10 5 Other Settings 4 40 4 11 Security 4 41 4 11 1 Drive Encryption Secure Data Wipe 4 41 4 11 2 Anti Virus 4 42 4 11 3 Transmission Encryption 4 42 4 12 System Information 4 42 5 Exam Preparation 5 1 5 1 Patient Information 5 1 5 1 1 New Patient Informatio...

Страница 10: ...ve Analysis 6 14 6 9 iScape 6 17 6 9 1 Basic Procedures for iScape Imaging 6 18 6 9 2 Image Review 6 18 6 9 3 Evaluate image quality 6 18 6 9 4 Cine Review 6 19 6 10 R VQS 6 19 6 11 Smart B line 6 21 6 11 1 Basic Procedures for Smart B line 6 21 6 11 2 Overview 6 23 6 12 Smart VTI 6 23 6 13 Smart IVC 6 25 6 14 RIMT Real time Intima Media Thickness 6 27 6 15 Tissue Tracking Quantitative Analysis 6 ...

Страница 11: ...ement 9 4 9 7 Contrast Imaging QA 9 4 10 Physiological Unit Signal 10 1 10 1 ECG 10 1 10 2 Respiratory Wave 10 3 10 3 ECG Review 10 3 10 3 1 Review Principle 10 3 10 3 2 Linked Review of Waveforms M D Images and 2D Images 10 3 10 4 Parameter Description 10 4 11 Stress Echo 11 1 11 1 Stress Echo Acquisition Procedure 11 1 11 2 Selecting Preferred Stress Echo Loops Select Mode 11 2 11 3 Review WMS M...

Страница 12: ...13 2 4 Deleting Comments 13 5 13 2 5 Setting the Start Position 13 5 13 3 Body Mark 13 6 13 3 1 Adding Body Mark 13 6 13 3 2 Moving Body Marks 13 6 13 3 3 Deleting Body Marks 13 7 14 Patient Data Management 14 1 14 1 Image File Management 14 1 14 1 1 Storage Media 14 1 14 1 2 Image File Formats 14 1 14 1 3 Image Storage Setting 14 2 14 1 4 Quickly Saving Images to the System 14 2 14 1 5 Saving Ima...

Страница 13: ...ment automatically after an exam ends 15 5 15 6 Query Retrieve 15 5 15 7 DICOM Media Storage DICOMDIR Review 15 5 15 7 1 Media Storage 15 6 15 7 2 Media review 15 6 15 7 3 Data Restore 15 6 15 8 Structured Report 15 7 16 Probes and Biopsy 16 1 16 1 Probes 16 1 16 1 1 Probe Functions by Part 16 4 16 1 2 Orientation of the Ultrasound Image and the Probe Head 16 5 16 1 3 Procedures for Operating 16 5...

Страница 14: ...e Power Cable and Plug 18 7 18 1 6 Checking Appearance 18 7 18 1 7 System Hard Drive Backup 18 7 18 2 Troubleshooting 18 7 A Barcode Reader A 1 A 1 1 D Barcode Reader A 1 A 1 1 Setting Up the Reader Take LS2208 as an example A 2 A 1 2 Setting A 2 A 1 3 Scanning in Hand Held Mode A 4 A 1 4 Scanning in Hands Free Mode A 5 A 2 2D Barcode Reader Take DS4308 as an example A 7 A 2 1 Overview A 7 A 2 2 S...

Страница 15: ...ic Screen and Operation E 2 E 3 1 View Selecting Area E 2 E 3 2 Single quad window Display E 2 F iVision F 1 F 1 Demonstration item F 1 F 2 Demonstration catalog F 1 F 2 1 Demo Catalog F 1 F 2 2 Customize Catalog F 1 F 3 Copy the file F 2 F 4 Demonstration mode F 2 F 5 Option of Demo F 2 G List of Vocal Commands G 1 H Acoustic Output H 1 H 1 Concerns with Bioeffects H 1 H 2 Prudent Use Statement H...

Страница 16: ...x Operator s Manual Contents H 9 References for Acoustic Power and Safety H 6 I EMC Guidance and Manufacturer s Declaration I 1 ...

Страница 17: ...g flammable gases or liquids such as anesthetic gases hydrogen and ethanol because there is danger of explosion Symbol Description Type BF applied part The ultrasound probes connected to this system are type BF applied parts The ECG leads within this system is type BF applied part Caution General warning sign Patient user infection due to contaminated equipment Be careful when performing cleaning ...

Страница 18: ...rning ON the system Disconnect the grounding cable after turning OFF the system Otherwise electric shock may result For the connection of power and grounding follow the appropriate procedures described in this operator s manual Otherwise there is risk of electric shock Do not connect the grounding cable to a gas pipe or water pipe otherwise improper grounding may result or a gas explosion may occu...

Страница 19: ...uipment analog or digital connected to the ultrasound system must comply with the relevant IEC standards e g IEC 60950 information technology equipment safety standard and IEC 60601 1 medical equipment standard Furthermore all configurations must comply with the standard IEC60601 1 It is the responsibility of the person who connects additional equipment to the signal input or output ports and conf...

Страница 20: ...then move them individually Object placed on the monitor may fall and injure an individual when moving Confirm that there is no peripheral device connected to the system before moving the system Otherwise peripheral device may fall and injure an individual If the circuit protector is tripped it indicates that the system or a peripheral device was improperly shut down and the system is unstable You...

Страница 21: ... clinical examination The cover contains natural rubber that can cause allergic reactions in some individuals Please use the ultrasound gel compliant with the relevant local regulations DO NOT expose the system to excessive vibration through transportation Mechanical damage may result Always keep the system dry Avoid transporting this system quickly from a cold place to a warm place otherwise cond...

Страница 22: ...mmended that you maintain the system under a Mindray service agreement Refer replacing job to Mindray service engineers or engineers authorized by Mindray only Do not turn OFF the power supply of the system during printing file storage or invoking other system operations An interrupted process may not be completed and can become lost or corrupted Ensure that the current exam date and time are the ...

Страница 23: ...e packaged sterile and for single use only Do not use if integrity of packaging violated or if expiration date has passed Please use the disposable components compliant with the relevant local regulations Please use the disinfection or sterilization solution recommended in this operator s manual otherwise Mindray will not be liable for damage caused by other solutions If you have any questions ple...

Страница 24: ... local distribution For CIVCO information please contact the following CIVCO Medical Instruments Tel 1 800 445 6741 www civco com WARNING Allergic reactions in patients sensitive to latex natural rubber may range from mild skin reactions irritation to fatal anaphylactic shock and may include difficulty breathing wheezing dizziness shock swelling of the face hives sneezing or itching of the eyes FD...

Страница 25: ... of protection against harmful ingress of water The main unit is rated as IPX0 The probes are rated as IPX7 The foot switch can be applied in the operating room is rated as IPX8 The power adapter is rated as IP22 According to the disinfection and sterilization method s recommended by manufacturer Equipment with disinfection and sterilization method s recommended by manufacturer According to the de...

Страница 26: ...ttery voltage 14 4 V 2 4 3 Environmental Conditions Operating conditions Ambient temperature 0 C 40 C Relative humidity 20 85 no condensation Atmospheric pressure 700 hPa 1060 hPa Storage and transportation conditions Ambient temperature 20 C 55 C B Mode B M Mode M C Mode Color Power DirPower D Mode PW CW Special imaging iScape View Free Xros M Free Xros CM Tissue Doppler Imaging TDI QA Contrast I...

Страница 27: ...ile measures the gray distribution of ultrasonic echo signals on a line Color Vel measures the velocity of blood flow on the Color Mode image Double Dist measures the lengths of line segments A and B perpendicular to each other Spline length measures the length of a curve on the image Parallel line measures the distance between every two line segments of five parallel line segments namely four dis...

Страница 28: ...d Needle guided Brackets Available Please see 16 Probes and Biopsy 2 6 3 Options Item Remarks Mobile Trolley Power supply retractable cable Power supply without retractable cable Without power supply without retractable cable ECG module Multilingual controls overlay Dust proof cover WiFi module ECG cables ECG module should be configured DC IN cable ECG module should be configured U Bank 2 Batterie...

Страница 29: ...st Cardiology Package should be configured Strain Elastography Stress Echo Cardiology Package should be configured Tissue Tracking QA Cardiology Package should be configured Smart 3D DICOM DICOM Basic DICOM Basic including Verify SCU and SCP Task management DICOM Storage DICOM Print DICOM Storage Commitment DICOM Media Storage including DICOM DIR DICOM Worklist DICOM Basic should be configured DIC...

Страница 30: ...Nerve Package Emergency Critical Package RIMT Vascular Package should be configured AutoEF Cardiology Package should be configured R VQS Vascular Package should be configured Smart B line Smart VTI Cardiology Package should be configured Smart IVC Others iWorks iNeedle eSpacial Navi iVocal McAfee DVR Module Item Remarks Item Model Black white video printer digital MITSUBISHI P95DW N Black white vi...

Страница 31: ...e system is connected to Class B peripheral devices otherwise RF interference may occur and the customer or user must take adequate measures accordingly 2 6 5 Parts that can be used within patient environment The ultrasound system Video Printers External DVD R W drive DVDRW HP GP60NB60 Barcode reader DS4308 LS2208 JADAK HS 1M JADAK HS 1R Footswitch 971 SWNOM 2 pedals 971 SWNOM 3 pedals FS 81 SP 2 ...

Страница 32: ... Used for turning on off the power The indicator lights up when the system is powered on 4 S Video S Video signal output 5 Network port Connects to network 6 HDMI Used for extending the monitor 7 USB ports Connects USB devices 8 Secondary Display Displays battery capacity AC power status and product model etc NOTE The actual remaining time of the battery varies depending on the actual operating mo...

Страница 33: ...ting conditions Ambient temperature 0 C 35 C Relative humidity 20 85 no condensation Atmospheric pressure 700 hPa 1060 hPa Storage and transportation conditions Ambient temperature 20 C 55 C Relative humidity 20 95 no condensation Atmospheric pressure 700 hPa 1060 hPa 10 Control Panel Operator system interface or control NOTE The buttons and knobs on the control panel may be different for differen...

Страница 34: ...Connects the power adapter 4 Capacity indicators L1 L5 Indicates the power of the U Bank The L1 L5 indicators remain on fully charged or 80 The L1 L4 indicators remain on 60 remaining capacity 80 The L1 L3 indicators remain on 40 remaining capacity 60 The L1 L2 indicators remain on 20 remaining capacity 40 The L1 indicator remains on 10 remaining capacity 20 The L1 indicator blinks remaining capac...

Страница 35: ...OTE When the U Bank is charging or when you are pressing the power button the indicator blinks in orange for 5s and other indicators remain off It indicates that the U Bank may have malfunction Please stop using the U Bank and contact the Mindray service engineers or your sales representative 6 Power button Used for checking the U Bank power status 7 Detach levers Used for detaching the U Bank fro...

Страница 36: ...m press the detach lever of U Bank and lift up slightly the system by holding the system s handle 2 9 ECG Module Overview Figure 2 3 ECG module No Name Description 1 USB cable Connects to the USB port of the system NOTE Ensure the system is powered off before connecting the ECG module The ECG module is only for use with the specified system 2 ECG lead port Used for ECG signal input 1 2 ...

Страница 37: ...fined key Undefined button set by the user in preset 2 CW CW mode button Enters CW mode iTouch iTouch button Press to enter iTouch mode Long press to exit iTouch mode 3 M M mode button Press to enter M mode 4 PW PW mode button Press to enter PW mode 5 Measure Measure button Press to enter exit application measurement 1 2 3 4 5 6 7 8 9 10 11 12 13 14 15 16 17 18 19 20 21 22 23 24 1 2 3 4 5 6 7 8 9 ...

Страница 38: ...mage zoom Press to enter or exit zoom status 13 iTouch Gain Gain and iTouch knob Adjust the gain of the image in various modes Press to enter iTouch mode Long press to exit iTouch mode Gain Gain knob Adjust the gain of the image in various modes 14 Depth Depth adjustment button and functional interface Adjust the depth parameter when the indicator is on 15 Save static image button Save images in a...

Страница 39: ...illuminates in green color when the power of the batteries is sufficient It illuminates in orange color for low battery power 21 Clear Clear button Press to clear off the comments or measurement calipers on the screen 22 Cursor button Press to show hide the cursor 23 Angle Multi functional knob Body mark Comment Angle Multi functional knob Press to enter exit the body mark textual comment mode Rot...

Страница 40: ...tion screen 3 Probe exam mode switch button Tap to switch probe and exam mode 4 Scan button Tap to enter B imaging mode 5 Patient data management system button Tap to enter or exit patient information system 6 Image review button Tap to review the stored images 7 Report button Tap to open close the exam report 8 Screen Lock button Tap to lock the system for 10 seconds 9 Setup button Tap to enter e...

Страница 41: ...ement calipers color bar grayscale bar are also displayed here 4 Hint trackball trackpad and Set key function indications Displays the current functions of trackball trackpad and Set keys 5 User defined Keys Area Displays the functions for the user defined keys 6 Help Information Area Displays various help information items or the progress bar in the current status 7 System Icons Area Displays the...

Страница 42: ...ration and close the screen To reposition a dialog box 1 Use the trackball trackpad to move the cursor onto the title bar of the dialog box At this time the cursor becomes a then press Set key 2 Use the trackball trackpad and position the rectangular graphic to the new desired location 3 Release Set key and the dialog box is moved to the desired position 2 13 2 Touch Screen Select Exam Mode and Pr...

Страница 43: ...n Parameter magnitude setting Tap the left right part of the parameter button or tap to select the parameter button and rotate the multi functional knob to increase decrease the value ON OFF setting some of the parameters only can be set at ON or OFF ON is to activate the function and when the function is activated the key is highlighted Parameter submenu tap to pop up the submenu to select the de...

Страница 44: ...ze active text color and fix text color To change arrow size and arrow style 2 Bodymark tab Tap to enter bodymark status 3 Comment tab Tap to enter text arrow comment status 4 Page If there is more than one page of comment texts for the current exam mode you can slide to view more 5 Comment position button Tap to directly mark the position Move the cursor onto the comment item to be modified and t...

Страница 45: ...rn the cursor to the set home location 12 Language button 13 Arrow button Tap to add an arrow comment to the image 14 Library Tap to pop up and select the library No Item Description Function Operations Adding a control Tap to select a button to add and tap Confirm Add a user defined control In comment and body mark editing status tap and then tap Custom to bring out the dialog box for adding user...

Страница 46: ...ons after recognizing the voice 2 Click to stop the voice Recognition 3 Click to open the help information No Warning Labels Meaning 1 Read this information carefully before using the system 2 The following labels are available when the system works with the mobile trolley 1 Do not place the system with the mobile trolley on a sloped surface Otherwise the system may slide resulting in personal inj...

Страница 47: ...re explained as follows Symbol Description Type BF applied part Caution Standby Transducer sockets Used for s video output Network port HDMI port USB port AC Alternating current Standby indicator Harddisk indicator Battery indicator Unlock position Lock position Dust proof mesh ECG lead port Equipotentiality Product serial number ...

Страница 48: ...mum load for main unit tray on the MT3 trolley MT3 Trolley AC output MT3 Trolley DC output MT3 Trolley input Power adapter bracket on the MT3 trolley Maximum load for the storage bin on the MT2 trolley Power consumption Federal law restricts this device to sale by or on the order of a licensed healthcare practitioner USA CONFORMS TO AAMI STD ES60601 1 IEC STD 60601 2 37 IEC STD 60601 1 6 CERTIFIED...

Страница 49: ...This system can work normally only when it is connected to the external power supply or the battery capacity is sufficient 3 2 1 Connecting Power 1 Connect the connector of the power adapter to the adapter port in the system 2 Use a three wire cable to connect the adapter with the external power supply If you have any question about the power adapter please contact your sales representative NOTE Y...

Страница 50: ...d permanently damaged Battery specification Voltage 14 4 V Capacity 6600 mAh single battery Battery Status Indicator The battery status indicator is located in the bottom right corner of the screen indicating the battery capacity Indicates the battery capacity is nearly empty Indicates the battery capacity is full 3 3 Power ON OFF CAUTION To ensure safe and effective system operation you must perf...

Страница 51: ...chanism of the casters if there is a trolley works normally 3 3 2 Power the System ON Press the power button to power the system on If access control has been set by the system administrator you can access data in the system only after logging onto the system For details see 4 1 10 Access Control You must log in again after system restart or dormancy To login onto the system Perform the following ...

Страница 52: ...image Check whether there is abnormal heat on the surface of the probe during an ultrasound procedure If you use a probe which is giving off excessive heat it may burn the patient The control panel keys and knobs are fully functional The date and time are displayed correctly WARNING If you use a probe giving off excessive heat it may burn the patient If you find anything not functioning properly t...

Страница 53: ...of time you should disconnect the power adapter disconnect the mains power and turn off the power to all peripherals connected to the system To enter standby Fully fold the LCD display and wait for 30 seconds then the system enters the standby status Set the time for screen saver and standby see 4 1 2 General If the system is not carrying out an operation the screensaver appears after the screensa...

Страница 54: ...RNING The probes cables and connectors should be in proper operating order and free from surface defects cracks and peeling Otherwise this may lead to electrical shock NOTE Before inserting the connector into the probe port inspect the connector pin If the pin is bent do not use the probe until it has been inspected repaired replaced Perform the following procedure 1 Keep the cable end of the tran...

Страница 55: ...e click to open the Remove USB Device screen Select the device to be removed and click OK A sound is heard when removing the USB memory device The system supports option of external DVD R W drive The DVD R W drive is connected to the ultrasound system via USB port NOTE When connecting an external DVD R W drive connect the two cables of the drive to the ultrasound system if the drive provides 2 USB...

Страница 56: ...nected to a wall receptacle as required Perform the following procedure 1 Connect the data cable to USB port of the ultrasound device 2 Power on the system and the printer 3 Preset the default report printer and its attribute a Open Setup Print screen b Select the Report Print column in the Service Type list c In the Property frame select printer from the driver list next to Printer in the lower s...

Страница 57: ...m the drop down list in the Property box and set other printing properties f Click OK to complete 3 8 3 Connecting a Wireless Printer The system supports the wireless graph text printer for the report print Perform the following procedure 1 Plug the printer power cord to an appropriate outlet 2 Power on the system and the printer 3 Make sure the ultrasound machine and the printer are connected to ...

Страница 58: ...This page intentionally left blank ...

Страница 59: ...p Tap Setup on the exam main screen of the touch screen To exit Setup Select OK in the Setup menu The parameter settings are saved Select Cancel in the Setup menu to close the Setup menu When you change the system language and click OK in the Setup menu the system automatically shuts down to make the modification effective Basic operations The commonly used setting types are Text box position the ...

Страница 60: ...ystem Date To set the date for the system System Time Move the cursor over the corresponding field and enter the time manually using the keyboard or move the cursor over the time segment and press Set then increase or decrease the required value by clicking the icons on the right side Time Synch To assign a time server and make the time of the ultrasound machine consistent with the server Type Ite...

Страница 61: ...dray to select the image from the system Or click Review to select the image on your own you can set the interval time for the screen saver slideshow in the drop down list beside Interval To set the waiting time before the system enters dormancy status in the drop down list beside Wait The system enters screen saver automatically if the system waiting time exceeds the screen saver already set Stan...

Страница 62: ...color flow is steered to a certain angle thus accommodating the operator s wish to distinguish the flow direction iScape Ruler Display To set whether to display the iScape ruler in iScape imaging mode B Color Refresh with PW CW Sampling Line Movement To set whether to turn on the function that when moving PW CW sampling line B Color image is activated under B Color PW CW mode Uninterruptible image...

Страница 63: ...ize of the cursor Heart Beat The number of cardiac cycles in the heart rate calculation In heart rate measurement the number of cardiac cycles should match the preset number Cursor Line Display If unselected the connecting line between the measuring ends will be hidden after measurement Ellipse Cross Line Display If unselected the measuring axis within the ellipse area will be hidden after measure...

Страница 64: ... page 2 Select the Fetal Weight Unit Select Metric English or English Metric from the drop down list 3 Select the formula for calculating the weight percentile Select the formula from the drop down list of EFW GP To import export an OB Table or Formula TIP Only imported user defined tables can be exported Perform the following procedure 1 Select Import or Export on the Fetal Gestational Age or Fet...

Страница 65: ...ill in the table according to the actual clinical values except for those cells with bold text Value of standard deviation Select from one of the following None 1SD 2SD 3 97 5 95 10 90 Unit of the measurement value according to the table to import select from mm cm g kg cm or mm Row number N of the table the maximum row number N in the column No Row Num Row number N of the table No GA Min Meas Val...

Страница 66: ...easure Result EDD display the EDD is displayed in the result window after checking GA Cycle For EDD Normal Cycle GA is calculated according to 40 weeks after checking EDD LMP 287 40 weeks French Cycle GA is calculated according to 41 weeks after checking EDD LMP 287 41 weeks Display EFW GA in report Estimate GA according to EFW data after checking 4 1 6 Key Probe Assign functions to the key probe ...

Страница 67: ...age to DICOM storage Send image to DICOM print Send image to USB disk Send image to iStorage Send image to local printer Retrospective prospective saving cine Send cine to DICOM storage Send cine to USB disk Send cine to iStorage Setting method taking Save Image as an example add the auxiliary functions Send Image to DICOM Storage and Send Image to USB disk 1 Select a key in the Key Function field...

Страница 68: ...etc Only one administrator is configured by default The administrator can add or delete operators Operator Type Item Description AVI ENCODE Encode Quality To set the image quality of unloaded AVI The system unloads according to the settings The higher the image quality is the clearer the unloaded image is The unloading speed become slower with the larger space Operating System Compatibility To set...

Страница 69: ...1 Click Add to bring up the dialog box 2 Enter the user name and password confirm password 3 Select or deselect the check box from the privilege list Users can only access the function module with assigned privilege 4 Click OK to confirm the setting and exit the dialog box The new user and the privilege will appear in the User List Deleting a User Turn on the access control function and log in to ...

Страница 70: ...ystem normally Reset Account Lockout Threshold after Set the duration allowed for a user to continuously input the wrong password Lockout Duration Set the duration after an account is locked Reset all lockout Reset all locked accounts Enable strong password Enable strong password to improve security If the strong password is enabled and you log in to the system with the account that is added befor...

Страница 71: ...Member of filter list Select a member to be deleted and click Delete Select a member to be modified modify the member name and select or deselect privileges from the drop down list of Privilege Click Modify and the modified member name and privileges will appear in the Member of filter list Logon Test 1 Enter the User name and password in the field boxes of the Authentication test area 2 Click Log...

Страница 72: ...e management list b Position the cursor on the target scene and press Set to switch 4 Configure scenes a In non preset screen press Cursor to show the cursor and move the cursor to the bottom right corner of the screen Click icon to see the scene management list b Click Configure to see the following dialog box c Add scenes click Add and enter the scene name in the Add Scene dialog box and then cl...

Страница 73: ...in Operator or Diagnostician item in Patient page automatically After scanning a 1D barcode of an operator or diagnostician for a second time the obtained data is B and A will be appended by B in Operator or Diagnostician item in Patient page automatically Default Item If the default item is set to No and both the 2D and 1D barcodes fail to be matched the obtained data of the barcode is input as a...

Страница 74: ...ay service engineer Item Description Item Description Scan Barcode Example Input a barcode example barcode example is separated by separators the separator is used to set the start and end position of each item and the barcode data is displayed in the following items in turn Parameters Input a barcode example and you can change the information of Patient ID Other ID First Name Last Name Middle Nam...

Страница 75: ...ication menus are only related to the current exam mode There are three kinds of measurement items Measurement Results of measurements are directly obtained via the measurement tools which are indicated by in the preset screen For example Distance in the 2D general measurement or HC in the OB measurement On the touch screen measurement tools are displayed using square button Calculation Results of...

Страница 76: ...elected Items To remove the selected tool from the Selected Items to the Available Items To remove all tools from the Selected Items to the Available Items You do not need to select any items before removing 4 Set the default item Select an item from the Selected Items then click Default The item is marked with a The default item is activated automatically when entering this general measurement me...

Страница 77: ... mode Selected Items shows application packages assigned to the current exam mode If more than one package is assigned to the current exam mode Package editing includes Creating Packages Add Remove Items Deleting Measurement Packages Setting Default Packages Adjusting Package Positions Creating Packages Click New and enter a name for the new package in the dialog box pop up Click OK to confirm the...

Страница 78: ...ool select it and click Default or set another item as the default If a particular item is set as the default item it automatically displays the submenu of the study when entering this measurement menu Adjusting Item Positions Select an item from the Selected Items click Move Up Move Down The order in the list is also the item position in the menu User defined Measurement Calculation Study NOTE Pl...

Страница 79: ...fined study items in the Selected Items column Perform the following procedure 1 Select the Measure tab page 2 Click Add Study on the right 3 Enter the study name in the dialog box that appears 4 Click OK and the item will be added to the Selected Items 5 Select a measurement calculation item from the Available Items and click to add the item to the user defined study 6 Repeat the step 5 to add mo...

Страница 80: ...only one formula are selected only results of that one formula will be displayed after measurement For e g if only items suffixed with Teicholz are selected not with Gibson or Cube then only results suffixed with Teicholz after measurement are displayed d Add the study Click Add Study and enter the study name in the dialog box which appears then click OK The new added study appears in the Selected...

Страница 81: ...age 2 Select a report template from the list 3 Click Default 4 Click OK to confirm 4 4 Comment Preset You can preset the custom comments library for current exam mode The comments in the library are provided by the system or user defined ones 4 4 1 Comment Configure Add a user defined item Directly enter user defined comment texts posit the cursor in the field box above Add Comment enter the text ...

Страница 82: ...er user defined comment in the name text box above Add Comment through the soft keyboard click Add Comment The entered comment item will be added to the Selected Items Change position of the selected items Select an item and click Up Down button to change the position of the item Delete a comment item from user defined group Select an item in the Selected Items click TIP You can only delete the us...

Страница 83: ...e protocol name type and select the application region 3 Click Add View to enter the view name and perform image settings In the measurement setting if Measurement on next section is selected the system will save two section images after finishing the section operation One of the two sections will include the measurement result Select the checkbox of Disable Protocol Body Marks for body mark displ...

Страница 84: ...rcise or drug 5 Click OK to save changes and quit Editing a Stress Echo Protocol Perform the following procedure 1 Click a user defined protocol on the Select Protocol screen 2 Edit the protocol as described in the create protocol Deleting a Stress Echo Protocol Click an user defined protocol on the Select Protocol screen click Delete Protocol 4 6 2 Maintenance Delete Protocol Delete the protocol ...

Страница 85: ...e value is less than 16384 or greater than 65536 the system automatically sets it to the value 32768 DICOM output charasets Select an character set for DICOM output according to the local PACS workstation Transcoding elements Set what DICOM element s will be transcoded TLS Port Set the TLS port TLS Server Setting Import the encryption key certificate TLS Client Setting After importing TLS certific...

Страница 86: ...nd click Update 3 Configure the item Select a strategy name from the Strategy List and assign strategy items to the selected strategy Add Set the function from the drop list box enter the parameter 1 and parameter 2 and click Add Then the added strategy item will be added to the Strategy Items List Delete Select a strategy item from the Strategy Items List and click Delete Update Select a strategy...

Страница 87: ...ncorrect application name Storage Service Preset DICOM storage preset items are described as follows Item Description Device After you set the server s in DICOM Preset screen the name s will appear in the drop down list select the name of the storage server Service Name Default is xxx Storage user changeable AE Title Application Entity title here it should be consistent with that of the storage se...

Страница 88: ... when choosing the mix The image use 8 bit if the image is captured in color mode or the image has the tint All images use 8 bit when choosing the grey Allow Multiframe If SCP supports this function then select it Max Frame Rate Set the frame range of transferring cin file into DCM multi frame file It is editable to the user 3D 4D Set the 3D 4D image transfer mode Set the transfer mode for the 3D ...

Страница 89: ...and white printing Please select the type the printer supports Film Orientation Select between LANDSCAPE and PORTRAIT Priority Specify printing task priority among HIGH MED and LOW Film Size Select film size among the selections listed in the drop down list Display Format Specify quantity of printed files e g STANDARD 2 3 indicates 6 images are printed for each page Medium Type Specify print mediu...

Страница 90: ... the service TLS Transport Layer Security Select whether to encrypt the data during network transportation Strategy Name Set the DICOM strategy Remove Attributes 0 Set what DICOM element s that will not be used in worklist query Item Description Device Name After you set the server s in DICOM Server Setting the name s will appear in the drop down list select the name of the MPPS server Service Nam...

Страница 91: ...ime s Reserved feature Timeout Refers to the amount of time after which the system will stop trying to establish a connection to the service Associated Storage Service The associated storage server is preset before storage commitment only after the exam is sent out can storage commitment be created TLS Transport Layer Security Select whether to encrypt the data during network transportation Item D...

Страница 92: ...ty title here it should be consistent with that of the HL7 server Port DICOM communication port 104 by default Here the port should be consistent with that of the HL7 server port Maximum Retries Reserved feature Interval Time s Reserved feature Timeout Refers to the amount of time after which the system will stop trying to establish a connection to the service Listen mode This function enables the...

Страница 93: ...nce Configuration Connected VPN is successfully connected Disconnected VPN is disconnected Error error connection Server IP Group User Name Password Hide characters The password is displayed as Connect Disconnect Connect or disconnect VPN Advance Enters the VPN Advance Config interface Reset if the system does not respond after you click Config click Reset Config enters the OpenConnect GUI VPN cli...

Страница 94: ...procedure 1 Select Remote Maintenance Permission 2 Select Upload logs to remote server to upload logs to the remote server Mindray service engineers can acquire and handle those log Check the process in Task Management screen 4 8 5 Q Path Preset You can use the ultrasound system to check data on browser directly After you have ordered storage service of a network website service you can check data...

Страница 95: ...ateway manual Item Description Advanced Sets the sub URLs of QView full and QView lite The sub URL is set by default Users can modify the sub URL and click Apply to exit the QView sub URL setting window Enable Direct Report Sets whether to open the Q Path server through the Report key Worksheet Only Sets whether to directly enter the Worksheet interface after opening the Q Path server Password On ...

Страница 96: ... Clear Click to cancel the parameter setting Add Click to add the Network service to the service list Update Select an item in the service list change the parameters in the above area and click Update to update the item in the service list Delete Click to delete the selected service in the service list Default Set the eGateway server as the default Select an item in the service list click Default ...

Страница 97: ...ta restore factory setting and export log You may also execute self test and option installation trial through the maintenance menu Furthermore you can set the factory preset export the register data and etc Clear Click to cancel the parameter setting Add Click to add the Network service to the service list Update Select an item in the service list change the parameters in the above area and click...

Страница 98: ... OK 4 10 3 Importing Setup Data This function is used to import the existing setup data to the setup data memory of the system The system will reset and operate according to the setup preferences that were imported Perform the following procedure 1 Click Import to open the Load Data screen 2 Select the imported file 3 Click OK a progress bar will appear and the setup data is imported to the specif...

Страница 99: ...m Enter Windows For password please contact your service engineer Prepay Installment Display the prepay installment information Start Stop WinProxy Cursor debug interface Touch Screen Calibration To calibrate the touch screen Needles List Replace Update the list of needles that support eSpacial Navi function NOTE The list of needles must be release version provided by Mindray Needles List Recover ...

Страница 100: ...y prevent the ultrasound system from being attacked by virus spyware or other malware Windows Defender is already installed on the system The McAfee software is an option If you want to buy McAfee contact the service engineer or your sales representative NOTE McAfee cannot be uninstalled after successful installation 4 11 3 Transmission Encryption After accessing the network click VPN Config to en...

Страница 101: ...ed patient information The system will set up a unique information database for each patient based on the patient information entered so that the information of one patient will not be confused with that of another patient 1 Tap Info on the touch screen to enter the patient information page Place the cursor onto the targeted box The field box is highlighted and a flashing cursor appears Informatio...

Страница 102: ...ained in iStation from the system hardware or USB memory device You can enter the searching conditions for the patient 1 Do one of the following to enter iStation screen Tap iStation on the touch screen Click iStation in the Patient Info screen Click iStation in the Review screen 2 Select the data source Select the data source in the drop down list of Data Source 3 Input the searching condition Th...

Страница 103: ...irst allow the system to load the patient data to the system s patient database For an only one re activated exam you can modify patient ID 5 2 2 Continue an Exam In iStation screen select an exam record paused within 24 hours click Resume Exam from the menu popped up to continue the exam If you want to select a patient data in an external memory database you have to first allow the system to load...

Страница 104: ...asurement data modify the status as Paused Save the exam information including report imaging mode exam mode image parameters operation mode and imaging measurement data and so on 5 3 2 End an Exam Before examining a new patient tap End to end the exam of the previous patient update the patient ID and information to avoid mixing data of the next new patient To end an exam do one of the following T...

Страница 105: ... B to return B mode Adjust parameters to optimize the image 6 1 2 B mode Image Parameters Image Quality Used for switching B THI and adjusting the frequency The real time value of frequency is displayed in the image parameter area and if harmonic frequency is used F H is displayed as harmonic frequency value The system provides a THI function using harmonics of echoes to optimize the image Harmoni...

Страница 106: ...e is available only for the convex and phased probes When the scan range is adjusted to the widest the FOV position cannot be changed Steer To steer the beam the probe transmits TIP Steer is available only for linear probes Line Density The function determines the quality and information of the image The higher the line density is the higher the resolution becomes Dynamic Range Adjusts contrast re...

Страница 107: ... image Tint Map This function provides an imaging process based on color difference rather than gray distinction TSI The TSI function is used to optimize the image by selecting acoustic speed according to tissue characteristics HD Scope The image inside the ROI is clearer than these outside when the function is enabled The function is disabled in frozen state The optimize speed is ended when savin...

Страница 108: ...cates the flow towards the probe while the color below the color bar indicates the flow away from the probe the brighter the color is the faster the flow speed becomes while the darker the color is the slower the flow speed becomes TIP In Color Mode acoustic power is synchronous with that of B Mode Adjustment of the depth or zoom to the B Mode image will lead to corresponding changes in Color Mode...

Страница 109: ...ket Size This function is an indication of the ability to detect flow which is used to adjust the accuracy of color flow The higher the sensitivity is the more sensitive indication for low velocity flow becomes Flow State Refers to optimizing the various flow states Persistence This function is to adjust the temporal smooth to optimize the image Smooth This feature is used to reject the noise and ...

Страница 110: ...levels of the flow display to display the grayscale signal or color signal The color image is preferred with higher value while grayscale signals are displayed with the lower value Velocity Tag This function is used to mark the specified velocity range in flow to check the flow function or specific flow velocity value Enable this function the green mark appears on the color scale Use trackball tra...

Страница 111: ...hich are highly sensitive to the low velocity flows The Directional Power maps provide information of flow direction Dynamic Range This function is to adjust the transformation of echo intensity into color signal Increasing dynamic range will lead to higher sensitivity to low power signals thus enhances the range of signals to display 6 4 M Mode 6 4 1 M Mode Image Scanning Perform the following pr...

Страница 112: ...ge The real time dynamic range value will be displayed on the image parameter area on the top of the screen M Soften This feature is used to process the scan lines of M images to reject noise making the image details to be clearer 6 5 Color M Mode CM To know the cardiac motion state CM is overlaid with flow based on M mode which is more sensitive to the instantaneous signal changes Then it shows t...

Страница 113: ...btain the desired plane in real time B mode or M mode Or select the B mode cine file to be observed 2 Tap Free Xros M on the touch screen to enter Free Xros M mode or press the user defined key to enter Free Xros M mode There are 3 M mark lines available each with a symbol of A B or C at one end as identification 3 Adjust the sampling line single line or couple of lines to obtain optimized images ...

Страница 114: ...em updates the time motion curve in real time and each point is marked with a number in sequence 7 Repeat Step 6 to finish the sampling line 8 Double press Set to finish the editing 9 You can edit the curve if needed a After finishing the sampling line tap Edit on the touch screen The cursor becomes the icon b Move the cursor over the curve press Set to activate the spot c Move the cursor to chang...

Страница 115: ...angle and depth in the real time scan 5 Adjust the image parameters to obtain optimized images 6 7 2 PW CW Mode Image Parameters Gain This function is intended to adjust the gain of spectrum map The real time gain value is displayed in the image parameter area PW Sampling Gate Adjusts the SV position and size of sampling in PW mode the real time value of SV and SVD are displayed in the image param...

Страница 116: ...s available only for linear probes Speed This function is used to set the scan speed of PW mode imaging T F Res Adjusts for a balance between time resolution and spatial resolution WF Wall Filter To display the image accurately it adjusts the cut off used in the wall filter and filters out the flow noise which is produced by vessel wall vibration The real time value is displayed in the image param...

Страница 117: ...or linear probes 6 8 TDI TDI mode is intended to provide information of low velocity and high amplitude tissue motion specifically for cardiac movement There are 4 types of TDI mode available Tissue Velocity Imaging TVI This imaging mode is used to detect tissue movement with direction and speed information Generally the warm color indicates the movement towards the transducer while the cool color...

Страница 118: ...introduces the specific items in TDI mode Tissue State This function is used for fast image optimization 6 8 3 TDI Quantitative Analysis CAUTION TDI is provided for reference not for confirming a diagnosis NOTE To perform the strain and strain curve the ECG curve is in need in case of the deviation in curve TIP TDI quantitative analysis is an option The current image in frozen state and the saved ...

Страница 119: ...iewed synchronously since the two images are frozen at the same time ROI movement is linked between the TDI Tissue Doppler Imaging review window and the 2D imaging reviewing window 3 Display analysis curve Y axis represents the velocity unit cm s in strain time curve Y axis represents the strain in strain time curve Y axis represents the strain unit 1 s X axis represents time s Frame mark a white ...

Страница 120: ...and press Set to complete the drawing You can press Clear to remove the last ROI 4 Select the curve Tap Speed Strain or Strain Rate For Strain or Strain Rate tap Strain Dist on the touch screen to select the corresponding value for Strain Time curve or Strain Rate Time curve If needed tap ROI Tracking to enable the function This function provides a motion compensated ROI as precise time intensity ...

Страница 121: ...or reference not for confirming a diagnosis iScape panoramic imaging constructs an extended image from individual image frames The quality of the resulting image is user dependent and requires operator skill and additional practice to become fully proficient Therefore the measurement results can be inaccurate Exercise caution when you perform measurements in iScape mode A smooth and even speed wil...

Страница 122: ...mage is not satisfactory During image acquisition none of the parameters are adjustable and functions such as measurement comments and body marks are not available A green box on the image indicating the boundary between the merged images and the unfinished images During image slicing the system gives feedback on the probe s moving speed in the form of colors and words The meanings are as follows ...

Страница 123: ...end auto play In auto play mode tap Auto Play on the touch screen or press rotate the corresponding knob to change the play speed When the speed is off the system exits auto play mode Review to a certain image Tap Set Begin to set the start point Review to another image Tap Set End to set the end point In auto play mode the review region is confined to the set start point and end point Tap iScape ...

Страница 124: ...ronously Where Dist maximum diameter within 1 s minimum diameter within 1 s Diam Vessel diameter refers to maximum diameter within 1 s 6 R VQS RF data based quantification on arterial stiffness values 6 cardiac cycles are calculated in total standard deviation SD and ROI length will be displayed in the result window on the left 4 Adjust parameters Speed Adjust refresh speed of vessel wall motion c...

Страница 125: ... and freeze modes TIP Smart B line is only available in Single B imaging mode It supports single frame and multi frame image file detection in B mode Smart B line is an option 6 11 1 Basic Procedures for Smart B line Perform the following procedure 1 Select an appropriate probe and exam mode The system enters the B mode by default 2 Adjust the image parameters to obtain optimized images For detail...

Страница 126: ...e intensively fused B lines it is marked as B2 in the brackets and the score is 2 Lung consolidation when the lung has a symptom that is similar to the liver lesion structure and air bronchogram it is marked as C in the brackets and the score is 3 When the lung consolidation and pleural effusion occur at the same time it is marked as C P in the brackets and the score is 3 Dist n B Line distance in...

Страница 127: ...trasound image with the highest percent of the B line area by default If a zone saves multiple ultrasound images tap the point corresponds to this zone and tap Pre Item and Next Item to switch the image Color Map Displays the color map of the lung and ultrasound image of a zone The color map uses different colors to mark the ultrasound image analysis result of every lung zone This analysis result ...

Страница 128: ...ed when there are no ECG signals the system automatically starts calculation Trace the LVOT spectrum in a cardiac cycle in real time to gain the VTI HR and CO results of the LVOT 6 If necessary adjust the color VOI and PW sampling line and sampling volume Use the trackball trackpad and Set keys to adjust the color VOI position and size and the PW sampling line position Tap the PW tab to enter the ...

Страница 129: ... frozen Enable Smart IVC in freeze mode or from the cine file The calculation starts from the current frame and ends at the last frame If the cine length is no longer than 10 seconds it is allowed to calculate in retrospective from the current frame after the cine length reaches 10 seconds Perform the following procedure 1 Select an appropriate probe and exam mode 2 Move the probe to gain an appro...

Страница 130: ...ls about report operation refer to Advanced Volume 1 B Mode Image 2 IVC CI Collapsibility Index DI Distensibility Index IVCV trend curve Corresponds to the selected breath type Spontaneous Breath displays the IVC CI curve Mechanical Vent displays the IVC DI curve and IVCV curve 3 IVC Sampling Line 4 IVC Trending Line The horizontal axis represents the time which is displayed in the below Free Xros...

Страница 131: ...otted line of the ROI is in the middle of the blood vessel Press Set to confirm the position and size of the ROI 4 Tap Start Calc to measure RIMT of left carotid and right carotid 6 RIMT values each RIMT value represents maximum IMT value within one cardiac cycle RIMT average value arithmetic mean value of the 6 RIMT values SD standard deviation of the 6 RIMT values and ROI length are displayed in...

Страница 132: ...an determine the image of interest by previewing the image Use Cycle to select and find the image of interest 3 Select the corresponding section name and locate one frame image with good image effect by cine play Use the cursor to set the reference point Long axis section use the 3 point method or Manual method to set Short axis section enter multiple points at least 6 points using the cursor manu...

Страница 133: ...ents displacement mm Strain curve X axis represents time s Y axis represents deformation of the tissue Strain rate curve X axis represents time s Y axis represents strain by time s 1 4 Displays ECG trace 5 Displays cardiac segmentation model and each segment name is illustrated beneath the model In the figure marks the peak position of the curve Under tracking status click on a segment in the card...

Страница 134: ...ation by pressing Set to place 3 points on the image the system generates the trace automatically 6 Displays measurement and calculation results EDV Maximum value of the end diastolic volume during the trace EDA Maximum value of the end diastolic area Left Ventricular during the trace ESV Maximum value of the end systolic volume Left Ventricular during the trace ESA Maximum value of the end systol...

Страница 135: ...er it is completed Perform the following procedure 1 Under tracing curve adjusting status the cursor turns into 2 Move the cursor to the editable point press Set 3 Use the trackball trackpad to drag the curve to desired position press Set again to set the point to the new position 4 Repeat step 2 3 above to finish all points that need adjustment TIP Under tracking status tap Edit on the touch scre...

Страница 136: ... screen to check the matching time AVO displays aortic valve open time AVC displays aortic valve closure time MVO displays mitral valve open time MVC displays mitral valve closure time Curve Display Select Parameter the system provides different curves of different segments for observation General Speed curve The X axis represents time s the Y axis represents velocity cm s Displacement curve The X...

Страница 137: ...king QA mode only Time measurement is available For details please refer to Operator s Manual Advanced Volume Comments and Body Mark operations are the same as in other modes 6 15 8 Data Export The system provides data exporting function so that you can export calculation result for analysis for instance SPSS analysis Tap Data Export on the touch screen to export analyzed data of each segment in c...

Страница 138: ...ps 3 to 5 to acquire all the necessary images If a pathology is discovered tap Insert to select a protocol outside of the normal routine to start scanning Tap Repeat to add a copy of the selected view to work on if necessary Tap Next or Previous to skip to a particular view you are interested in Tap Replace to delete images and operations for the selected view and restart operations on that view T...

Страница 139: ...ents and adding comments and body marks etc Operations are the same as those for manual operation See the relevant chapters for details Repeat View If necessary tap Repeat to insert another template of the current view You can then perform an extra examination View Replacement The previous image will be deleted and replaced by the new image Delete View Tap Prev Next to select the view to be delete...

Страница 140: ...be mode Perform the following procedure 1 Adjust parameters to optimize the image 2 Select Probe QSave or press the user defined key for QSave to enter the QSave dialog box 3 Click Show Parameter to view the image parameter of the current exam mode and the probe 4 Click Advanced to set the following items if needed Set the value to TIC TIB TIS Enable the M mark line The M mark line always appears ...

Страница 141: ...However 3D imaging can obtain the reference information by overall observation 7 1 1 Terms Volume data to obtain the data collection of three dimensional object via the sequence reconstruction to two dimensional object 3D image Volume Rendering VR the 3D image on the screen View point the position for viewing volume data 3D image MultiPlaner Rendering MPR a tangent plane of the 3D image that obtai...

Страница 142: ...struction Set ROI on the 2D image with the largest section area of the fetal face Set ROI a little larger than the fetal head Perform the following procedure 1 Press the right Set key to toggle among setting the ROI position size or curved VOI 2 Use the trackball trackpad to change the ROI size position and curved VOI 3 Press the left set key to adjust VOI angle Depending on the view direction the...

Страница 143: ...3D image rendering mode Display the minimum echo intensity in the observation direction This is helpful for viewing vessels and hollow structures X Ray Set X ray as 3D image rendering mode Display the average value of all gray values in the ROI This is used for imaging tissues with different structure inside or tissues with tumor 7 1 4 MPR MPR represents three different views of 3D image In the qu...

Страница 144: ...e provided for reference only not for confirming a diagnosis Please use caution to avoid misdiagnosis 7 1 5 Wire cage When you view a 3D image on the display monitor it s sometimes difficult to recognize the orientation The system displays a three dimensional drawing to illustrate the orientation for help Of which the blue plane presents the image acquisition where started while the red plane pres...

Страница 145: ...mbilical cord The fetus keeps still If there is a fetal movement you need a rescan when the fetus is still Angle of a B tangent plane The optimum tangent plane to the fetal face 3D imaging is the sagittal section of the face To ensure high image quality you d better scan maximum face area and keep edge continuity Image quality in B mode 2D image quality Before entering 3D capture optimize the B mo...

Страница 146: ...e The arrow in the figure below indicates the movement of the probe You can move the probe in the opposite direction to the arrow 7 2 1 Smart 3D Image Acquisition NOTE In Smart 3D image scanning if the probe orientation mark is oriented to the operator s finger perform the scan from right to left in linear scan or rotate the probe from left to right in rocked scanning Otherwise the VR direction wi...

Страница 147: ...mode 7 2 2 Smart 3D Image Viewing Activate MPR Select Ref Image A B C or VR to activate sectional plane image MPR or 3D image VR MPR Viewing In actual display different colors of the window box and the section line are used to identify the section A B and C The color of window A is blue and the color of the lines representing section A displayed in the other two windows is blue as well The color o...

Страница 148: ...he system supports the observation of 3D image from 6 directions Tap Up Down Left Right or Front Back to select the direction of the figure a c and e Tap Flip on the first page to observe by the converse direction of the current direction which is equivalent of the 180 rotation of current VOI as shown in the figure b d e and f Adjust VOI Adjusting the VOI box size and position is to select the vol...

Страница 149: ...e viewing status you can render the image by adjusting the relevant parameters Tap VR or MPR on the touch screen to select the VR parameters or MPR parameters When VR button is highlighted adjust parameters of 3D image VR When MPR button is highlighted adjust parameters of sectional image You can adjust Item Description Threshold Set the threshold for 3D image rendering 3D image is rendered on the...

Страница 150: ...p The color of image change according the tint value Quick Rotation Rotate the 3D image quickly iClear Use the 3D self adapation filter to strengthen the space continuity of the tissue structure and provide speckle suppression and improve the image contrast effect so as to optimize the image data Adjust iClear to optimize MPR image VR Refine Optimize the signal noise ratio and the contrast of VR i...

Страница 151: ... Use the trackball trackpad to view to a certain position tap Set End d Set the auto rotation increment rotate the knob under the Increment e Tap Off to start auto rotation Use Speed to adjust the rotation speed Tap SE SE for single direction rotation tap SE ES for bidirectional rotation Surface Enhancement This function is to make the edge structure of the image and surface details clearer so as ...

Страница 152: ... Set to trace the region When the start point and the end point coincide the region is selected or you can press Set twice to finish tracing 3 Move the cursor to the region you want to edit and press Set again to edit Contour Allows you to trace the portion of the image you want to cut Follow the steps below 1 Press Set to position the start point 2 Use the trackball trackpad to trace the region W...

Страница 153: ...orientation and press Set to start drawing press Set when ends are necessary press Set twice to finish drawing 3 Move the cursor to the region you want to edit and press Set again to edit Soft Eraser Applies to softer or smoother boundary within a small range of the image Follow the steps below 1 Press Set to position the start point 2 Use Eraser Diam to adjust the eraser size if needed 3 Use the ...

Страница 154: ...This page intentionally left blank ...

Страница 155: ...Tap Elasto on the touch screen or press the user defined key for Elasto to enter the elastography mode The system displays two dual B E windows in real time The left one is 2D image and the right one is elasto image 3 Adjust ROI according to the lesion size Press Set to switch between the solid line and the dotted line status When the ROI box is solid line use the trackball trackpad to change its ...

Страница 156: ... down display the elasto image appears above and the real time ultrasound image appears below Full The elasto image only displayed Map Select different maps for observation Strain mode Affect the display effect of adjusting dynamic range Dynamic Range Adjust contrast resolution of an image The real time dynamic range value is displayed on the image parameter area in the upper left corner of the sc...

Страница 157: ...ast imaging is an option Select an appropriate probe for Contrast Imaging see 16 1 Probes 9 1 Basic Procedures for Contrast Imaging Perform the following procedure 1 Select an appropriate probe and perform 2D imaging to obtain the target image and then fix the probe 2 Tap Contrast or press the user defined key for Contrast to enter the contrast imaging mode 3 Adjust the acoustic power experiential...

Страница 158: ...ances echo reflection by using contrast agent to perform myocardial analysis based on echocardiography technique Perform the following procedure 1 Acquire ECG signal 2 Select an appropriate probe and cardiac exam mode 3 Workflow of Low MI Contrast imaging is similar to abdomen contrast imaging see 9 1 Basic Procedures for Contrast Imaging 9 4 Image Parameters When entering contrast imaging mode th...

Страница 159: ... time via the touch screen Dual Live In live mode or freeze mode set touch screen item Dual Live as ON to enable dual live function Both the contrast mode and tissue mode are displayed The THI and B image are displayed on the screen if the Dual Live is enabled TIP In dual live mode the screen displays the contrast image and tissue image In freeze mode there displays only one cine review progress b...

Страница 160: ...l Perform the following procedure 1 During real time scanning tap MFE on the touch screen to start MFE imaging 2 Use MFE Period on the touch screen to select different imaging period suitable for current flow Where MAX is the maximum superimposing effect 9 7 Contrast Imaging QA CAUTION Contrast Imaging QA images are provided for reference only not for confirming a diagnosis TIP In case of inaccura...

Страница 161: ...different color and its corresponding trace data is plotted using that same color 1 Contrast cineloop window Sample area indicates sampling position of the analysis curve The sample area is color coded 8 maximum sample areas can be indicated 2 B cineloop window Sample areas are linked in the contrast cineloop window and B cineloop window 3 Time intensity curve Y axis represents the intensity unit ...

Страница 162: ...for time intensity curve and perform data analysis on time intensity curve for data table Tap Raw Curve to hide display raw curve Tap Table Display to check parameters Trace ROI Follow the steps below 1 Press Set key to fix the starting point 2 Press Set key and use the trackball trackpad to depict the ROI Press Clear to cancel the last point The system automatically links the start point to the e...

Страница 163: ... a Tap Export on the touch screen b Select the drive and enter the file name in the displayed window c Select OK to save the data and return to the QA Analysis screen All displayed ROI traces are saved in the exported file The parameters are included in the trace file if the user has fixed a ROI After the exporting is succeeded a BMP format image is displayed in the thumbnail area of the screen On...

Страница 164: ...This page intentionally left blank ...

Страница 165: ... electrodes directly in contact the patient s heart otherwise it may lead to stop of the patient s heartbeat Do not use this system when any digital device such as a high frequency electrotome high frequency therapeutic device or defibrillator is applied already Conductive parts of electrodes and associated connectors for ECG should not contact other conductive parts including earth grounding Freq...

Страница 166: ...d key for Physio to exit ECG mode and remove ECG electrodes from the patient ECG Triggering ECG triggering means that image scanning is activated at some time points of ECG signals thus obtaining B images at these time points The triggering image should be in 2D mode When ECG triggering occurs some marks frame triggering mark appear on the ECG waveform relative R wave the time for delay set indica...

Страница 167: ...by ECG and the other is non triggered real time image 10 2 Respiratory Wave Perform the following procedure 1 Connect the ECG lead and position the ECG electrodes 2 Tap Physio or press the user defined key for Physio to enter Physio screen 3 Switch the imaging modes and display formats adjusting the parameters to get an optimized image 4 Parameter adjusting a Tap RESP on the touch screen b Adjust ...

Страница 168: ...ription ECG Source Select ECG source Gain Set the amplitude of the trace Position Set the vertical position of the both traces on the image display Speed Change the speed of the physio trace T1 Set the delay time T1 in Single trigger or Dual trigger T2 Set the delay time T2 Interval Set the time interval for Timer Invert Invert the display ...

Страница 169: ...us stages are limited by time rather than a maximum number of loops the system stops acquisition after two minutes Acquisition is prospective when you select the stage label and then press Save on the control panel the system starts saving newly acquired images In some protocols the system will jump to Select Mode after retrospective saving When images are saved the system places a green checkmark...

Страница 170: ...e selected stage tap Pause on the touch screen or press Freeze directly The percentage stops increasing Select Continue or press Freeze again to continue To end the current acquisition press Save on the control panel To select another continuous stage use Stages XXX on the touch screen Suspending is not allowed under continuous exam When acquisition is complete for each stage the system advances t...

Страница 171: ...tinue designating the preferred loop for each displayed view until all views are completed Description of select mode controls Selection Description Stages XXX To select a stage Views XXX To select a view Acquire Select Review WMS To switch the mode status 1 Clip 2 Clip 3 Clip 4 Clip For selecting views in the selected stage Next Next four Clips Previous Previous four Clips First Go to first Clips...

Страница 172: ...required phase and or view The system inserts a X into each selected box like 3 Select Display Selected on the touch screen The system displays the selected phases for each selected view side by side To display all views for a specific phase Select the phase label for example Rest To display all phases for a specific view Select the view label for example PLAX The system displays all phases for th...

Страница 173: ...er The meanings and colors used in segments are listed in the table below 2 Use the trackball trackpad to select the value and then click the target segments then the segment is assigned with a value Item Description Review WMS Perform side by side comparison of the same views at different stages PLAX PSAX A4C A2C at Rest compared to PLAX PSAX A4C A2C Post Exercise Clips are synchronized Under Tex...

Страница 174: ...ting the Stress Echo Feature To exit the Stress Echo feature Tap End SE exam on the touch screen 11 6 Measurement and Report Suspend the stress echo exam by selecting Suspend Exam Press the measurement related keys or buttons to enter cardiology measurement For details see the Advanced Volume Reports contain the entered indication if any and also any entered comments that are specific to the repor...

Страница 175: ...ensity to occur at a different location in the acoustic filed As a result the MI may change 12 2 1 Spot Zoom Perform the following procedure 1 Press Zoom to enter the sample volume definition status 2 Use the trackball trackpad to change the box size and position Press Set to toggle between setting the size and position 3 After the sample volume is set press Zoom Update again to enter spot zoom st...

Страница 176: ... key for Quad to switch among the windows press B to exit splitting display mode and enter the image of the currently activated window in full screen In frozen mode the system supports imaging mode switching between the sub modes only for the activated window For example if the frozen image is of B C PW mode then the system supports imaging mode switching between B C PW B C B PW and B by pressing ...

Страница 177: ...ackball trackpad the review sequence is reversed to the image storing sequence thus the images are displayed in descending order Whereas if you move the playback mark to the right by using the trackball trackpad the review sequence is the same as the image storing sequence thus the images are displayed in ascending order When you review images until the first or the last frame further using the tr...

Страница 178: ...een to set the review speed The system plays the auto review region automatically 4 Tap Jump to First Jump to Last to review the first or last image 12 4 3 Cine Review in M PW CW TVD Mode Enter cine review in M mode PW mode CW mode TVD mode and then use the trackball trackpad the cine images are displayed on the screen one by one Move the playback mark to the left by using the trackball trackpad T...

Страница 179: ... 1 Image Compare in Review Mode TIP For B B COLOR B TVI B POWER B TEI mode image you can select at most 4 images for PW M CW TVD mode image you can select at most 2 images Perform the following procedure 1 Tap Compare on iStation screen or Review screen 2 Select the images for comparison Click to select the image and the icon appears on the image which indicates the image is to be compared If sele...

Страница 180: ...h screen to enter frame comparison mode 2 Review the images of different image windows cine replaying can t be performed for single frame image file press Update or Dual key to switch the active image window 3 Save the image if it is necessary Measurements adding comments and body marks are allowed 4 Tap Frame Compare again to return to image frozen status press Freeze to enter real time imaging 1...

Страница 181: ...tab Tap Saving type Post to choose the type of the saving time and the cardiac cycles Use Time Post or Cycle Post to adjust it Prospective Cine Length Retrospective cine duration set the time that user taps Retro when playing the first frame of the image It also refers to saving the cine or cycles retrospectively With the ECG disabled tap Cine tab and use Time Retro to adjust it With the ECG enabl...

Страница 182: ...This page intentionally left blank ...

Страница 183: ...w otherwise false readings and potential misdiagnosis may result CAUTION If an image is unfrozen or the mode is changed during a measurement the calipers and measurement data will be cleared from the screen but the measurement data will be stored in the report If the system is turned off or End is selected during a measurement the data not saved will be lost In Dual B imaging mode the measurement ...

Страница 184: ...on transcranial application When angle 60 5 10 300 cm s for transcranial application Within 20 Velocity CW mode 10 200 cm s for non transcranial application When angle 60 5 10 300 cm s for transcranial application Within 20 Table 13 3 Function Measurement item Error Smart IVC Dmax Within 10 Dmin Within 10 CI Within 10 DI Within 10 IVCV Within 10 Smart VTI LVOT Vmax Within 10 LVOT VTI Within 10 LVO...

Страница 185: ...cedure 1 Select ABC button Comments tab or press the user defined key for Annotation to enter the comment status 2 Use the trackball trackpad or press direction control keys on the soft keyboard to move the cursor to the desired location for comments 3 Do one of the following to add a comment Tap the desired comment text on the touch screen the system adds the selected comment text onto the screen...

Страница 186: ... knob clockwise to restore 1 pixel of trace Short press Clear to clear last trace Long press Clear to delete all tracing 3 Press Set to finish the tracing Using the touch screen 1 Trace around the ROI by taping the touch screen image using your finger 2 Remove your finger to finish the tracing Clear tap to delete the trace in reverse order one by one Clear All tap to delete all traces 3 Tap Exit t...

Страница 187: ...ction 3 Press Set key to complete the operation 13 2 4 Deleting Comments Deleting Comments Characters Texts or Arrows Perform the following procedure 1 Move the cursor to the comments to be deleted 2 Press Set to select the comment 3 Tap Delete Word or press Clear to complete the deletion Deleting a recently added character text or arrow In comment status press Clear to delete the latest added mod...

Страница 188: ...e 1 Press or the user defined key for Body Mark to enter the Body Mark status 2 Tap the desired body mark on the touch screen directly 3 To adjust the probe position and orientation marker Use the trackball trackpad to place the probe marker at the correct position Rotate Angle to adjust the mark s direction Tap Save Probe to save the current direction and position for the probe mark of the curren...

Страница 189: ...t returning switching the exam mode patient probe will clear the body marks Set if body mark is erased when the image is unfrozen see 4 1 4 Application Perform the following procedure 1 Press Cursor and move the cursor onto the body mark The cursor then becomes 2 Press Clear to delete the body mark ...

Страница 190: ...This page intentionally left blank ...

Страница 191: ... to external memory devices For a save image you can perform operations like image reviewing analyzing and demonstration 14 1 1 Storage Media System supported memory media including System hard disk USB memory devices USB flash drive removable USB hard disk Optical disk 14 1 2 Image File Formats The system supports file formats which belong to the system and file formats which are PC compatible Sy...

Страница 192: ...to the system quickly Press the user defined key for Save Cine Retrospective Prospective to save the cine file in the default file directory in the CIN format The thumbnail of this image will appear in the thumbnail area on the screen When you move the cursor onto the thumbnail its file name with suffix will be displayed Quickly Saving Full Screen Image to the System Press the user defined key for...

Страница 193: ... page open images to enter the image analyzing status all the thumbnails belong to the exam are displayed 14 1 9 Image Review and Analysis The system supports the image review and analysis to the saved patient image To review images You can review all images stored in an exam and send delete or analyze the stored images During image scan saved image thumbnails will display on the right of the scre...

Страница 194: ...red image thumbnail and click on the upper right corner of the image In the Review screen select a image and click Send to 2 Select from the destination NOTE If the transferred AVI file cannot be played normally on PC please try to transfer the multi frame cine file in MP4 format and try Send To function again or use a VLC media player 14 2 Report Management 14 2 1 Report storage The exam reports ...

Страница 195: ...kage NOTE If the password is forgotten you cannot open the backup package The password cannot be multi language or Chinese characters Export report via Send To In the iStation or Review screen click Send Exam or Send to to send patient data to an external memory device USB disk or disc or network storage you can choose if reports are exported Perform the following procedure 1 Check Export Report o...

Страница 196: ...o the system supported media Original format to back up the data in original format DICOM format you can change the cine compression mode and JPEG compression mode You can select whether to remove images or the whole exam record from the system Restore Exam Click to import the patient data from an external media Send Exam You can use this function to export the exam data to external devices in PC ...

Страница 197: ...y and the item can never be restored again Click Restore All Items to restore all the items back to iStation Click Empty Recycle Bin to empty the recycle bin and all items can never be restored again Click Exit to exit the recycle bin To set maximum number of days or deleted data to be kept in the recycle bin NOTE The patient exams which exceed the preset maximum will be deleted and unrecoverable ...

Страница 198: ... output settings see 4 1 System Preset 14 6 1 Image Print For DICOM image printing refer to relevant chapters Video printer is applied in image print service Perform the following procedure 1 Select the desired image in iStation or Review screen 2 Click icon on the upper right side of the image and select the printer in the popped up dialog box 3 Click OK to start printing Please refer to the acco...

Страница 199: ...rint task Media Storage Task DICOM media storage task including disc and USB devices In iStation screen select the target exam and click Send Exam then click DICOMDIR in the menu which appears Back up task system relevant format Select the exam to be backed up in iStation and click Back Up Exam Send to external devices including disc and USB devices Select exam data or images in the iStation or Re...

Страница 200: ... system brings up a dialog box for entering the IP address of the remote server 2 Enter the IP address and click OK 3 Log on with the server account and password 4 Check the data transferred and carry out operations as necessary After logging in to the remote server you can switch from the Ultrasound System and the remote server as follows a Click Minimize to exit the remote server and enter the D...

Страница 201: ...orage Commitment and Query Retrieve applications For detailed information about DICOM presets see 4 7 DICOM HL7 15 1 DICOM Storage DICOM Storage is used to send images single frame or multi frame or structured report to the DICOM storage server for storage 15 1 1 Send images on iStation Review main screens Perform the following procedure 1 Do one of the following to select images Tap iStation on t...

Страница 202: ...to DICOM storage automatically 15 1 4 Encapsulate PDF Encapsulate PDF refers to the PDF file is encapsulated in DICOM IOD Encapsulated PDF is sent by following the procedures below Send in the unit of single exam The exam with the state of End Cancel or Stop cannot be sent as encapsulated PDF Check Encapsulate PDF in the storage service preset If there is an exam result in the report template this...

Страница 203: ...print server on the right side and click OK 15 2 2 To send images to DICOM Print after an exam ends TIP Preset Sending printing after End Exam for details see 4 1 2 General Start the scan and obtain the image Each time End Exam is tapped the system will send the image to the default DICOM print server for printing 15 3 Worklist When the DICOM basic package is configured and the Worklist server has...

Страница 204: ... see details of patient data 7 Click Exit to exit the Worklist 15 4 MPPS MPPS is used to send exam state information to the configured server This facilitates the other systems in obtaining the exam progress in time After you preset the Worklist server and MPPS server if the system obtains the patient information from Worklist server to begin the exam it will send exam status information to MPPS s...

Страница 205: ...rver After setting the DICOM query retrieve server you can perform the query retrieve function in the iStation screen 1 Tap iStation to enter iStation screen 2 Click Query Retrieve to open Query Retrieve screen 3 Select the server in the Server and Service area both the source and the destination and query level 4 Enter the query information such as Patient ID Patient Name Accession Exam Date or k...

Страница 206: ...rom the current exam is sent to the external storage media in DICOM format If the backup is successful a tick will appear in the Backup list in the iStation screen If not there will be no tick TIP There must be no DICOMDIR DCMIMG IHE_PDI files on the external storage media of the same name as the one being backed up Otherwise the backup cannot proceed Ensure there is enough storage space or the ba...

Страница 207: ...rocedure 1 Click to select a patient or an exam record in the list on iStation page and click Send Exam in the iStation page 2 Select DICOM in the storage server list select a server in the Storage Server list 3 Click OK the status of sending task can be viewed in task management After successful storage of both image and structured report you can see the storage commitment mark in the list below ...

Страница 208: ...This page intentionally left blank ...

Страница 209: ... Guidance Smart 3D Contrast imaging Contrast agent for Liver SC5 1Ns Body surface Fetal Abdominal Pediatric Musculo skeletal Conventional Thoracic Pleural Peripheral vessel Urology B M PW Color Power Combined modes B M PW B Color B Power B PW Color B Power PW B Tissue Harmonic Imaging iScape Color M Biopsy Guidance Smart 3D Contrast imaging Contrast agent for Liver V11 3Hs Intracavitary Fetal Tran...

Страница 210: ...ance Smart 3D Strain Elastography L13 3Ns Body surface Ophthalmic Abdominal Pediatric Small Organ breast thyroid testes Musculo skeletal Conventional Superficial Thoracic Pleural Peripheral vessel B M PW Color Power Combined modes B M PW B Color B Power B PW Color B Power PW B Tissue Harmonic Imaging iScape Biopsy Guidance Smart 3D Strain Elastography L12 3RCs Body surface Abdominal Pediatric Smal...

Страница 211: ... Color B Power PW B Tissue Harmonic Imaging iScape Biopsy Guidance Smart 3D Strain Elastography L20 5s Body surface Ophthalmic Pediatric Small Organ breast thyroid testes Musculo skeletal Conventional Superficial Peripheral vessel B M PW Color Power Combined modes B M PW B Color B Power B PW Color B Power PW B Tissue Harmonic Imaging iScape Smart 3D Strain Elastography P4 2s Body surface Abdominal...

Страница 212: ...obes Probe Model Region Applied Intended Use Imaging Mode Probe Figure No Item Description 1 Probe head Converts the electrical signal into an ultrasonic signal focusing the sound beams in a given direction meanwhile it receives the reflected ultrasonic signal and converts it into an electrical signal for transmission over the cable The lens on the surface is the acoustic lens Apply ultrasound gel...

Страница 213: ...ear probe as an example 16 1 3 Procedures for Operating WARNING Disinfect the probe and sterilize the needle guided bracket before and after an ultrasound guided biopsy procedure is performed Failure to do so may cause the probe and the needle guided bracket becomes a source of infection This section describes general procedures for operating the probe The proper clinical technique to be used for ...

Страница 214: ...tem Examinations Wiping off the ultrasound gel Thoroughly cleaning the probe Drying the probe Disinfecting the probe Rinsing the probe Drying the probe Inspection after use Storage Biopsy procedure Sterilization of the needleguided bracket Inspection after use Storage Disconnection to the system Thoroughly cleaning the needle guided bracket ...

Страница 215: ...y not be sufficient DO NOT use such a probe sheath The cover contains natural rubber latex and talc that can cause allergic reactions in some individuals DO NOT use an expired probe sheath Before using a probe sheath verify whether the term of validity has expired Inspection before examination Connection to the system Examinations Wiping off the ultrasound gel Thoroughly cleaning the probe Drying ...

Страница 216: ...o civco com http www civco com Refer to the following dimension table of all probes to choose the necessary probe sheath type You can select the probe sheath according to the actual application situation The following figure is a dimension illustration of the V11 3s probe Probe Mode Length mm Width mm Height mm Cable Length mm C5 1s 76 7 109 6 28 2050 50 SC5 1Ns 111 8 76 7 28 2050 50 V11 3s 317 41...

Страница 217: ... sheath 3 Secure the sheath with the enclosed elastic bands 4 Inspect the sheath to ensure there is no hole or tear 16 1 5 Probes Cleaning and Disinfection Before and after completing each examination clean and disinfect the probes as required When biopsy procedures have been performed be sure to sterilize the needle guided bracket Fail to do so may result in the probe and the needle guided bracke...

Страница 218: ... products Thorough cleaning is essential before high level disinfection and sterilization because inorganic and organic material that remains on the surfaces of instruments interfere with the effectiveness of these processes Disinfection describes a process that eliminates many or all pathogenic microorganisms except bacterial spores Low Level Disinfection Destruction of most bacteria some viruses...

Страница 219: ...e probe by wiping with a piece of disposable lint free soft cloth or tissue Do not dry the probe by heating 8 Inspect the probe If visible dirt still exists repeat the preceding steps to wash the probe until it is all clean 9 Check whether the probe has defects such as peeling rifts bumps cracks or liquid spill If such defects exist the probe has reached the end of its service life In this case st...

Страница 220: ...tion process before the next use High level disinfection of a semi critical probe Perform the following procedure 1 Wear a pair of gloves to prevent infection 2 Clean the probe thoroughly in accordance with the cleaning procedure before disinfection 3 Disinfect the probe by using an appropriate high level disinfectant or system For how to use a high level disinfectant or system see the operator s ...

Страница 221: ...leaning and disinfection process before the next use Compatible Cleaners and Disinfectants For the detailed information about cleaners and disinfectants see Mindray Transducer Disinfectant Recommendation 16 1 6 Cleaning the probe cable and connector NOTE Do not use cloth with water to clean the probe connector Perform the following procedure 1 Wipe out the dust attached to surface of probe connect...

Страница 222: ...RCs Operating 0 C 40 C 20 85 700 hPa 1060 hPa Storage and transportation 20 C 55 C 20 95 700 hPa 1060 hPa L13 3s Operating 0 C 40 C 20 85 700 hPa 1060 hPa Storage and transportation 20 C 55 C 20 95 700 hPa 1060 hPa L14 6Ns Operating 0 C 40 C 30 85 700 hPa 1060 hPa Storage and transportation 20 C 55 C 30 95 700 hPa 1060 hPa L20 5s Operating 0 C 35 C 15 80 700 hPa 1060 hPa Storage and transportation...

Страница 223: ...rmality is found on the needle guided bracket immediately stop using it and contact MINDRAY Customer Service Department or sales representative Needle guided brackets are required to verified before each biopsy If the verification fails it indicates that the needle guided brackets are out of service life Disposable brackets are packaged sterile and are single use only and the method of sterilizati...

Страница 224: ...robe So even though the biopsy needle appears to have penetrated the target object in the image it may not actually have done so When the target for biopsy is small dispersion of the ultrasound beam may lead to image deviate from the actual position Pay attention to this If the target object and the biopsy needle appear in the image as shown in the figures below For reference only The biopsy needl...

Страница 225: ...le detachable 40 50 60 Metal 14G 16G 18G 20G 22G Plastic 13G 15G 16G 18G 20G SP5 1Ns P4 2s NGB 011 Metal needle detachable 11 23 13G 15G 16G 18G 20G C5 1s SC5 1Ns NGB 022 Metal needle detachable 25 35 45 14G 16G 18G 20G 22G V11 3Hs NGB 025 Metal needle detachable 1 6 16G 17G 18G L12 3RCs NGB 043 Metal needle detachable Angle range 35 80 20G 21G 22G 23G NGB 044 Metal needle detachable Biopsy depth ...

Страница 226: ...an abnormality is found on the needle guided bracket immediately stop using it and contact MINDRAY Customer Service Department or sales representative Sterilize the needle guided bracket before and after use Put on the sterile probe sheath before installing to the probe Confirm that the needle guided bracket is free of damage deformation stripping malfunction loose or missing parts Confirm that th...

Страница 227: ...ng clamp is turned to the correct position the locking nut will lock the retaining clamp and the needle guided bracket is then mounted in the correct position 2 Remove the needle guided bracket Hold the probe in your left hand Unscrew the locking nut with your right hand to open the retaining clamp then raise the needle guided bracket to separate the locating bulge from the locating grooves NGB 00...

Страница 228: ...bracket to ensure that the needle guided bracket is properly installed on the probe 2 Adjust the needle angle to the proper shift as required a Loosen the angle pinch nut b Adjust the angle block to the desired level c Tighten the angle pinch nut 3 Install the guiding block a Select a suitable guiding block and push it into the groove above the angle block then clamp it tightly 2 Tab and groove fo...

Страница 229: ...e needle from the bracket a Screw the nut of the guiding block and remove the guiding block slightly along the direction of the needle s tail b Separate the residual part of the needle guide bracket and the probe from the needle 5 Remove the needle guided bracket a Unscrew the Needle guided bracket pinch nut and remove the needle guided bracket from the probe b Separate the probe and the needle gu...

Страница 230: ...then push the needle guided bracket forward making the tabs and the grooves of the needle guided bracket to match with the grooves and tabs of the probe c Check manually to confirm that the needle guided bracket is securely installed on the probe 2 Install the guiding block a Select a proper guiding block and push it into the groove above the angle block and clamp it tightly 1 Support of needle gu...

Страница 231: ...nto the hole of the guiding block 3 Release the needle from the bracket a Remove the guiding block slightly along the direction of the needle s tail b Separate the residual part of the needle guide bracket and the probe from the needle 4 Remove the needle guided bracket Remove the support of needle guided bracket from the probe ...

Страница 232: ...he convex point on the probe head c Turn the grip knob at the tail of the needle guided bracket tightly 2 Remove the needle guided bracket Hold the probe and the needle guided bracket then open the grip knob of the needle guided bracket NGB 022 Metal needle detachable needle guided bracket 1 Clamp 2 Locating groove 3 Grip knob 4 Needle guide rack 5 Needle guide hole 6 Needle guide clamping knob 7 ...

Страница 233: ...angle to the proper shift as required a Loosen the angle pinch nut b Adjust the angle block to the desired level c Tighten the angle pinch nut 3 Insert the biopsy needle a Adjust the dial scale to the required needle type shift and then screw the needle fixing nut to lock the dial scale To adjust the dial scale you have to loosen the needle fixing nut first b Pull the lock pin and close the V shap...

Страница 234: ...bracket a Screw the pinch nut to release the needle guided bracket b Separate the bracket and the probe NGB 025 Metal needle undetachable needle guided bracket Perform the following procedure 1 Install the needle guided bracket a Put on the sterile probe sheath 1 Pinch nut 2 Intra cavity probe 3 Lower clamp 4 Location hole 5 Front slot 6 Front clamp 7 Location clamp 8 Upper clamp 1 2 3 4 5 6 7 8 ...

Страница 235: ...nserting into the location hole Turn the lower clamp against the intra cavity probe Tighten the nut to lock the biopsy arrow s direction 2 Remove the needle guided bracket a Hold the prober in the left hand unscrew the locking nut with the right hand to loose the clamp arrow s direction b Lift the biopsy up towards arrow s direction The locating pole front clamp the locating hole and the front cla...

Страница 236: ...s of the probe c Mount the bracket onto the probe and rotate the locking nut to fix the bracket 2 Insert the biopsy needle a Insert a biopsy needle into the guiding block hole b Adjust the biopsy angle of the needle and ensure that the needle can be adjusted continuously within the range of 30º to 85º 3 Release the needle from the bracket Hold the probe and remove the biopsy needle form the guidin...

Страница 237: ...m the probe b Hold the probe and take out the bracket NGB 044 Metal needle detachable needle guided bracket Perform the following procedure 1 Install the needle guided bracket 1 Right clamp 2 Groove 3 Guiding block fixing frame 4 Locking nut of left and right clamps 5 Guiding blocks 6 Depth shift sign 7 Depth pinch nut 8 Left clamp 1 2 3 4 5 6 7 8 ...

Страница 238: ...tabs of the probe c Mount the bracket onto the probe and rotate the locking nut to fix the bracket 2 Adjust the needle angle to the proper shift as required a Loosen the depth pinch nut b Adjust the depth shift to the desired level c Tighten the depth pinch nut 3 Insert the biopsy needle a Select a suitable guiding block and loosen its nut install the guiding block to the guiding block fixing fram...

Страница 239: ...nto the guiding block hole 4 Remove the needle guided bracket a Hold the probe and remove the needle b Loosen the guiding block nut and remove it from the guiding block fixing frame c Rotate the clamping nuts of the needle guided bracket The needle guided bracket is separate from the probe Hold the probe and take out the bracket ...

Страница 240: ...l the needle guided bracket a Put on the sterile probe sheath b Align the needle guided bracket with the probe to align the locating bulges on the needle guide with the locating grooves on the probe then turn the retaining clamp to the correct position 1 Needle exit 2 Needle guide 3 Needle entry 4 Retaining clamp 5 Locating bulges 5 1 3 2 4 ...

Страница 241: ...the probe and insert the needle into Needle entry of the needle guide 2 Remove the needle guided bracket a Hold the probe and remove the needle b Hold the probe and raise the needle guided bracket to separate the locating bulge from the locating grooves ...

Страница 242: ...ngle pinch nut 3 Insert the biopsy needle a Hold the probe Press the separation pressure position to separate needle guided V shaped block from pressure position of the needle b Put the needle into the needle guided bracket and the needle leans to V shaped block c Hold the probe and release the pressure position of the needle Adjust the needle type adjusting nut manually The needle moves smoothly ...

Страница 243: ...psy to enter Biopsy Select the biopsy bracket angle guide line If the needle guided bracket supports more than one biopsy angle select the angle guideline by using Biopsy Kit Select the guide line dot size Tap Dot Size to select the dot size NOTE The distance between two dots is depth dependent Move the cursor over the big dot and a numeral representing the biopsy depth is displayed The biopsy gui...

Страница 244: ...ine according to the actual situation Tap Verify to enter Biopsy Verify menu to fine tune the guide line if needed 4 If available use iNeedle function to help enhance the needle visualization when the needle display is not clear iNeedle is an option a Tap iNeedle in B menu The parameters that can be adjusted appear on the menu B iNeedle tap to display B image and iNeedle image synchronously Needle...

Страница 245: ... free soft cloth to remove coarse dirt 3 Prepare a cleaning solvent enzymatic or neutral pH detergent e g liquinox MetriZyme by using distilled or softened water in accordance with the operator s manual provided by the manufacturer 4 Detach all the detachable parts of the needle guided bracket and immerse the needle guided bracket and all its parts fully in the cleaning solvent for at least 1 minu...

Страница 246: ...ackage the needle guided bracket in accordance with the sterilization requirements of surgical instruments using the sterilization wrap or pouch cleared by FDA 4 Place the packaged needle guided bracket inside a high temperature steam sterilizer and perform sterilization The sterilization parameters are 121 C and 30 minutes for a gravity displacement steam sterilizer and are 132 C and 4 minutes fo...

Страница 247: ...ap Biopsy Middle Line or press the user defined key for Middle Line to turn on the function The middle line is a vertical dotted line located in the middle of the screen the position and direction of which cannot be changed There is a mark icon of located on the middle line which can be moved up and down along the line by using the trackball trackpad To use the Middle Line function of the ultrasou...

Страница 248: ...ls see 16 4 1 Interface Keep the L11 3VNs away from the source of disturbance such as metal objects and magnetized objects Do not use or store L11 3VNs in the vicinity of strong electric or magnetic fields NOTE When used under optimal operating conditions by an experienced medical professional the eSpacial Navi system can achieve precision as high as 2 4 mm Place the magnetizer in the proper posit...

Страница 249: ...eline 5 mm scale 6 Needle guidance trajectory 7 Needle tip position in the ultrasound plane 8 Needle position in the ultrasound plane 1 Alignment indicator plan view 2 Filed strength 3 Maximum depth at which the needle can be detected 4 Selected needle type 5 Scale of guideline 5 mm scale 6 Projection position of the needle guidance trajectory in the ultrasound plane 7 Position at which the needle...

Страница 250: ...ring the calibration 3 Magnetize a needle cap a Place an appropriate sterile needle cap length 3 5cm to 4 5cm diameter 7 mm with bottom closed into the magnetizer b Introduce a needle into the cap and ensure that the needle tip contacts the bottom of the needle cap Table 16 6 eSpacial Navi Needle settings Item Description Needle Select the desired needle from the drop down list You can set the mos...

Страница 251: ...obe stably and put the needle close to the probe for connection After the needle and probe are successfully connected the system automatically calculate the maximum depth at which the needle can be detected in real time and display the depth value in the touch screen When the actual depth is greater than the maximum value the needle guidance information disappears temporally 2 Adjust the needle po...

Страница 252: ...brush because it may damage the magnetizer 3 Dry the magnetizer using a sterile cloth or gauze after rinsing Do not dry the magnetizer by heating it Table 16 7 Compatible disinfectants Trade Name Manufacturer Chemical Name Procedures Surfa safe Anios Laboratoires didecyldimethylammonium chloride 1 4mg g polyhexamethylene biguanide hydrochloride 0 96mg g Sprays fungicidal in 20 min T B in 15 min Sa...

Страница 253: ...ant solution for the shortest time the manufacturer recommends Follow local regulations when selecting and using the disinfectant 3 Rinse the magnetizer with plenty of water about 2 gallons for at least 1 minute to remove all chemical residues on it Or follow the rinsing method recommended by the disinfectant manufacturer to rinse the magnetizer 4 Wipe off the water on the magnetizer with sterile ...

Страница 254: ...This page intentionally left blank ...

Страница 255: ... save the recording file automatically you can select to save in local disk U disk or optical disk Perform the following procedure 1 Perform ultrasound exams select appropriate views and adjust parameters to prepare for recording 2 Click to open the dialog box and select desired recording type Hard disk USB CDRO 3 Click Close to enter recording status 4 Press the user defined key for DVR and click...

Страница 256: ...ending progress the icon displays as 17 3 DVR Video Replay You can replay the video and audio record 17 3 1 Replay on PC Connect the USB disk or optical disk with the file to the PC open the file directly 17 3 2 Replay on the ultrasound system Perform the following procedure 1 Click to open the dialog box and select desired playing type Hard disk USB CDROM 2 Click Play to open the dialog box 3 Sel...

Страница 257: ...y maintenance 18 1 1 Cleaning the System WARNING Before cleaning the system be sure to turn off the power and disconnect the power cord from the outlet Cleaning the system while the power is On may result in electric shock Especially the touch screen and control panel of the system equipped with trackpad can be cleaned on power on status tap bar in the left side of the touch screen to enter the Ex...

Страница 258: ...or Cleaning holders Tools soft dry cloth soapy water soft brush Remaining stains should be wiped away using a cloth with clean or soapy water and the surface left to air dry Perform the following procedure 1 Use a soft dry cloth to wipe away dust attached to the inside outside and gaps in the probe holder Use a soft brush to brush away dust or stains from the small intra cavity probe holder or its...

Страница 259: ...ith the help of adhesive tape 2 Cleaning Clean the lens slightly using the tissue until there is no foreign matter Then clean the other parts and the dust excluder Make sure to exert force properly when clean the small ball otherwise the small ball may drop down When liquid is spray onto the trackball area most of the liquid can be discharged through the waterspout besides you can dry the leaving ...

Страница 260: ...tants and methods listed in this section to disinfect the main unit Warranty does not cover damage caused by unapproved substances or methods Do not mix disinfectants as hazardous gases may result We make no claims regarding the efficacy of the listed chemicals or methods as a means for controlling infection For the method to control infection consult your hospital s infection control officer or e...

Страница 261: ...and leakage current test and thus can be disinfected on power on status tap bar in the left side of the touch screen to enter the Exam Main Menu screen and then select to lock the system for 10 seconds to disinfect the system while the power is On After cleaning disinfect the system as follows 1 Wear medical gloves to prevent infection 2 Disinfect the main unit with disinfectant wipe or solution F...

Страница 262: ...the connector pins are bent destroyed or falling off Content Description Color and B W video printer First wipe off dust or stain attached to the cover of printer with soft dry cloth then clean the inside of printer Be sure to do the cleaning maintenance according to the operation manual if necessary Graph text printer First wipe off dust or stain attached to the cover of printer with soft dry clo...

Страница 263: ...he power indicator of the monitor is lit up but the image is blank The interval between turning off and restarting the system is too short wait at least 20 seconds Turn off the system and wait at least 1 minute then restart the system The monitor brightness or contrast may be improperly set Adjust the monitor brightness and contrast back to the factory defaults 2 The monitor displays the character...

Страница 264: ...This page intentionally left blank ...

Страница 265: ...s low power visible LED DO NOT stare into beam because of unknown hazards of transient radiation provided by class 2 laser DO NOT stare into beam emitted by SYMBOL DS4308 for more than 10 s CAUTION Ensure the information acquired by barcode reader is consistent with the actual information TIP The reader does not support decoding of Multi language A 1 1 D Barcode Reader There are 2 operation modes ...

Страница 266: ...nector is properly secured 2 Connect the other end of the interface cable to the host A 1 2 Setting The reader has factory settings please refer to A 4 for details The reader supports some user defined functions as introduced below 1 LED Green A barcode was successfully decoded Red A data transmission error or reader malfunction occurred 2 Scan window Scan the barcode 3 Trigger Press to decode 1 C...

Страница 267: ...rameter Low Volume Medium Volume High Volume Code 93 and codebar scanning To enable or disable Code 93 scan the appropriate barcode below To enable Codebar scan the appropriate barcode below Code 39 full ASCII scanning Code 39 Full ASCII is a variant of Code 39 which pairs characters to encode the full ASCII character set To enable or disable Code 39 Full ASCII scan the appropriate barcode below ...

Страница 268: ...o decode only I 2 of 5 symbols with 8 characters scan I 2 of 5 One Discrete Length then scan 0 followed by 8 A 1 3 Scanning in Hand Held Mode Perform the following procedure 1 Ensure all connections are secure 2 Aim the reader at the barcode Press the trigger Ensure the scan line crosses every bar and space of the symbol see the figure below 3 Upon successful decode the reader beeps and the LED tu...

Страница 269: ...ly back into the reader from the barcode is known as specular reflection This specular reflection can make decoding difficult You can tilt the reader up to 55 forward or back and achieve a successful decode A 1 4 Scanning in Hands Free Mode Assembling the Intellistand 1 One piece scanner cup with flexible neck 1 2 3 4 ...

Страница 270: ...ot provided Perform Scanning in Hands Free Mode When the reader is seated in the scanner cup the reader s built in sensor places the reader in hands free mode When you remove the reader from the stand it operates in its normal hand held mode 2 Flat areas 3 Stand base 4 Wingnut 1 Two screw mount holes For Screw Mount follow the steps below 1 Position the assembled base on a flat surface 2 Screw one...

Страница 271: ...mple The 2 D barcode reader supports hand held operation mode Hand held mode press the trigger to decode A 2 1 Overview 1 LED Green A barcode was successfully decoded Red A data transmission error or reader malfunction occurred 2 Scan window Scan the barcode 3 Trigger Press to decode ...

Страница 272: ...ct the other end of the interface cable to the host Removing the Interface Cable Perform the following procedure 1 Using the tip of a screwdriver or some other tools with a sharp head depress the cable s modular connector clip 2 Carefully slide out the cable A 2 3 Setting The reader has factory settings for details see A 5 Parameter Defaults The reader supports some user defined functions as intro...

Страница 273: ...ume Code 93 and codabar setting To enable Code 93 scan the appropriate barcode below To enable Codabar scan the appropriate barcode below Code 39 full ASCII setting Code 39 Full ASCII is a variant of Code 39 which pairs characters to encode the full ASCII character set To enable or disable Code 39 Full ASCII scan the appropriate barcode below ...

Страница 274: ...ect the length using the numeric barcodes below For example to decode only I 2 of 5 symbols with 8 characters scan I 2 of 5 One Discrete Length then scan 0 followed by 8 A 2 4 Scanning in Hand Held Mode Perform the following procedure 1 Ensure all connections are secure see the appropriate host chapter 2 Aim the digital imager reader at the barcode ...

Страница 275: ...igital imager reader beeps indicating the barcode is successfully decoded Steps 2 4 above may be required to repeat on poor quality or difficult barcodes The aiming pattern is smaller when the digital imager reader is closer to the symbol and larger when it is farther from the symbol Scan symbols with smaller bars or elements mil size closer to the digital imager reader and those with larger bars ...

Страница 276: ...propriate interface cable to the barcode reader 3 Plug the other end of the cable into a free USB port on the Ultrasound system 4 Once the imager has been fully connected power on the Ultrasound System A 3 3 HS 1M JDK 2413 Configuration The barcode reader is configured through scanning the barcode Ensure that the barcode reader is properly connected to the Ultrasound System before scanning After t...

Страница 277: ...r is properly connected to the Ultrasound System before scanning After the barcode is successfully scanned the barcode reader buzzes and the green indicator is On Configuration before use Perform the following procedure 1 Scan the following 1 D barcode to configure the barcode reader 2 Scan the following 1 D barcode to enable the suffix Reset the barcode reader Perform the following procedure 1 If...

Страница 278: ...h Wipe the window using a tissue moistened with ammonia water Do not spray water or other cleaning liquids directly into the window A 5 Parameter Defaults Refer to the following table for parameter defaults of LS2208 and DS4308 For scanning Barcode For scanning RFID For scanning Barcode For scanning RFID Parameter Defaults Parameter Defaults 1 D Symbologies Interleaved 2 of 5 ITF UPC EAN Interleav...

Страница 279: ... Disable UPC E1 Preamble System Character Code 128 Emulation Disable Convert UPC E to A Disable Data Matrix Enable Convert UPC E1 to A Disable Maxicode Enable EAN 8 JAN 8 Extend Disable QR Code Enable UCC Coupon Extended Code Disable Code 128 Code 128 Enable UCC EAN 128 Enable ISBT 128 Enable Code 39 Code 39 Enable Trioptic Code 39 Disable Convert Code 39 to Code 32 Italian Pharmacy Code Disable C...

Страница 280: ...This page intentionally left blank ...

Страница 281: ... wire before inserting the power plug into the receptacle be sure to remove the power plug from the receptacle before disconnecting the equipotential wire otherwise electric shock may result Connect the earth cable before powering ON Disconnect the earth cable after powering OFF Otherwise electric shock may result CAUTION Maximum output power of the outlet in the trolley is 240 VA When moving the ...

Страница 282: ...cing report or other stuff 4 Caster Used for securing or moving the system 5 Retractable cable AC power supply cable 6 Power indicator Lights at AC supply 7 Power outlet Supplies the power for peripheral devices 8 Power adapter bracket Used for placing the power adapter 9 Lifting column Used for adjusting the height of operation panel 10 Probe extension module Used for extend ports for connecting ...

Страница 283: ... 14 Main unit tray Used for placing and fixing the main unit You can remove the tray and install the U Bank purchased separately instead NOTE Keep the main unit tray carefully for future use after it is removed from the trolley Reinstall the main unit tray to the trolley if the U Bank has been removed from the trolley 15 Height lever Used for adjusting the height of the stand 16 Tray release lever...

Страница 284: ...er Used for placing probes temporarily 3 Trolley handle Used for moving the trolley 4 Tray release lever located on the bottom of the handle Used for removing the main unit tray 5 Cable hook Manage cables 6 Storage box Used for placing report or other stuff 7 Caster Used for securing or moving the system 8 Printer bracket Used for placing the printer 9 Probe extension module Used for extend ports ...

Страница 285: ...s An electrical safety inspection should be periodically performed every two years The safety analyzer is also an excellent troubleshooting tool for detecting abnormalities in line voltage and grounding as well as total current loads NOTE Make sure the safety analyzer is authorized and complies with the requirements of IEC 61010 1 Follow the analyzer manufacturer s instructions C 1 Power Cord Plug...

Страница 286: ... 5 Earth Leakage Test Run an Earth Leakage test on the device being tested before performing any other leakage tests The following outlet conditions apply when performing the Earth Leakage test normal polarity Normal Condition reverse polarity Normal Condition Test Item Acceptance Criteria The enclosure and accessories No physical damage to the enclosure and accessories No physical damage to meter...

Страница 287: ...ngle Fault Condition reverse polarity with open earth Single Fault Condition LIMITS For ES 60601 1 100 μA in Normal Condition 300 μA in Single Fault Condition For IEC 60601 1 100 μA in Normal Condition 500 μA in Single Fault Condition C 7 Patient Leakage Current Patient leakage currents are measured between a selected applied part and mains earth All measurements have a true RMS only The following...

Страница 288: ...olarity Reversed Polarity LIMITS For BF applied parts 5000 μA C 9 Patient Auxiliary Current Patient Auxiliary currents are measured between any selected Applied Part connector and the remaining Applied Part connectors All measurements may have a true RMS response The following outlet conditions apply when performing the Patient Auxiliary Current test normal polarity Normal Condition reverse polari...

Страница 289: ... the same LAN may interfere with each other the operator should be cautious Do not connect devices that may cause strong interference For example life supporting devices should not be connected in the same LAN Other non medical devices in the same frequency band may cause interference please be cautious For a better wireless LAN transmission effect please take the following settings SSID 80 with s...

Страница 290: ...ange the IP otherwise the background task may fail You can check if there are tasks undergoing in the task manager If the IP address displays as 0 0 0 0 this means that the network is abnormal The reason for the failure may be disconnection or the system cannot obtain the IP address IP config is used for setting local network parameters which is also applied to DICOM connection Perform the followi...

Страница 291: ...ilable under abdominal gynecological urological obstetrical small parts and nerve block area E 1 Use iScanHelper for Reference Perform the following procedure 1 Perform ordinary scanning procedure 2 Press the user defined key for iScanHelper to enter iScanHelper status 3 Use the trackball trackpad to move the cursor onto the target view name in the view selecting box and then press Set 4 Perform s...

Страница 292: ... or Ultrasonic image to go to the single window of each of them Double click single window again to return to quad window display 1 Section selecting box Move the cursor onto the target view and press Set to select a section 2 Anatomic graphic Related anatomical tissue information are provided here 3 Scanning picture Ordinary scanning tips can be observed here including posture probe mark probe sw...

Страница 293: ...that cannot be opened F 2 Demonstration catalog There are two kinds of catalog Demo Catalog and Customize Catalog F 2 1 Demo Catalog The demo catalog is a folder on the hard disk where the factory DEMO is stored The system plays the images in this folder when performing demonstrations The system supports importing deleting or clearing the data in the demo catalog Click Demo Manager to operate to i...

Страница 294: ...Drive and File Name 3 Click Choose Catalog Select the path of the source file from the Drive and File Name and then click OK 4 Click OK again to complete the task F 4 Demonstration mode The system automatically plays all the image files in the list one by one The time interval between images played is same and can be changed F 5 Option of Demo You can choose whether to repeat the demonstration or ...

Страница 295: ...on off Power Mode M Mode Turn on off M Mode PW Mode Turn on off PW Mode 3D Turn on off 3D Mode Freeze Freeze Image UnFreeze UnFreeze Image Clear Clear Dual Enter Dual Windows Format Quad Enter Quad Windows Format QSave QSave Update Update Full Image Turn on off Full Image Mode Middle Line Display Hide Middle Line iNeedle Turn on off iNeedle Mode iTouch Turn on iTouch Mode Depth Increase Depth Incr...

Страница 296: ... Switch Exam Mode to Abdomen Vascular Neonatal Abdomen Switch Exam Mode to Neonatal Abdomen Adult Cardiac Switch Exam Mode to Adult Cardiac Cardiac Difficult Switch Exam Mode to Adult Cardiac Difficult Pediatric Cardiac Switch Exam Mode to Pediatric Cardiac Left ventricular opacification Switch Exam Mode to LVO Neonatal Cardiac Switch Exam Mode to Neonatal Cardiac TEE Cardiac Switch Exam Mode to T...

Страница 297: ...to Emergency Obstetrics Emergency Vascular Switch Exam Mode to Emergency Vascular Emergency Superficial Switch Exam Mode to Emergency Superficial Lung Switch Exam Mode to Lung Neonatal Head Switch Exam Mode to Neonatal Head Orthopedic Switch Exam Mode to Orthopedic Deep Nerve Switch Exam Mode to Deep Nerve Superficial N Switch Exam Mode to Superfical Nerve Renal Artery Switch Exam Mode to Renal Ar...

Страница 298: ...t of Vocal Commands Close Report Dialog Close Report Dialog Open Preset Dialog Open Preset Dialog Close Preset Dialog Close Preset Dialog Smart IVC Smart IVC Smart VTI Smart VTI Smart B lines Smart B lines Vocal command Operation ...

Страница 299: ...gnostic ultrasound instruments the possibility exists that such biological effects may be identified in the future Thus ultrasound should be used in a prudent manner to provide medical benefit to the patient High exposure levels and long exposure times should be avoided while acquiring necessary clinical information H 3 ALARA Principle As Low As Reasonably Achievable It is required to practice ALA...

Страница 300: ...ns MI is an index that shows the possibility of the cavitations generation based on acoustic pressure and the value in which the peak rarefactional acoustic pressure is divided by the square root of the frequency Therefore MI value becomes smaller when the frequency is higher or the peak rarefactional acoustic pressure is lower it becomes difficult to generate the cavitations CMI 1 MPa For the fre...

Страница 301: ...r percentage the greater the current acoustic output When the image is frozen the system stops transmitting acoustic power Default setting of acoustic power Selection of diagnostic applications is the most important factor for controlling ultrasound output The permissible level of intensity of ultrasound differs depending on the region of interest For fetal examinations in particular much care mus...

Страница 302: ... Indirect controls The controls that indirectly affect output are the many imaging parameters These are operating modes frequency focal point positions overall depth and PRF The operating mode determines whether the ultrasound beam is scanning or non scanning Thermal bioeffect is closely connected to M mode Doppler and Color mode Acoustic attenuation of tissue is directly related to probe frequenc...

Страница 303: ...ases or decreases the possibility of Thermal or Mechanical effect More specifically they were designed to assist in the implementation of the ALARA principle As an operator changes a given system control the potential effect of the change in output will be indicated However the Thermal Index is not the same as temperature rise in the body for several reasons First of all in order to provide a sing...

Страница 304: ...uipment Part 2 37 Particular requirements for the basic safety and essential performance of ultrasonic medical diagnostic and monitoring equipment issued by IEC in 2015 IEC 62359 Ultrasonics Field characterization Test methods for the determination of thermal and mechanical indices related to medical diagnostic ultrasonic fields 2017 Acoustic Quantities Total Uncertainties Standard Power 26 48 for...

Страница 305: ...r equipment should be observed to verify that they are operating normally Use of accessories transducers and cables other than those specified or provided by the manufacturer of this equipment could result in increased electromagnetic emissions or decreased electromagnetic immunity of this equipment and result in improper operation Portable RF communications equipment including peripherals such as...

Страница 306: ...ther devices may interfere with this system even though they meet the requirements of CISPR Preventing conducted RF immunity Due to technological limitations the conducted RF immunity level are limited to 3 Vrms level conducted RF interference above 3 Vrms may cause wrong diagnosis and measurements We suggest that you position system further from sources of conducted RF noise Portable and mobile R...

Страница 307: ...MENT GUIDANCE Electrostatic Discharge ESD IEC 61000 4 2 8 kV contact 15 kV air 8 kV contact 15 kV air Floors should be wood concrete or ceramic tile If floors are covered with synthetic material the relative humidity should be at least 30 Electrical fast Transient burst IEC 61000 4 4 2 kV for power supply lines 1 kV for input output lines 2 kV for power supply lines 1 kV for input output lines Mai...

Страница 308: ...al commercial or hospital environment NOTE UT is the A C mains voltage prior to application of the test level Table I 2 GUIDANCE AND MINDRAY DECLARATION ELECTROMAGNETIC IMMUNITY The system is intended for use in the electromagnetic environment specified below The customer or the user of system should assure that it is used in such an environment IMMUNITY TEST IEC 60601 TEST LEVEL COMPLIANCE LEVEL ...

Страница 309: ...hould be less than the compliance level in each frequency range Interference may occur in the vicinity of equipment marked with the following symbol Radiated RF IEC 61000 4 3 10 V m 80MHz 2 7GHz 10 V m 80MHz 2 7GHz Proximity fields from RF wireless communications equipment IEC 61000 4 3 27 V m 380 390 MHz 27 V m 28 V m 430 470 MHz 800 960 MHz 1700 1990 MHz 2400 2570 MHz 28 V m 9 V m 704 787 MHz 51...

Страница 310: ...ters at a maximum output power not listed above the recommended separation distanced in meters m can be determined using the equation applicable to the frequency of the transmitter where P is the maximum output power rating of the transmitter in watts W according to the transmitter manufacturer If system image distortion occurs it may be necessary to position system further from sources of conduct...

Страница 311: ......

Страница 312: ...P N 046 018839 00 5 0 ...

Отзывы: