3 System Preparation
Operator’s Manual
3 - 5
1.
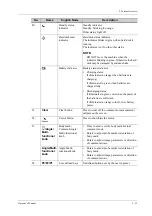
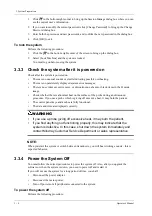
Press the power button to see the option:
–
Shutdown: to power the system off normally.
–
Standby: to enter standby status.
–
Cancel: to cancel the operation.
2.
Select [Shutdown] to power the system off.
NOTE:
•
Press and hold the power button for a long time and the system will power off without
displaying the “Shutdown Confirm” screen. However, shutting down the system this way may
destroy the data.
•
DO NOT rush direct shutdown of the system. It may damage the data.
•
After the system is upgraded, use [Shutdown] to power the system off to make the upgraded
data effective.
3.3.5 Standby
NOTE:
•
Power off the system if you will not use the system for a long period of time (including
storage/ transportation condition), and you should not allow the system in standby status,
otherwise the batteries will be out of power and permanently damaged.
•
If the system will not be used for a long period of time, you should disconnect the power
adapter, disconnect the mains power, and turn off the power to all peripherals connected to the
system.
To enter standby
•
Fully fold the LCD display and wait for 30 seconds, then the system enters the standby status.
•
Set the time for screen saver and standby, see “4.1.2 General”. If the system is not carrying out
an operation, the screensaver appears after the screensaver delay period. If there is still no
operation, the system enters standby after the standby delay period.
•
Press the power button and select “Standby”.
To exit standby
•
Unfold the LCD display.
•
Press the power button.
3.4
Monitor Brightness/Contrast Adjustment
Monitoring the brightness and contrast adjustment is one of the most important factors for proper
image qualities. If set incorrectly, the gain, TGC, dynamic range or even acoustic output have to be
changed more often than necessary to compensate.
For details about adjustment, see “4.1.2 General”.
NOTE:
On the monitor, the brightness adjustment comes before contrast. After readjusting the monitor’s
contrast and brightness, adjust all preset and peripheral settings.
Содержание Anesus ME7T
Страница 2: ......
Страница 58: ...This page intentionally left blank ...
Страница 154: ...This page intentionally left blank ...
Страница 164: ...This page intentionally left blank ...
Страница 182: ...This page intentionally left blank ...
Страница 190: ...This page intentionally left blank ...
Страница 208: ...This page intentionally left blank ...
Страница 254: ...This page intentionally left blank ...
Страница 264: ...This page intentionally left blank ...
Страница 280: ...This page intentionally left blank ...
Страница 311: ......
Страница 312: ...P N 046 018839 00 5 0 ...

