Quickstart Guide : Starting a New Project
Page 30
11.
Hold down the
CTRL
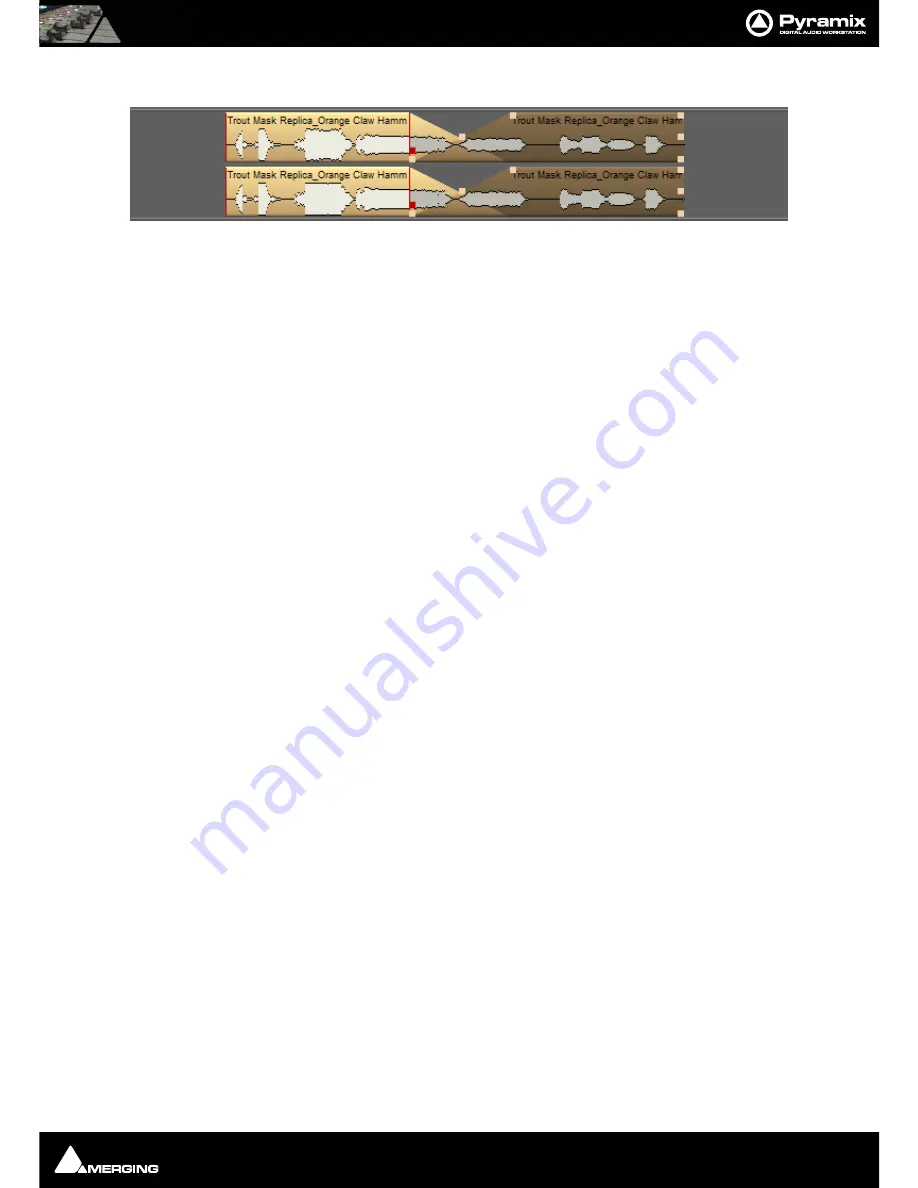
key, click and drag the right hand clip over the other to create a cross-fade.
The mouse cursor changes to a hand with a X over it, indicating
Auto-Crossfade
mode is engaged. If this is
not the case look at
Edit > Auto-Crossfade
. If it has a tick next to it, Auto-Crossfade mode is engaged by
default. Click on the menu entry to change mode.
Descriptions of the multitude of other editing tools and functions are to be found in the Pyramix User Manual.
Editing can be as simple as we have just described or you can make use of the many ‘power user’ tools Pyramix has
to offer.
Starting a New Project
Project Templates
Pyramix provides a selection of
Templates
for various applications. A Template is a complete Pyramix Project,
without any associated audio, specially configured to suit a particular type of activity. Apart from configuring the
appearance of Pyramix, the track layout and mixer design, templates also include important optimizations to suit
the activity.
Templates also offer a good starting point for creating your own customized templates. To begin a new project
using a template choose
Project > New from Template
which opens the
Select a Template
file window.
When a template is opened a dialogue box appears requesting the user to choose a
Media Folder
for the new
project. Unless the project is saved using the
Save As
option, the first time it is saved the
Save As
dialogue will
appear.
To save a new Template choose
File > Save as Template
, name and save.
New Project from scratch
To start a new
Project
from scratch, choose
Project
>
New.
This launches the
New Project wizard
, which will lead
you through the steps to create a new project.
Step 1: Choose the project type
Choose
Editing Project
, select the required sampling rate and resolution (number of bits) or accept the defaults
(44.1kHz, 16 bits), then click the
Next
button which will lead you to step 2.
Note that a
Digitizing Session
,
DXD Mixing Project
or
DSD Project,
the other possible choices available in the
New
window,
are special kinds of Project described elsewhere.
Step 2: Setup a new project workspace
Checking the box labeled:
Setup a new Project Workspace
,
allows you to name the new project and choose a
location for the
Project
and
Media Files
. Type in a name for the
Project
and either type in a valid path or use the
Browse button
to browse to a suitable folder. When you have entered the information, click the
Next
button to
get to the next step.
If you uncheck the
Setup a new Project Workspace
box, when the new project is created it will be given the
working name
Project 1
(or the next available number if
Project 1
already exists) and the save path will be the
default.
Step 3: Choose a Mixer
A new Project needs a properly configured Mixer. The
Mixer
, also called the
Virtual
Studio
, is used to route all sig-
nals into and out of Pyramix; it also determines the sample rate and synchronization source for the Project.


