Diagnostic information
2-42
Marketing Name
Go Back
Previous
Next
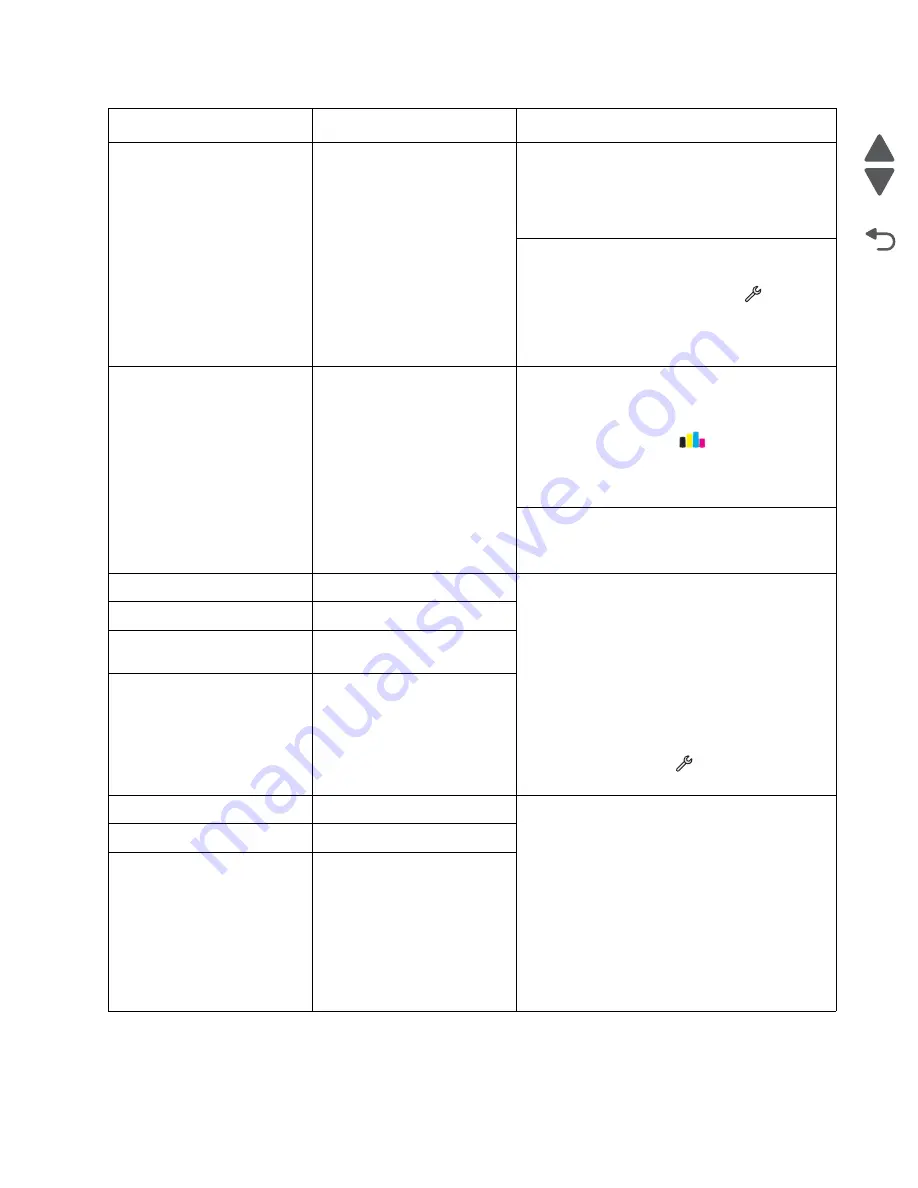
Printhead stall
Technical Support Center:
Turn off the printer by unplugging the power cord.
Open the printzone cover and clear any obstruction
on the carrier path. Turn on the printer. If the
problem remains, then replace the printer.
Service:
Go to the
Manufacturing Menu
, and run a test
print. From the home screen, touch
>
Reports
>
Demonstration Page
.
Go to
“Printhead stall service check” on
Printhead recovery warning
Printhead Warning
Technical Support Center:
Turn off the printer by unplugging the power cord.
Wait for 10 seconds, then turn on the printer. From
the home screen, touch
>
More
Options
>
Deep
Clean Printhead
>
Deep Clean
Color
and Black
. If the problem remains, replace
the printer.
Service:
Go to
“Printhead recovery warning service
.
Cartridge missing
Cartridge Missing
Technical Support Center:
Be sure that the installed ink cartridges are
supported and genuine Lexmark cartridges. Open
the ink tank door, and check if the cartridges are
properly installed. Reinsert the cartridges. Turn off
the printer by unplugging the power cord. Wait for
10 seconds, and turn on the printer. If the problem
remains, then replace the printer.
Service:
Bring the printer up in Manufacturing mode. From
the home screen, touch
>
Manufacturing
Test
, and check if it is set to off.
Cartridge not supported
Cartridge Unsupported
Unable to authenticate
cartridge
Cartridge Error
Printing faxes with missing/
invalid cartridges
Ink low behaviors
Technical Support Center:
Shake the ink cartridges to check if they still
contain ink. Insert the cartridges, and POR the
printer. If error messages continue to appear, then
replace the cartridges. Be sure that the installed ink
cartridges are supported and genuine Lexmark
cartridges. Turn off the printer by unplugging the
power cord. Wait for 10 seconds, and turn on the
printer. If the problem remains, then replace the
printer.
Service:
Go to
“Ink low service check” on page 2-75
Ink low thresholds
Ink low message
Ink Low
Error
Control panel message
Action
Содержание Pro5500 Series
Страница 11: ...Safety information xi 4447 20x Go Back Previous Next 012 3456789...
Страница 191: ...Repair information 4 22 4447 20x Go Back Previous Next Disassembly Flow chart This is the photo of the ADF input tray...
Страница 254: ...4 85 Service Manual 4447 20x Go Back Previous Next Disassembly Flow chart...
Страница 260: ...5 6 Service Manual 4447 20x Go Back Previous Next Wireless card Card reader JP3...
Страница 261: ...Connector locations 5 7 4447 20x Go Back Previous Next Carrier card J1 J2 J3...
Страница 262: ...5 8 Service Manual 4447 20x Go Back Previous Next...
Страница 266: ...7 2 Service Manual 4447 20x Go Back Previous Next Assembly 1 Covers 5 6 8 9 10 11 12 13 16 17 1 14 15 7 2 3 4...
Страница 268: ...7 4 Service Manual 4447 20x Go Back Previous Next Assembly 2 Engine 1 2 3 5 4...
Страница 270: ...7 6 Service Manual 4447 20x Go Back Previous Next Assembly 3 Fluid system assembly 1 3 2 5 4...
Страница 274: ...7 10 Service Manual 4447 20x Go Back Previous Next...
Страница 277: ...I 3 Service Manual 4447 20x Go Back Previous Next...


