68
Cle
a
ring ja
ms
16
Close the lower access door.
17
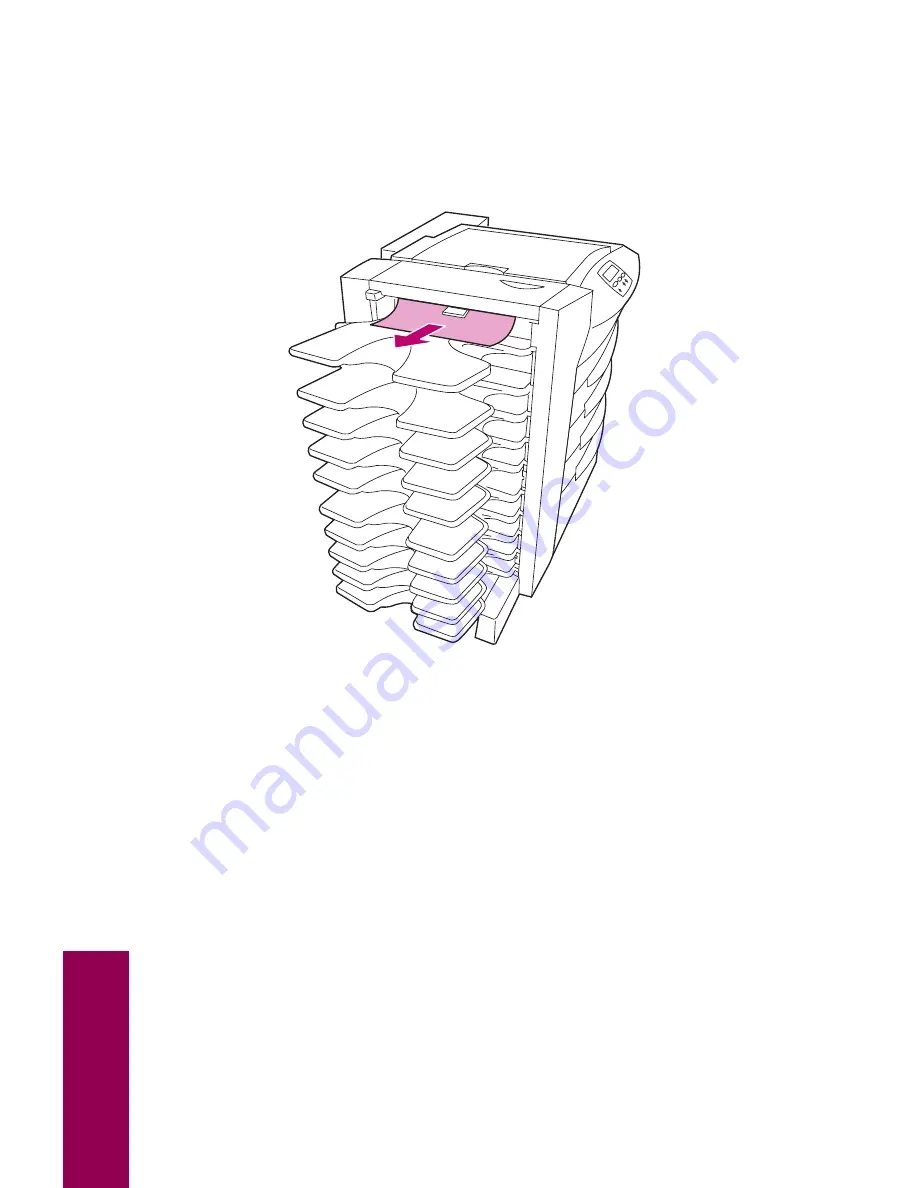
Push the mailbox against the printer.
18
Pull any jammed paper straight out of the bins.
19
Press
Go
on the operator panel to continue printing.
The printer clears the
2
xx Paper Jam
message and continues
printing. If the message does not clear, paper is still present in the
path. Recheck all doors, covers, and trays in the paper path.
Содержание 12L0103
Страница 1: ...OptraTM W810 User s Reference...
Страница 6: ...vi Table of contents...
Страница 14: ...xiv Preface...
Страница 54: ...40 Troubleshooting...
Страница 60: ...46 Clearing jams 3 Pull the jammed paper straight out 4 Close the jam access door...
Страница 88: ...74 Clearing jams 11 Open the finisher top cover Cover M...
Страница 103: ...89 Loading paper 2 Press down on the pressure plate until it clicks into place...
Страница 106: ...92 Loading paper b Lift the paper guide up and out of the tray...
Страница 126: ...112 Replacing supplies To install a new toner cartridge 1 Open the toner box cover Cover A...
Страница 137: ...123 Replacing supplies 13 Push the cartridge into the printer as far as it will go...
Страница 139: ...125 Replacing supplies 2 Press the green tab on the left end of the paper dust remover and lift the end up...
Страница 142: ...128 Replacing supplies 6 Press the green tab and push the paper dust remover into place...
Страница 150: ...136 Replacing supplies 3 Remove the cover 4 Pull the old ozone filter down and out of the printer Discard the filter...
Страница 152: ...138 Replacing supplies b Swing the cover up toward the printer until it snaps into place...
Страница 156: ...142 Replacing supplies 3 Loosen the two fuser retaining screws...
Страница 159: ...145 Replacing supplies 8 Tighten the two fuser retaining screws...
Страница 168: ...154 Replacing supplies...
Страница 190: ...176 Finisher...
Страница 196: ...182 Mailbox 5 Push the two covers onto the mailbox s legs as shown...
Страница 198: ...184 Mailbox To adjust the mailbox s height 1 Remove the two screws from the mailbox s bottom plate...
Страница 199: ...185 Mailbox 2 Open the lower door 3 Remove the bottom plate 4 Remove the four screws from the backs of the legs as shown...
Страница 201: ...187 Mailbox 7 Replace the bottom plate...
Страница 216: ...202 Removing options 4 Slide the hard disk out of the bracket...
Страница 222: ...208 Removing options 3 Remove the manual feed unit from the printer 4 If available attach the printer s side panel...
Страница 234: ...220 Print and hold...
Страница 242: ...228 Menus...


