KNIGHT D-SERIES SERVO HOIST OPERATION MANUAL
SECTION 2
INSTALLATION
7
Step 2b) Safety Cable Installation:
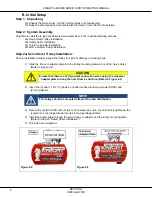
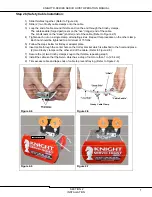
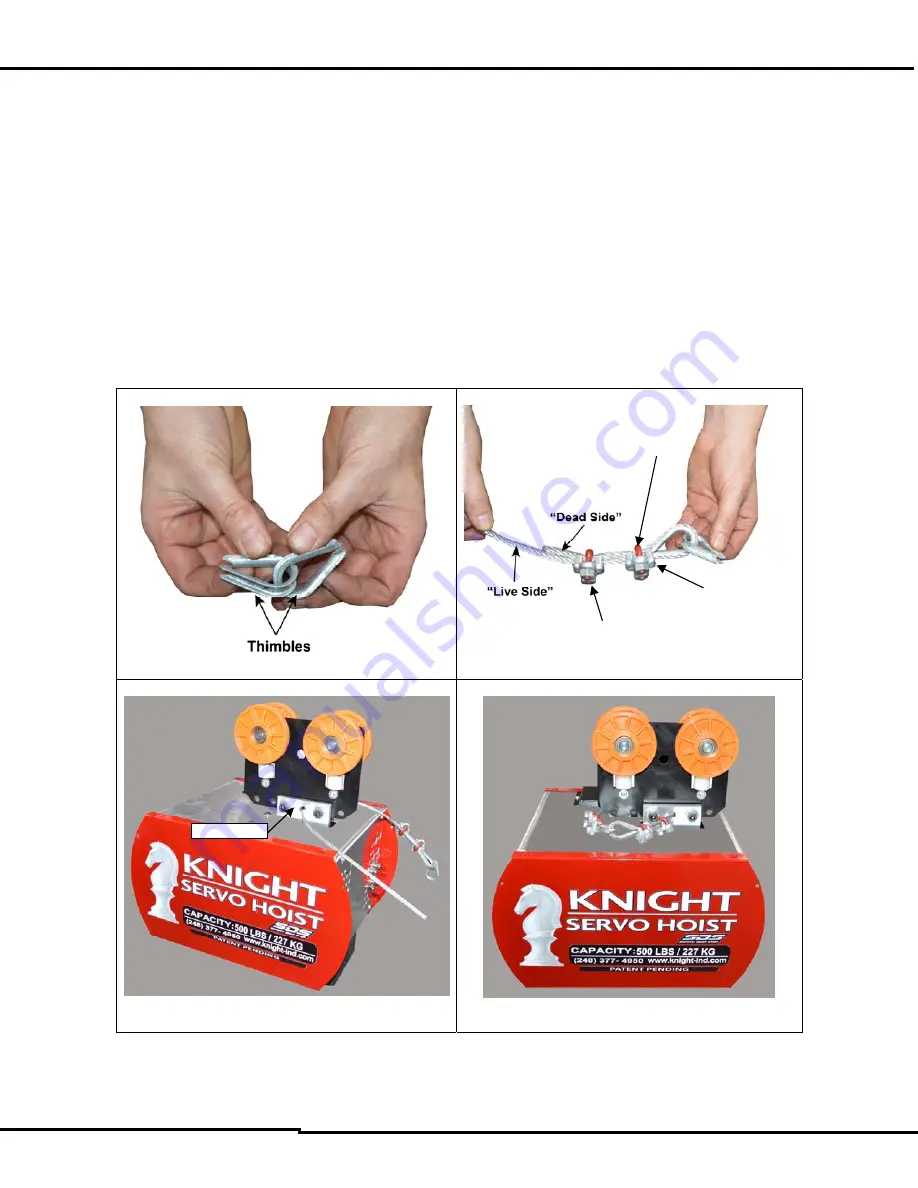
1) Slide thimbles together. (Refer to Figure 2-4)
2) Slide (2) two Crosby cable clamps onto the cable.
3) Loop the end of cable around thimble and run the end through the Crosby clamps.
The cable saddle (forged part) rests on the “live” (longer) end of the cable.
The U-bolt rests on the “dead” (shorter) end of the cable. (Refer to Figure 2-5)
4) Tighten each nut on a single clamp, alternating sides. Repeat this procedure on the other clamp.
Each nut should be tightened to a minimum of 15 ft-lbs.
5) Follow the steps below for trolley or adapter plate.
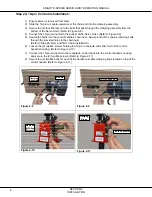
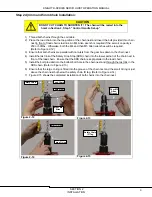
6) Insert cable through the center hole on the trolley bracket which is attached to the hoist and place
(2) two Crosby clamps on the other end of the cable. (Refer to Figure 2-6)
7) Secure the (2) two Crosby clamps snug to the thimble, repeating step 3.
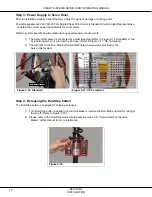
8) Install the cable so that the Servo Hoist has a drop of not more than 1 in. [2.54 cm].
9) Trim excess cable and tape ends of cable to prevent fraying. (Refer to Figure 2-6)
Figure 2-4
Figure 2-5
Figure 2-6
Figure 2-7
“U-Bolt”
“Cable Saddle”
Center Hole
Crosby Cable Clamp


